Repository navigation
Usage
Open the Options Menu — hold L+R on a SNES/Super Famicom, or B+Down on a NES/Famicom — and go to Themes.
| Button | Action |
|---|---|
| D-pad | Move around the grid |
| A | Apply the selected theme, or open the selected entry |
| B | Back |
| B (hold ~1 second) | Delete the selected theme — confirm with A |
The first screen shows every theme on your console as a grid of previews. The theme you're using has a green outline; the selected one, a yellow one.
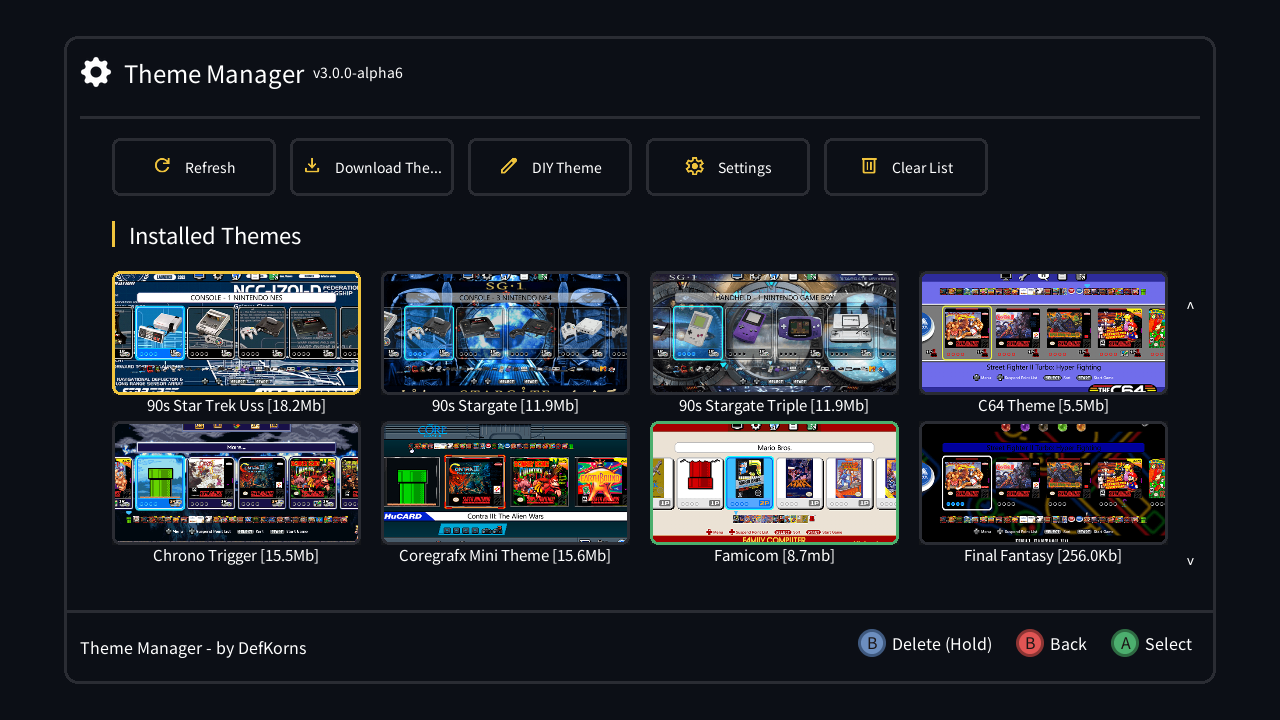
Above the grid:
- Refresh — rescans the themes folder. Use it after copying themes by hand (see Adding themes by hand).
- Download Themes — the online catalog (see Downloading themes)
- DIY Theme — build a theme from pieces of the ones you have (see Guides → DIY theme)
- Settings — see Settings
- Clear List — empties the grid without deleting any theme; Refresh builds it again. Handy if the grid gets out of sync with the themes folder.
Select a theme and press A to apply it. The console shows Applying Theme and reboots with the new theme.
To delete a theme, select it and hold B for about a second, then confirm with A. This deletes the theme folder and its preview.
The theme that ships for your console's own region is hidden from the list, since it's what the console uses without any theme applied. The other regions' stock themes are listed so you can switch to them.
You need the Wi-Fi mod, a USB Wi-Fi adapter and a working network connection.
-
Open Download Themes.
-
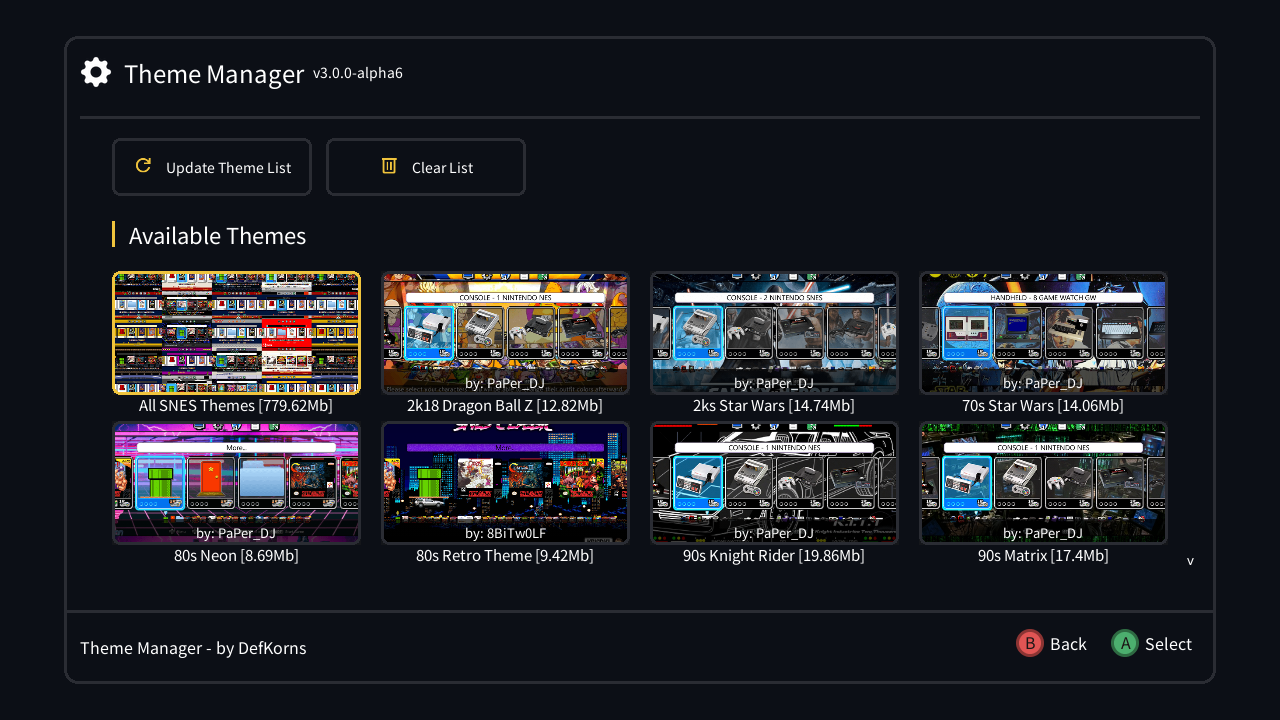
Select Update Theme List. The console downloads the current catalog for your console type.
-
Every theme shows its preview, its size and, at the bottom of the preview, who made it.
-
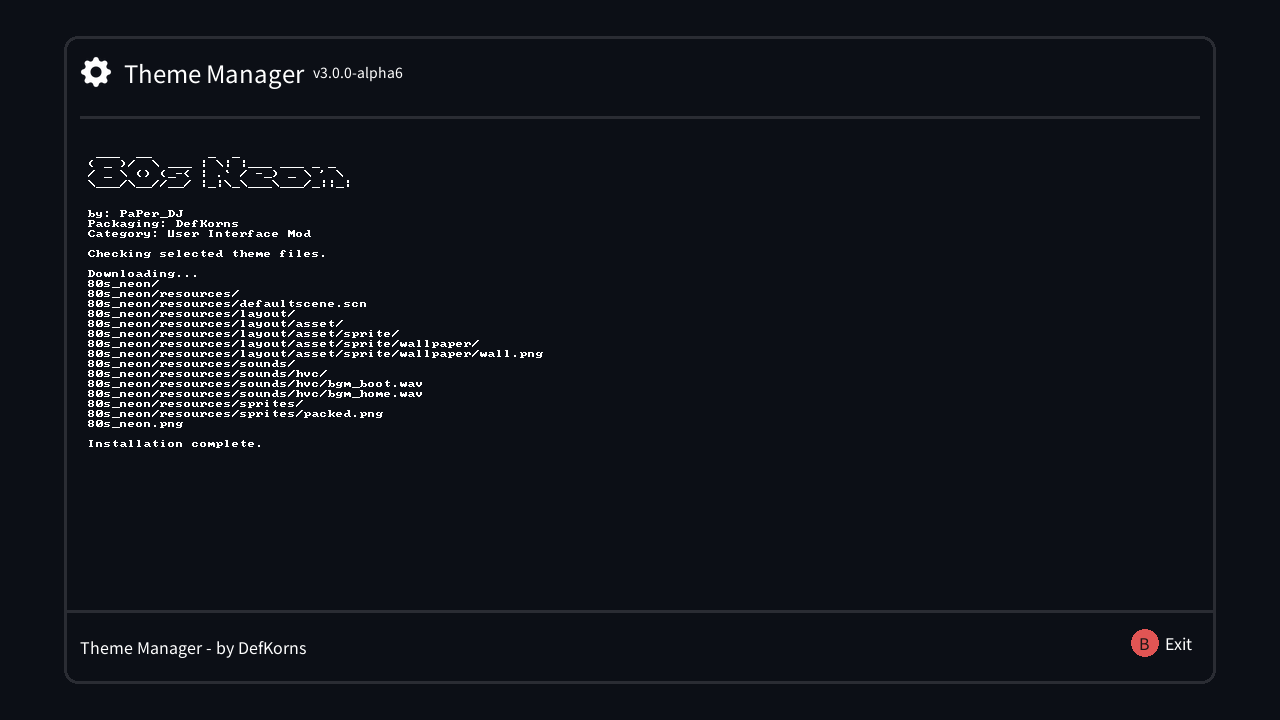
Select a theme and press A. A log shows the download and install; press B when it's done.
-
Go back to Installed Themes. The new theme is in the grid, ready to apply.
All SNES Themes / All NES Themes, the first entry, downloads the whole catalog in one go. It's several hundred MB, so it only shows up when a USB/SD drive is connected.
Clear List removes the downloaded catalog from the console. It doesn't touch your installed themes.
If there isn't enough free space, the download stops with Not enough free space instead of filling the console's memory. If some themes in a bulk download fail, they're listed at the end so you can retry them one by one.
Without Wi-Fi, copy themes over with hakchi's FTP or straight onto your USB/SD drive:
| Themes folder | |
|---|---|
| USB/SD | /media/hakchi/themes/<console> |
| NAND | /var/lib/hakchi/rootfs/usr/share/themes/<console> |
<console> is nes, snes or shonen.
You can copy either:
- a theme folder (the one that contains
resources/), or - a theme package from the catalog, named
SNES.<name>.tar.gz,NES.<name>.tar.gzorSHONEN.<name>.tar.gz. It's unpacked automatically. The prefix must match your console: themes are not compatible across consoles. Every catalog package can be downloaded on a PC from the om-theme-downloads release.
Then open Themes and select Refresh.
To give the theme a preview in the grid, put a PNG with the same name as the theme folder next to it, e.g. my_theme/ and my_theme.png (569×320). Without one, the grid shows a placeholder. See Guides → Theme previews.
When you connect a USB/SD drive, themes that were on the console's internal memory are moved to the drive (Moving Themes to USB/SD).