AI-powered assistant untuk install, debug, dan monitor DePIN nodes dengan mudah.




- Overview
- Features
- Demo
- Tech Stack
- Getting Started
- Project Structure
- Usage Guide
- API Integration
- Deployment
- Configuration
- Development
- Troubleshooting
- Roadmap
- Contributing
- License
MiMo DePIN Node Copilot adalah AI assistant yang membantu node operators untuk:
- 🔍 Analyze error logs — Paste log, dapat diagnosis + fix commands
- 🏥 Health monitoring — Generate checklist, analyze node health
- ⚙️ Automation — Generate systemd/pm2/docker configs
- 📊 History tracking — Simpan semua analyses + fixes
- 🗂️ Node management — Manage multiple nodes dalam satu dashboard
Node operators kesulitan:
- Troubleshoot error yang kompleks
- Setup automation (systemd, pm2, docker)
- Track health node secara konsisten
- Manage multiple nodes sekaligus
Paste error log → AI analisis → actionable fix + automation commands + health checklist.
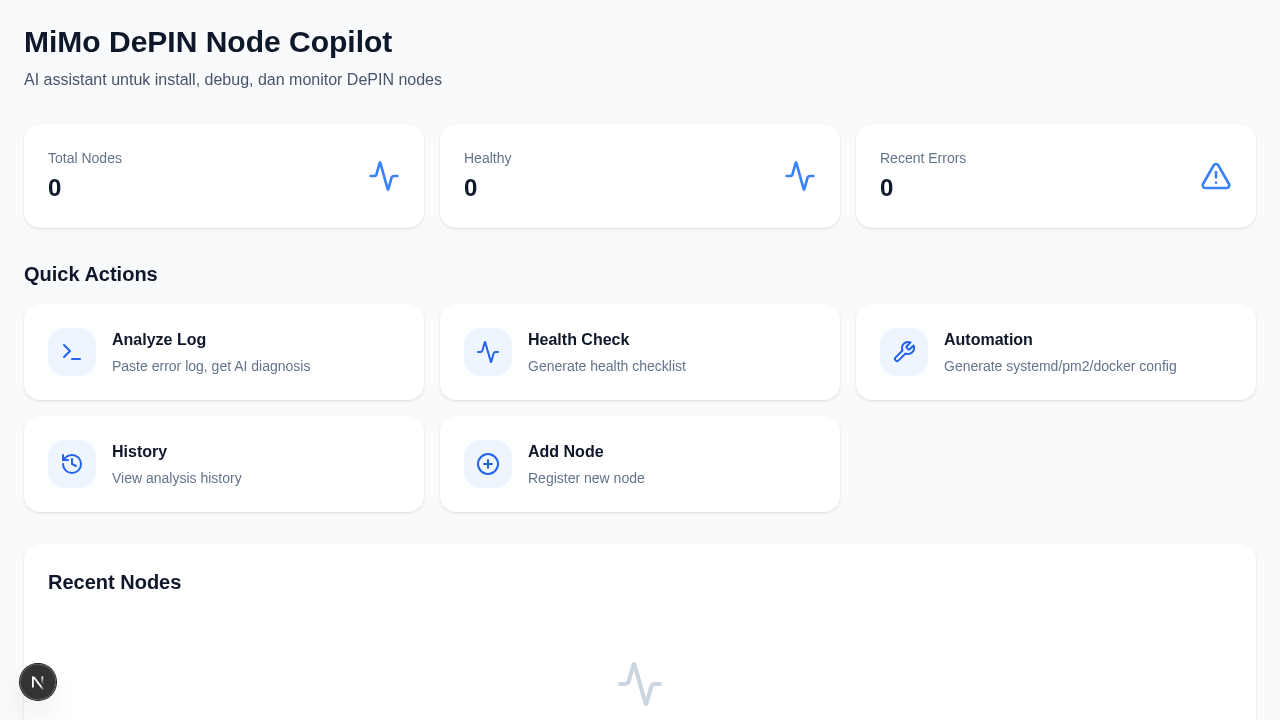
- Quick stats: Total nodes, healthy nodes, recent errors
- Quick action cards untuk semua fitur
- Empty state dengan CTA
- Responsive grid layout
- Paste error log dari VPS/node
- AI diagnosis dengan Groq (Llama 3.3 70B)
- Root cause analysis
- Severity level (Critical/High/Medium/Low)
- Step-by-step recommended fix
- Copy-paste ready shell commands
- Save to history
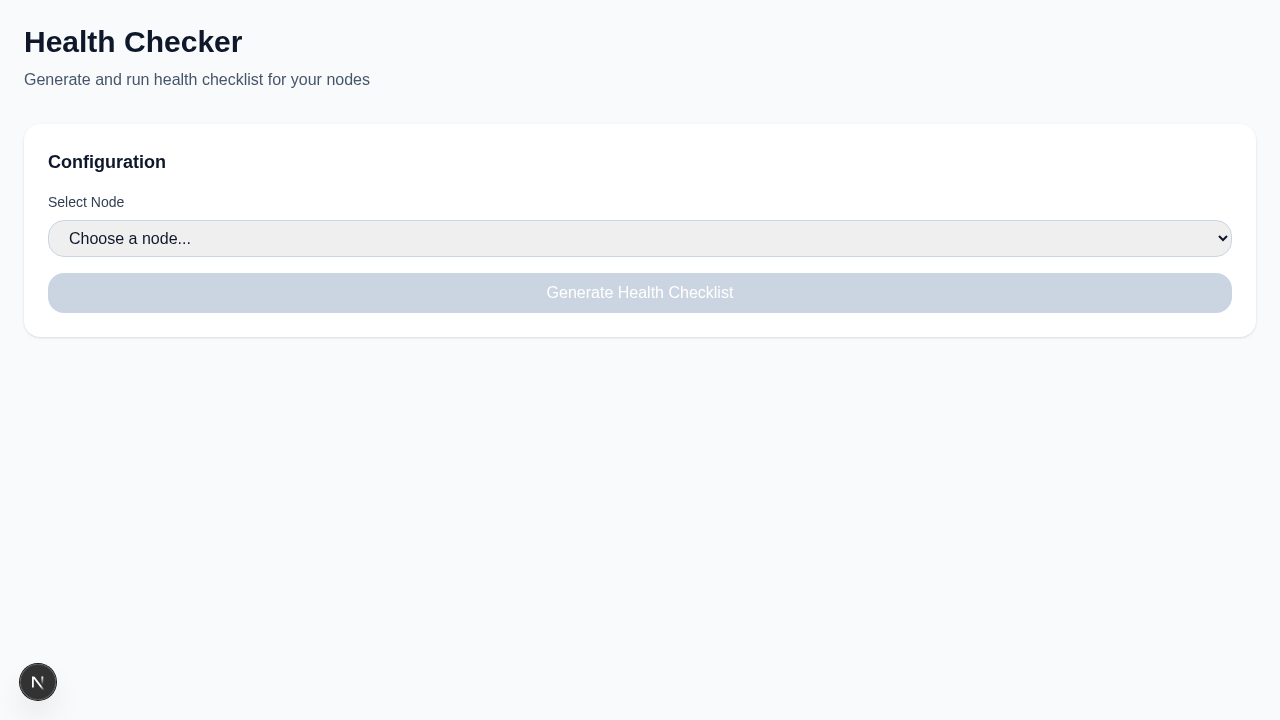
- Select node dari registry
- Generate health checklist (CPU, memory, disk, network, process)
- Node-type specific checks (Zcash, Filecoin, Arweave)
- Paste command output untuk analysis
- Health score (0-100)
- Visual status indicators
- Support 3 process managers: systemd, pm2, docker
- Support 4 node types: Zcash, Filecoin, Arweave, Other
- Generate config file (service/config.js/docker-compose.yml)
- Generate startup script
- Copy & download buttons
- Step-by-step deployment instructions
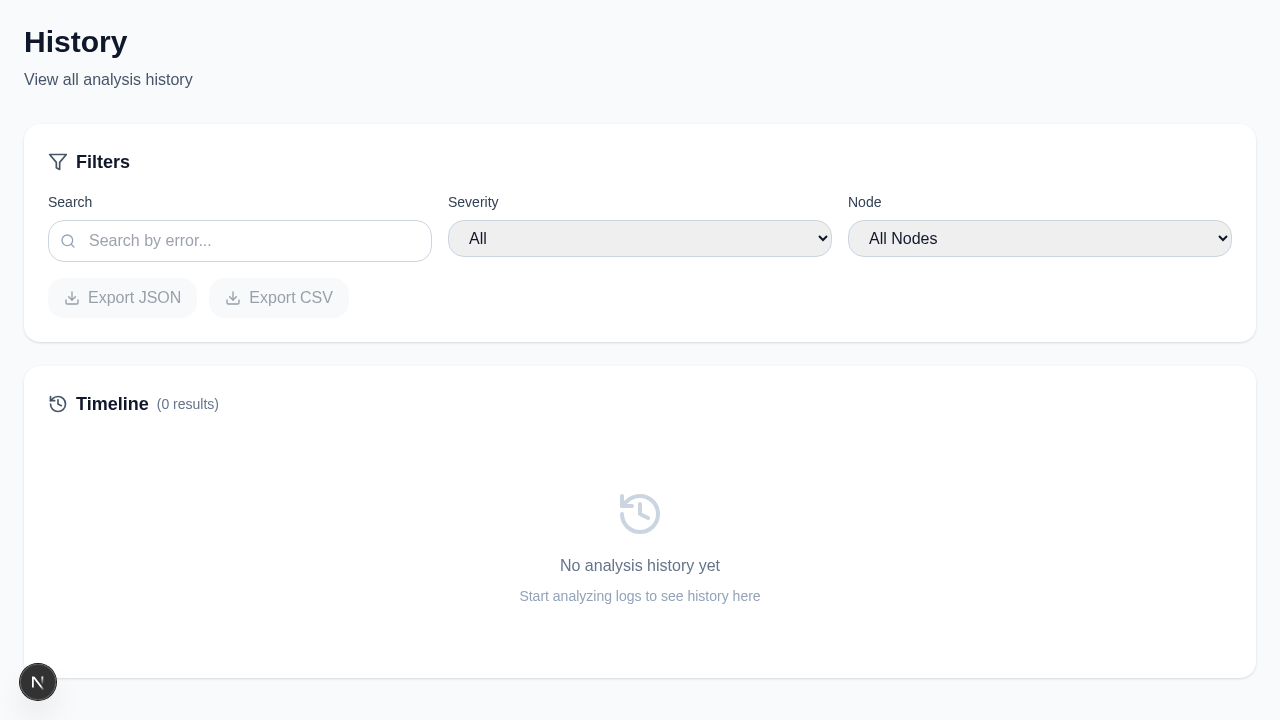
- Timeline view semua analyses
- Search by error keyword
- Filter by severity
- Filter by node
- Export to JSON
- Export to CSV
- Shows: timestamp, severity, root cause, commands
- Add/edit/delete nodes
- Fields: name, type, IP, port, process manager
- Node list dengan quick actions
- Empty state dengan CTA
- Persistent storage (localStorage)
- 🌐 Netlify: https://mimo-depin-node-copilot.netlify.app ✅ LIVE
- 📱 GitHub Pages: https://sahruldolkenkai2.github.io/mimo-depin-node-copilot
| Dashboard | Log Analyzer |
|---|---|
 |
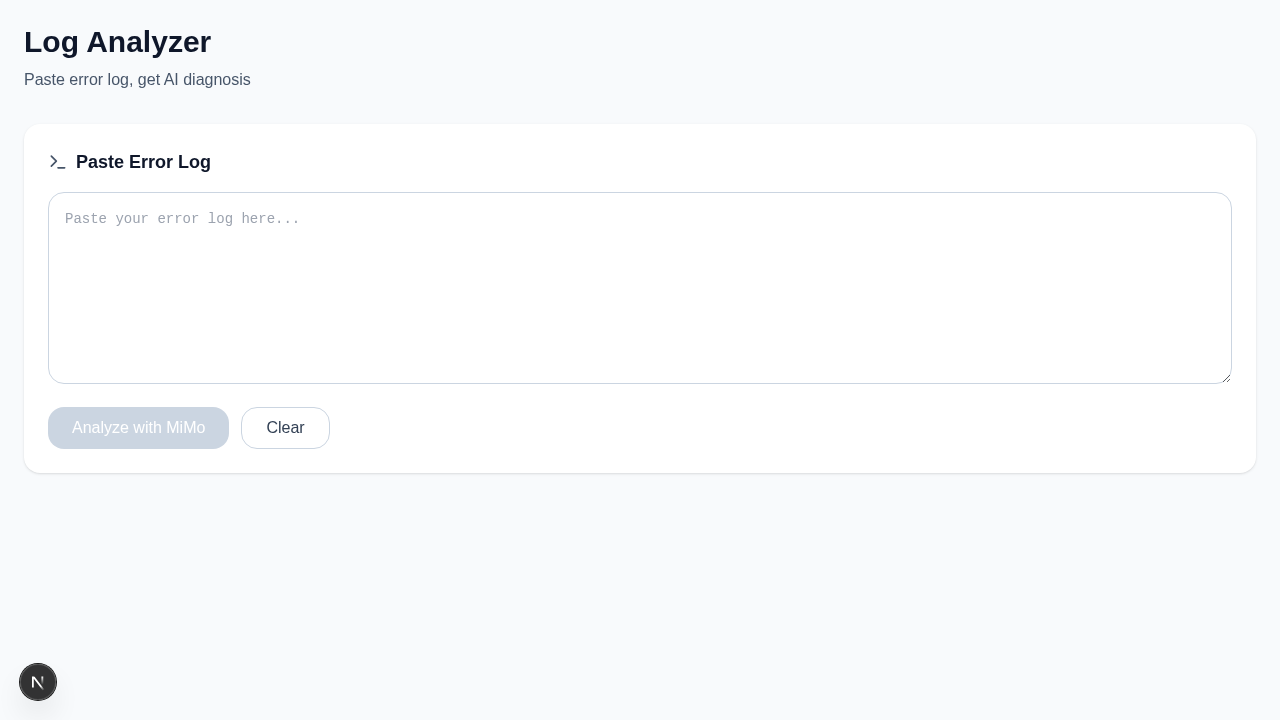 |
| Quick stats + action cards | AI diagnosis + fix commands |
| Health Checker | Automation Generator |
|---|---|
 |
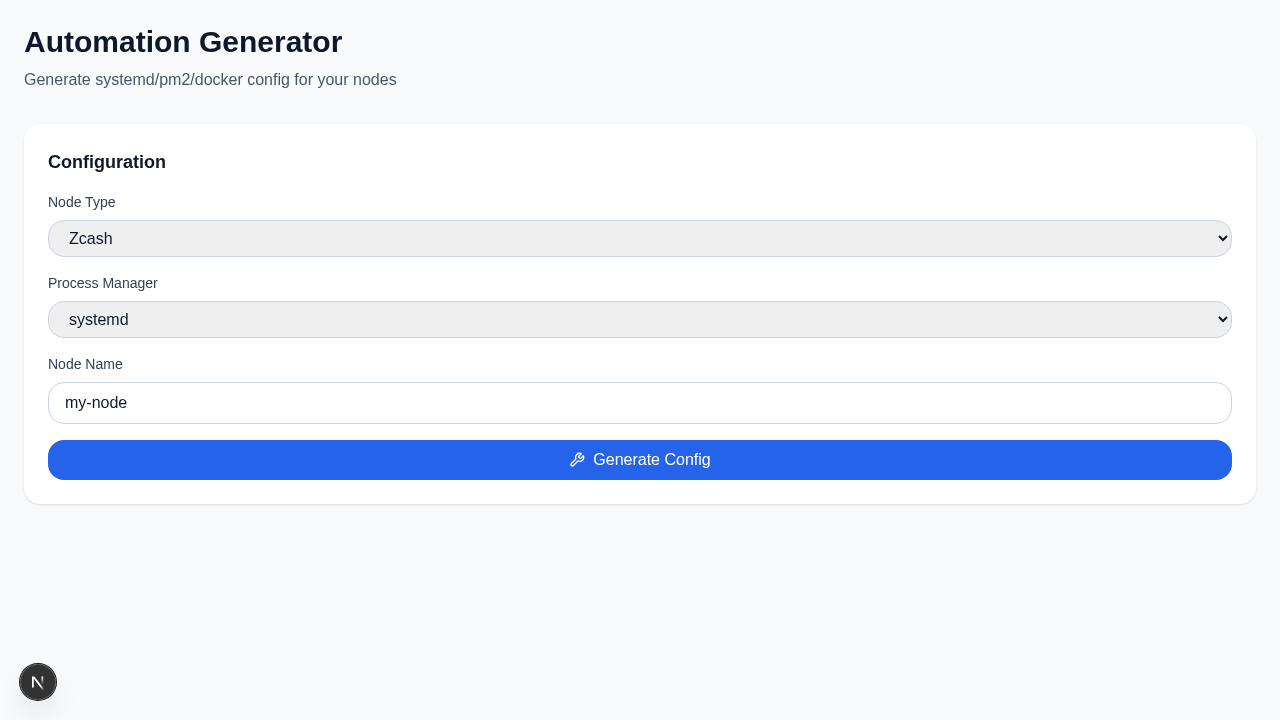 |
| Health checklist + score | systemd/pm2/docker config |
| History | Node Registry |
|---|---|
 |
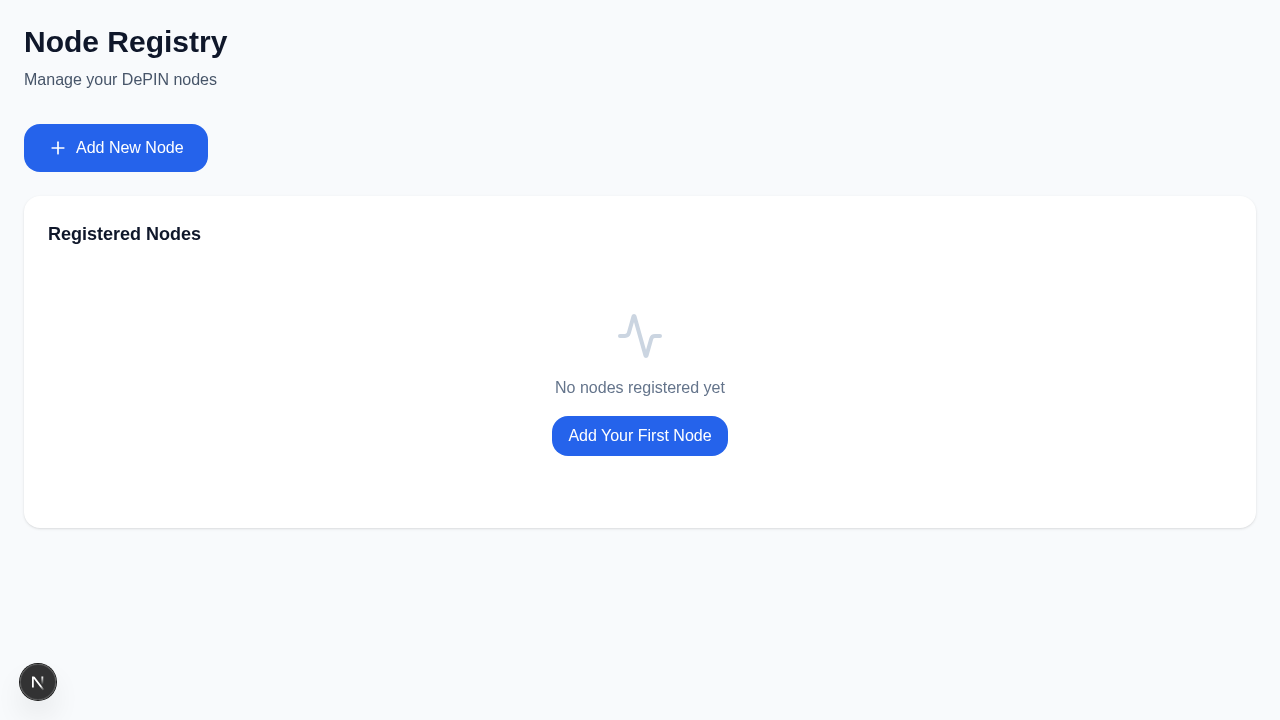 |
| Search + filter + export | Add/edit/delete nodes |
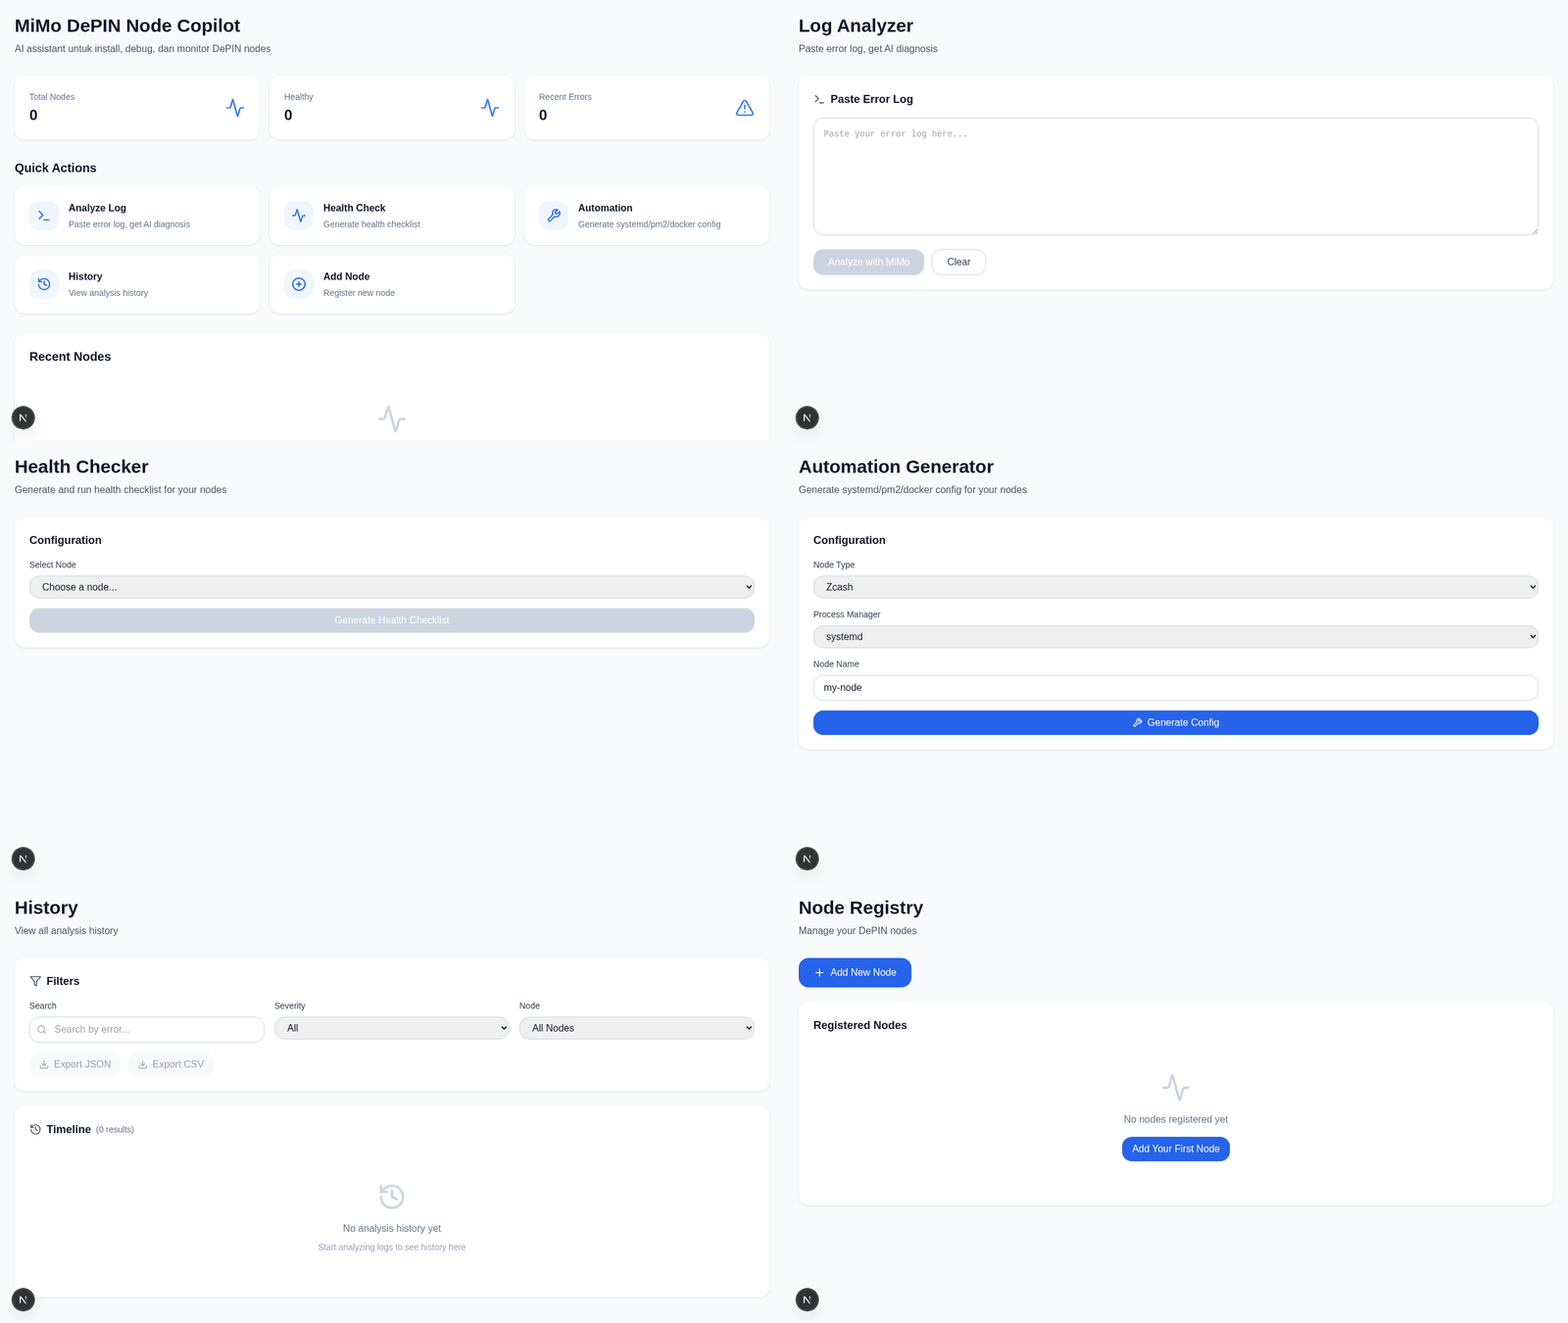
6-second animated demo showing all features in action
To record your own demo video:
- Run
npm run dev - Screen record the app (30-60 seconds)
- Upload to YouTube/Vimeo
- Update README with video link
- Framework: Next.js 14 (App Router)
- Language: TypeScript 5.7
- Styling: Tailwind CSS 3.4
- Icons: Lucide React
- Store: Zustand 5.0
- Persistence: localStorage (client-side)
- Primary: Groq API (Llama 3.3 70B, free tier 30 RPM)
- Fallback: MiMo API (future)
- Platform: Netlify
- Build: Next.js static export
- CDN: Global edge network
- Node.js: 18.x or higher
- npm: 9.x or higher (or yarn/pnpm)
- Git: For version control
# 1. Clone repository
git clone https://github.com/yourusername/mimo-depin-node-copilot.git
cd mimo-depin-node-copilot

# 2. Install dependencies
npm install

# 3. Setup environment variables
cp .env.example .env.local
# Edit .env.local and add your GROQ_API_KEY

# 4. Run development server
npm run dev

# 5. Open browser
# Navigate to http://localhost:3000# Development
npm run dev # Start dev server (http://localhost:3000)
# Production
npm run build # Build for production
npm start # Start production server
# Code Quality
npm run lint # Run ESLint
npm run type-check # Run TypeScript compiler (no emit)
# Clean
rm -rf .next node_modules
npm install # Fresh installmimo-depin-node-copilot/
├── src/
│ ├── app/ # Next.js App Router
│ │ ├── layout.tsx # Root layout + metadata
│ │ ├── page.tsx # Dashboard (home)
│ │ ├── globals.css # Global styles + design tokens
│ │ ├── analyzer/
│ │ │ └── page.tsx # Log analyzer page
│ │ ├── health/
│ │ │ └── page.tsx # Health checker page
│ │ ├── automation/
│ │ │ └── page.tsx # Automation generator page
│ │ ├── history/
│ │ │ └── page.tsx # Analysis history page
│ │ └── nodes/
│ │ └── page.tsx # Node registry page
│ └── lib/
│ ├── types.ts # TypeScript interfaces
│ ├── store.ts # Zustand store (state management)
│ └── api/
│ └── groq.ts # Groq API integration
├── public/ # Static assets
│ └── favicon.ico
├── docs/ # Documentation
│ ├── PRD.md # Product requirements
│ ├── design.md # Design system + UI specs
│ ├── IMPLEMENTATION.md # Technical details
│ └── QUICKSTART.md # Quick start guide
├── .eslintrc.json # ESLint config
├── .gitignore # Git ignore rules
├── .env.example # Environment variables template
├── next.config.ts # Next.js config
├── tailwind.config.ts # Tailwind CSS config
├── tsconfig.json # TypeScript config
├── postcss.config.js # PostCSS config
├── package.json # Dependencies
└── README.md # This file
1. Navigate to "Node Registry" page
2. Click "Add New Node"
3. Fill in:
   - Node Name: my-zcash-node
   - Node Type: Zcash
   - IP Address: 192.168.1.100
   - Port: 8232 (optional)
   - Process Manager: systemd
4. Click "Add Node"
1. Navigate to "Log Analyzer" page
2. Paste your error log in textarea
3. Click "Analyze with MiMo"
4. Review:
   - Root cause
   - Severity level
   - Recommended fix steps
   - Shell commands
5. Copy commands and run on your VPS
6. Click "Save to History" (optional)
1. Navigate to "Health Checker" page
2. Select node from dropdown
3. Click "Generate Health Checklist"
4. Copy all commands
5. Run commands on your VPS
6. Paste output back to "Paste Output" textarea
7. Click "Analyze Health"
8. Review health score + warnings
1. Navigate to "Automation Generator" page
2. Select:
   - Node Type: Zcash
   - Process Manager: systemd
   - Node Name: my-zcash-node
3. Click "Generate Config"
4. Download or copy:
   - Config file (my-zcash-node.service)
   - Startup script (my-zcash-node-startup.sh)
5. Upload to VPS and run startup script
1. Navigate to "History" page
2. Use filters:
   - Search by keyword
   - Filter by severity
   - Filter by node
3. Export data:
   - Click "Export JSON" or "Export CSV"
-
Get API Key
- Visit Groq Console
- Sign up / Login
- Create new API key
-
Add to Environment
# .env.local
GROQ_API_KEY=gsk_your_api_key_here
NEXT_PUBLIC_APP_URL=http://localhost:3000
-
Update API Function (src/lib/api/groq.ts)
export async function analyzeLogWithGroq(request: GroqAnalysisRequest) {
  const response = await fetch('https://api.groq.com/openai/v1/chat/completions', {
    method: 'POST',
    headers: {
      'Authorization': `Bearer ${process.env.GROQ_API_KEY}`,
      'Content-Type': 'application/json',
    },
    body: JSON.stringify({
      model: 'llama-3.3-70b-versatile',
      messages: [
        {
          role: 'system',
          content: 'You are a DePIN node expert. Analyze error logs and provide actionable fixes.',
        },
        {
          role: 'user',
          content: `Analyze this node error log and provide: root cause, severity (critical/high/medium/low), recommended fix steps, and shell commands.\n\nLog:\n${request.log}`,
        },
      ],
      temperature: 0.7,
      max_tokens: 1000,
    }),
  })

  const data = await response.json()
  // Parse response and return GroqAnalysisResponse
  return parseGroqResponse(data)
}
- Groq Free Tier: 30 requests per minute
- Recommendation: Implement queue system for high traffic
- Fallback: Add MiMo API as secondary provider
# 1. Push to GitHub
git init
git add .
git commit -m "Initial commit: MiMo DePIN Node Copilot MVP"
git branch -M main
git remote add origin https://github.com/yourusername/mimo-depin-node-copilot.git
git push -u origin main

# 2. Connect to Netlify
# - Login to Netlify
# - Click "Add new site" → "Import an existing project"
# - Choose GitHub → Select repository
# - Configure build settings:
#   - Build command: npm run build
#   - Publish directory: .next
# - Add environment variables:
#   - GROQ_API_KEY: your_key_here
#   - NEXT_PUBLIC_APP_URL: https://your-site.netlify.app
# - Click "Deploy site"# 1. Install Netlify CLI
npm install -g netlify-cli
# 2. Login
netlify login
# 3. Initialize site
netlify init
# 4. Deploy
netlify deploy --prod
# 5. Set environment variables
netlify env:set GROQ_API_KEY "your_key_here"
netlify env:set NEXT_PUBLIC_APP_URL "https://your-site.netlify.app"# 1. Install Vercel CLI
npm install -g vercel
# 2. Deploy
vercel
# 3. Set environment variables
vercel env add GROQ_API_KEY
vercel env add NEXT_PUBLIC_APP_URL
# 4. Deploy to production
vercel --prod# Netlify
netlify domains:add yourdomain.com
# Vercel
vercel domains add yourdomain.com| Variable | Description | Required | Default |
|---|---|---|---|
GROQ_API_KEY |
Groq API key for AI analysis | Yes | - |
NEXT_PUBLIC_APP_URL |
Public URL of your app | No | http://localhost:3000 |
Customize design tokens in tailwind.config.ts:
theme: {
  extend: {
    colors: {
      primary: {
        500: '#3b82f6',  // Change primary color
        700: '#1d4ed8',
      },
    },
  },
}Modify next.config.ts for custom settings:
const nextConfig: NextConfig = {
  reactStrictMode: true,
  swcMinify: true,
  // Add custom config here
}- Formatter: Prettier (recommended)
- Linter: ESLint (configured)
- Type Checking: TypeScript strict mode
-
Create new page
mkdir src/app/newfeature
touch src/app/newfeature/page.tsx
-
Add to navigation (update src/app/page.tsx)
-
Update store (src/lib/store.ts)
-
Add API functions (src/lib/api/)
# Type checking
npx tsc --noEmit

# Linting
npm run lint

# Build test
npm run build- Code splitting (automatic per-page)
- Image optimization (Next.js Image component)
- CSS minification (Tailwind)
- Tree shaking (unused code removal)
# Clear cache and reinstall
rm -rf .next node_modules package-lock.json
npm install
npm run dev# Check errors
npx tsc --noEmit
# Common fixes:
# - Check import paths
# - Verify type definitions
# - Update dependencies- Check browser privacy settings
- Ensure cookies/storage enabled
- Try incognito mode to test
- Check browser console for errors
- Verify
GROQ_API_KEYis set correctly - Check API rate limits (30 RPM free tier)
- Review browser console for errors
- Test API key with curl:
curl https://api.groq.com/openai/v1/chat/completions \
  -H "Authorization: Bearer $GROQ_API_KEY" \
  -H "Content-Type: application/json" \
  -d '{"model":"llama-3.3-70b-versatile","messages":[{"role":"user","content":"test"}]}'
- Dashboard
- Log analyzer
- Health checker
- Automation generator
- History
- Node registry
- localStorage persistence
- Mock API responses
- Integrate actual Groq API
- Add MiMo API fallback
- Implement rate limiting
- Add error handling + retry logic
- Response caching
- Supabase integration
- User authentication
- Multi-user support
- Cloud sync across devices
- Team collaboration
- Real-time monitoring dashboard
- Webhook alerts (Slack, Discord, Telegram)
- Advanced analytics
- Custom node types
- Batch operations
- API rate limit dashboard
- React Native mobile app
- Electron desktop app
- Push notifications
- Offline mode
- Premium tier (unlimited API calls)
- Custom integrations
- Priority support
- White-label solution
Contributions welcome! Please follow these steps:
- Fork the repository
- Create feature branch
git checkout -b feature/amazing-feature
- Commit changes
git commit -m "Add amazing feature" - Push to branch
git push origin feature/amazing-feature
- Open Pull Request
- Follow existing code style
- Add TypeScript types for new code
- Update documentation
- Test thoroughly before PR
- Write clear commit messages
This project is licensed under the MIT License - see the LICENSE file for details.
- Groq — Fast AI inference
- Next.js — React framework
- Tailwind CSS — Utility-first CSS
- Zustand — State management
- Lucide — Beautiful icons
- Pages: 6 (all functional)
- Components: Inline (ready to extract)
- API Functions: 3 (analyzeLog, generateChecklist, generateConfig)
- Store: 1 (Zustand with persistence)
- Build Size: ~107 KB per page
- TypeScript: 100% type-safe
- Responsive: Mobile-first design
Built with ❤️ for DePIN node operators
by sahruldolkenkai2