



Build your map in Unity, click EXPORT TO BEAMNG, get an installable BeamNG.drive mod ZIP.


Status: alpha (v0.4.3). Meshes, materials, spawn point, collision, terrain height, terrain textures, vegetation (trees/grass with collision) and the minimap have been confirmed working in BeamNG.drive 0.40. The road network (AI), traffic lights, stop signs, water and wind sway are not yet verified in game. See Known limitations.
This project is vibe coded. It was written together with an AI assistant and tested by hand. Expect rough edges, and please report bugs with the files listed below - that is how it gets better.
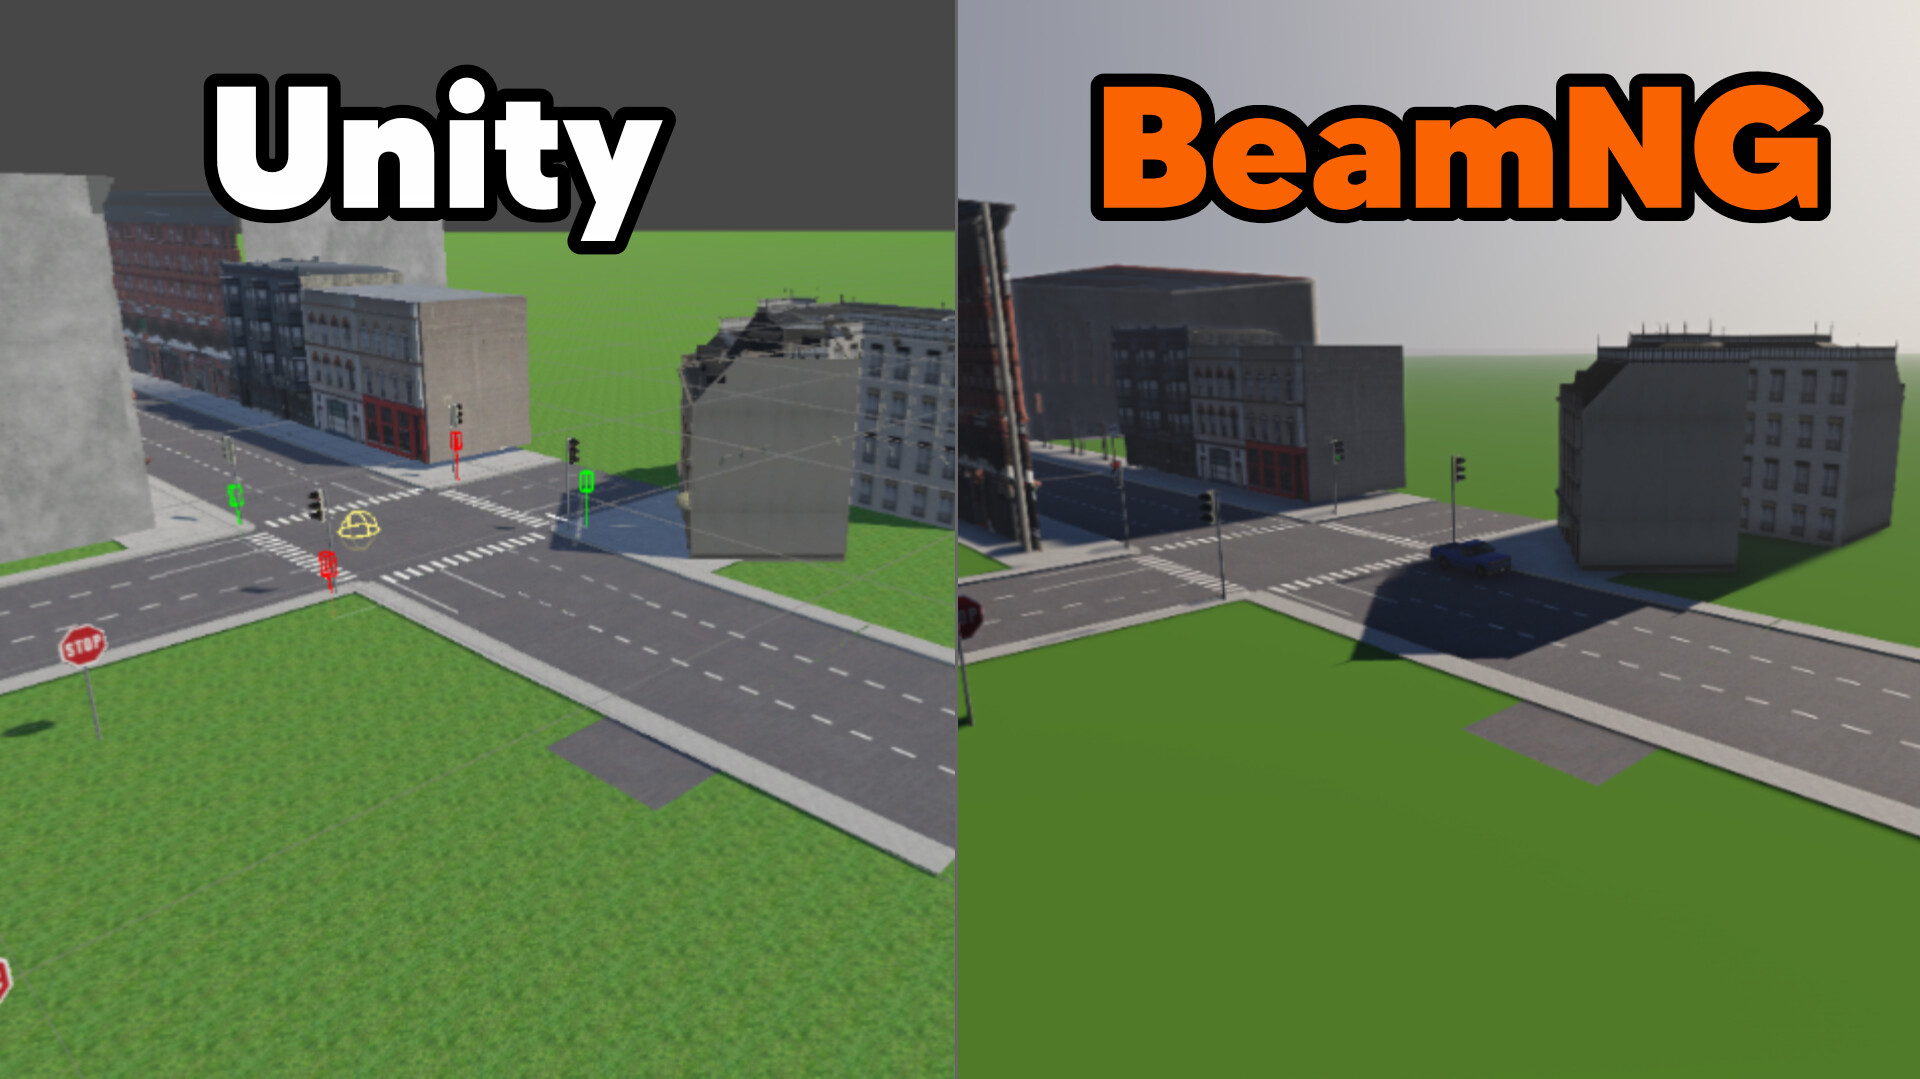
Left: the scene in Unity. Right: the exported map in BeamNG.drive.
- One-click export of the open Unity scene to a BeamNG level ZIP (
levels/<name>/...) - Terrain -> BeamNG
.ter(version 9), multiple Unity terrains are merged, hole masks are kept, terrain layers become terrain materials - Vegetation (new in 0.4.0) -> trees from Paint Trees and grass/meshes from Paint Details become BeamNG forest items, trees with trunk collision
- Minimap (new in 0.4.0) ->
minimap/terrain.png+info.jsonentry - Static meshes -> COLLADA
.dae(reused meshes are written once), placed asTSStaticobjects with collision - Materials and textures ->
main.materials.json+ PNG textures (base color, metallic, roughness, tiling/offset baked into the UVs) - Spawn point from any empty GameObject (position and facing direction), optional ground snapping
info.json, preview image, sky/time of day, level objects- Validation report with
PASS/WARNING/ERROR/MANUALand anexport_report.txtnext to the ZIP - Cancelable export, writes to a temp folder first and only keeps the result if validation passes
- Works with larger scenes (streamed writing, terrain up to 8192x8192)
- Unity 2022.2 or newer (uses
FindObjectsByType) - BeamNG.drive (tested with 0.40)
- Meshes need Read/Write enabled in their import settings
- Download the latest release ZIP from the Releases page (or clone the repository).
- Copy the folder
Assets/UnityToBeamNGinto theAssetsfolder of your Unity project. - Wait for Unity to compile. The menu
Tools > Unity to BeamNGappears.
- Build your scene (terrain and/or meshes with materials).
- Open
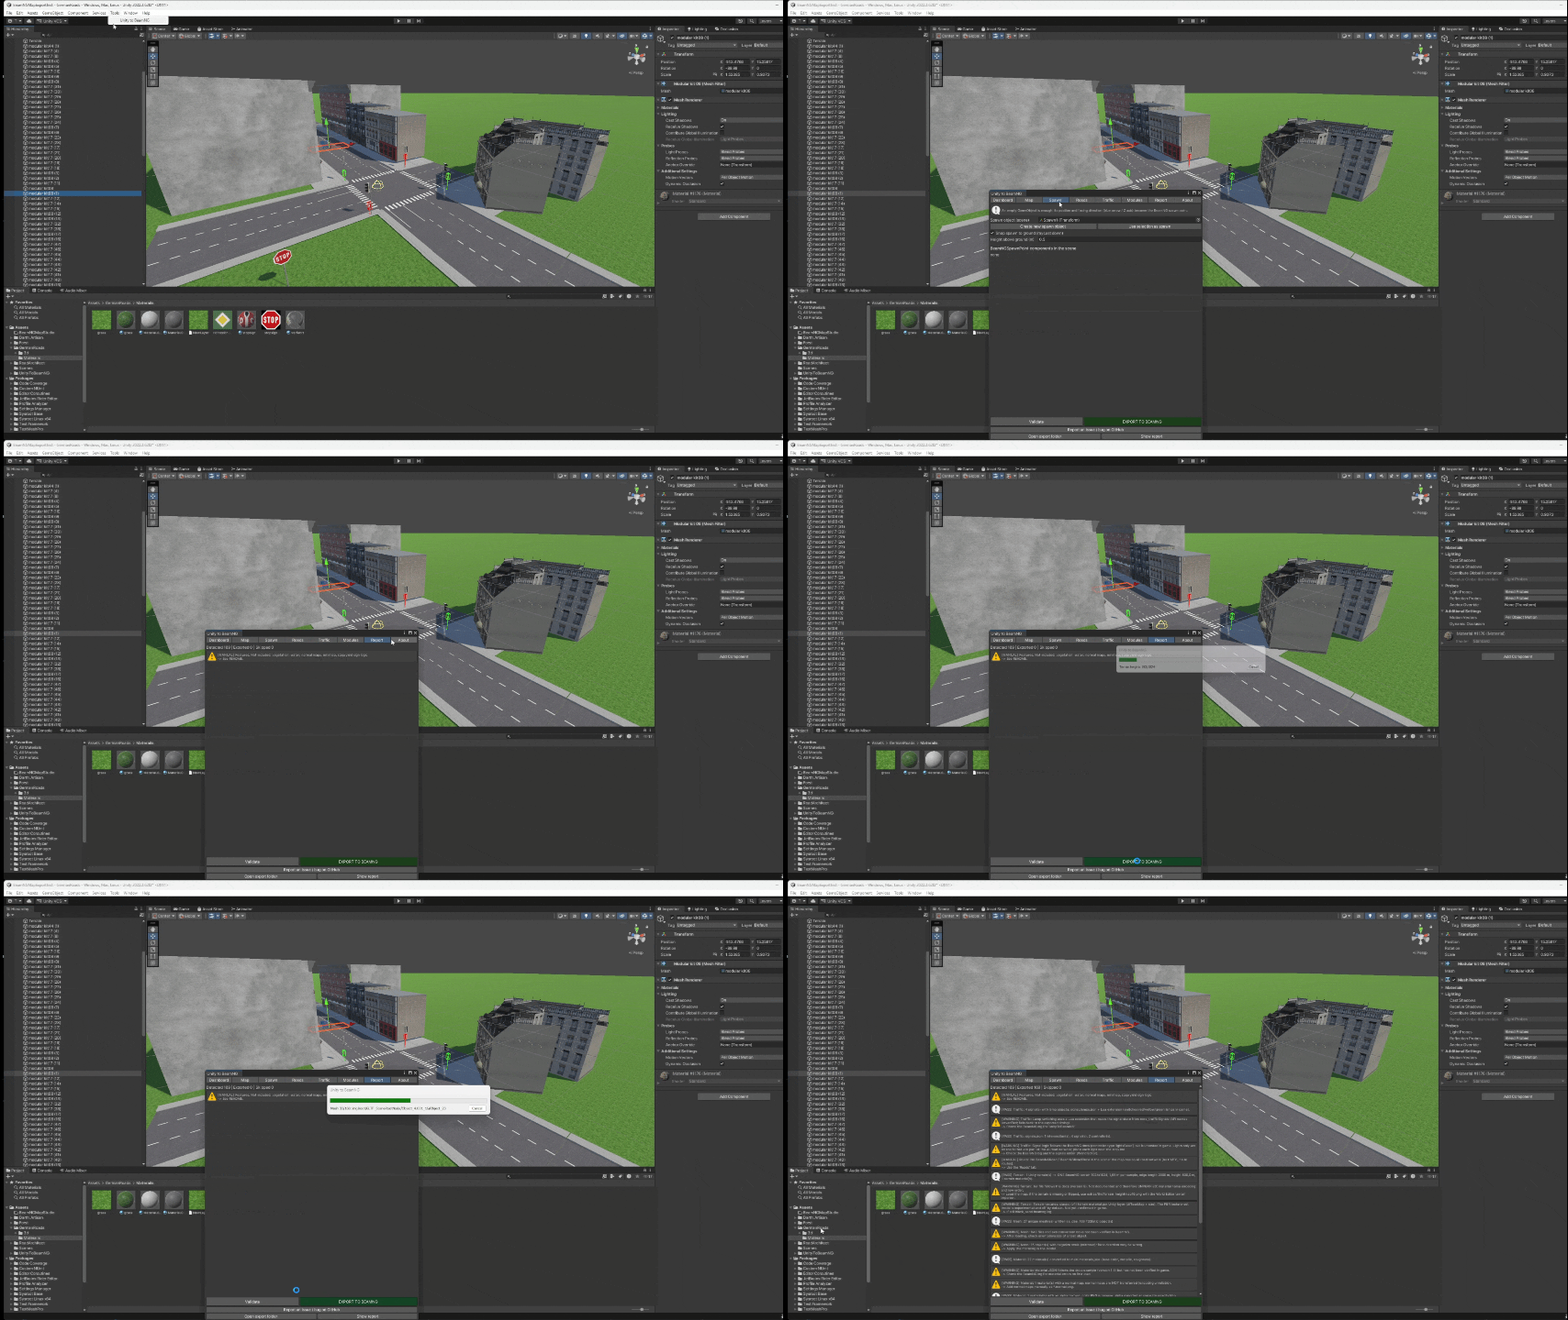
Tools > Unity to BeamNG. - Map tab: set the map name, an internal level name (
a-z,0-9,_) and an export folder. - Spawn tab: click Create new spawn object (or pick any empty GameObject). Move it where you want to start and rotate it so the blue arrow points in the driving direction.
- Click Validate, read the Report tab, then click EXPORT TO BEAMNG.
- Put the resulting
<levelname>.zipinto your BeamNG mods folder (on Windows usually%LocalAppData%\BeamNG\BeamNG.drive\current\mods) and start the game. The map appears in the level list.
Optional per-object settings:
| Component | Menu | What it does |
|---|---|---|
BeamNGSpawnPoint |
BeamNG/Spawn Point |
Marks a GameObject as a spawn (name, display name, default flag) |
BeamNGCollisionSettings |
BeamNG/Collision Settings |
Collision mode per object (Auto / None / VisibleMesh / Bounds) or exclude it from the export |
These are Unity-side settings. They are not native BeamNG components.
levels/<levelname>/
  info.json
  preview.png
  main.materials.json
  theTerrain.ter, theTerrain.terrain.json      (if a terrain is exported)
  main/items.level.json                         (MissionGroup)
  main/MissionGroup/{Environment,Terrain,Buildings,Gameplay}/items.level.json
  art/shapes/*.dae, art/shapes/main.materials.json
  art/textures/*.color.png
  art/terrains/main.materials.json
  art/forest/managedItemData.json, forest/*.forest4.json   (if the terrain has trees/details)
  main/MissionGroup/Vegetation/items.level.json            (Forest object)
  minimap/terrain.png
A fallback heightmap for the BeamNG World Editor terrain importer and an export manifest are written next to the ZIP in extras/ (not part of the mod).
Not implemented yet:
- Water, tree LODs/billboards and wind sway, stop/yield sign logic
- Normal maps, emission and transparency (opaque base color only)
- Per-vertex colors, skinned meshes, particle systems
Not verified in game yet (best guesses based on the BeamNG documentation):
- The binary details of the
.terfile that the docs do not specify (material name encoding, row order) - Terrain material JSON keys
- Rotation matrix layout of rotated objects (fixed in 0.2.1, needs confirmation)
If something is off, the export report says so. A successful export means the files were created and structurally validated - it does not mean the map was tested in game.
Open Tools > Unity to BeamNG > Vegetation.
- Paint trees with Paint Trees and grass / rocks with Paint Details on your Unity Terrain, then export as usual. Tree prefabs need Read/Write enabled on their meshes (the tab has a button that does this for you).
- Trees collide (trunk shape,
Colmesh-1node in the DAE). Trees lower than 1.5 m (bushes) do not. Detail meshes can collide via a checkbox; grass never does. - Details: set the density and the instance budget. Millions of grass blades would make BeamNG slow, so the tool lowers the density automatically when the budget is exceeded (see the report).
- Forest items have only one uniform scale, so tree width/height scale is averaged. No wind and no far LODs yet.
- Minimap: created automatically (terrain colours, roads, buildings, trees) and added to
info.json. If it is shifted or flipped in game, send a screenshot.
- Speed limit signs (Traffic tab): simple model with the number on it (pole + sign, replaceable by your own 3D model), limit in km/h or mph per sign. The limit is applied to the road in front of the sign (length adjustable) via
map.json(speed limit in m/s on the road network, per the BeamNG docs). Untested in game. - Performance automatically (Modules tab): Smart collision - heavy objects (over 1,500 triangles by default) get a simplified collision mesh instead of exact
Visible Mesh, tiny objects get none; automatic distance LOD for heavy meshes; meshes with more than ~65,000 vertices are split into parts. In Unity nothing changes. The old "Visible Mesh collision on everything is heavy" warning only appears if you turn Smart collision off. - Road Architect roads: spline nodes / splines are no longer mistaken for roads (that produced hundreds of duplicate roads); roads are always searched at export; width is read from
RoadWidth()(FritzsHero fork). Traffic lights and signs are snapped to the nearest road so BeamNG can attach them to the road network. - Textures: the material colour tint (e.g. darker road textures set in Road Architect) is multiplied into the exported texture, as Unity shows it.
- Minimap options (Vegetation tab): BeamNG draws the road network itself, so roads are no longer painted into the image by default; offset corner and flip switches if the map is shifted.
- Water: texture paths for the water object are written (fixes "Texture missing" in the log).
- Own preview image (Map tab), cropped to 16:9. Empty = screenshot at the spawn point.
- Default description "Made with UnityToBeamNG!" when the description field is empty.
- Stop signs (Traffic tab): simple model or logic only (use your own 3D model). Exported as
signStop/basicStopso the AI stops. They only work on roads that are part of the road network (mark roads in the Roads tab). - Water (Water tab): footprint = X/Z scale, surface = Y, type lake/ocean/river/pool/stream, depth. Exported as
WaterBlock, drawn on the minimap. - Roads detected automatically (Road Architect) when none are marked; the minimap draws roads only if they exist.
- Road Architect intersections (traffic lights / all-way stop) are converted automatically at export (or via button in the Traffic tab): timing is taken from Road Architect, the AI obeys them. Road Architect's lamp texture (atlas) is replaced by own lamp discs placed at its
redlight/yellowlight/greenlightobjects, which switch colour in BeamNG; housings and poles are exported as they are. - Existing water in your scene (large flat meshes with a water material, HDRP WaterSurface) is exported as BeamNG water automatically (can be turned off in the Water tab).
- Removed warnings for features already confirmed in game.
- Terrain textures: the real Unity terrain textures are exported as PBR (v1.5) terrain materials with a
TerrainMaterialTextureSet(Modules tab, on by default). The export is aborted if the set is missing or a texture does not match its slot size. If BeamNG crashes on load, switch it off. - Minimap: now also set as
minimapImageon the TerrainBlock (BeamNG docs/forum), resolution "Auto". - Trees: LODs (
_a100), automatic billboard (bb_autobillboard25) and far culling; wind via vertex colours +ForestWindEmitter. Grass is culled at a distance. Tree collision only for trees taller than 2.5 m; the report lists every tree type. - Fixes: too-long texture file names (Windows path limit), materials named like BeamNG classes (
Camera,spotlight,Material).
Use the bug report template (or the Report an issue / bug on GitHub button in the tool window). Please attach:
export_report.txt(in your export folder, also shown in the Report tab)beamng.logfrom right after loading the map- Unity console errors (if any)
- Screenshots of the scene in Unity and in BeamNG, plus Unity / BeamNG / tool versions
If this tool saves you time, you can support its development:
- Buy me a coffee: https://timexo.gumroad.com/coffee
- PayPal: https://www.paypal.com/donate/?hosted_button_id=38GT8LH75W4GU
Copyright (c) 2026 Timexo. All rights reserved. See LICENSE.
In short: free to use for exporting your own maps (including commercial ones). You may not redistribute or sell the code. If you show the tool or maps made with it on social media or elsewhere, link to the project: [link to site].
Maps you export belong to you. This project is not affiliated with BeamNG GmbH or Unity Technologies.
Built against the public BeamNG documentation (level file formats, terrain .ter, level objects, materials).
Grab the newest ZIP from the Releases page and unpack it into your Unity project (it contains Assets/UnityToBeamNG). Found a problem? Use the Report an issue button in the tool window or open an issue.
Open Tools > Unity to BeamNG, tabs Roads and Traffic.
- Road network: your visible roads stay normal meshes. The tool exports invisible
DecalRoadobjects (road_invisible) along the centre lines, which BeamNG uses for AI, traffic and navigation.- Road Architect / any road object: select it, press "Mark selected as BeamNG road" (the centre line is read from the Road Architect spline via reflection; if that fails, use child points).
- Own centre line: "Create road from points".
- Modular 3D pieces: "Add road piece" creates connectors at both ends; add more connectors for T-junctions and crossings. Touching connectors are joined automatically.
- Traffic lights: "Create traffic intersection" places 4 lights (2 phases) with pole, head and three emissive lamps. Timings (green/yellow/all-red) are on the intersection object. Logic is exported to
signals.json(controller typelightsBasic); the red/yellow/green lamp objects are switched in game by a small Lua extension shipped in the ZIP (scripts/andlua/). For your own models assign the lamp objects on the Traffic Light component. - Road markings / emission: transparent materials (road markings) are exported with alpha blending, emissive materials with an emissive map.
- Lamps: the generated intersection has a pole with red/yellow/green lamp objects (emissive). A small Lua extension shipped in the mod (
lua/ge/extensions/unityToBeamNG/lights.lua, started byscripts/unity_to_beamng/modScript.lua) shows only the lamp of the current signal state. Use your own models by assigning the lamp objects on eachBeamNGTrafficLight. - Road Architect: the centre line is read from the road's
SplineNnode objects (and the spline itself, if available). Mark theRoad1object (or press "Find Road Architect roads in scene"). - Road markings: textures with alpha on marking-like materials are exported with alpha blending.
- Road network (needed for AI). Your visible road stays a normal mesh. For every road press Roads > Find Road Architect roads in scene (or select the road and Mark selected as BeamNG road). Every road becomes an invisible DecalRoad (the AI navigation graph).
- Intersections. Roads that end at the same point (within 0.75 m) are joined automatically. At a 4-way crossing let all arms end in the middle of the crossing; for a T-junction end the side road exactly on a point of the main road (split the main road there so both halves also end at that point).
- Traffic lights. Traffic > Create traffic intersection: move the whole object to the crossing, then move each light next to the stop line of its arm. The blue arrow of a light must point in the driving direction of the cars it controls. Lights with the same phase number are green together (0 and 1 alternate). Times are on the intersection object.
- Own models for lights. Disable the simple poles and assign the red/yellow/green lamp objects on each BeamNG/Traffic Light (emissive materials).
- AI traffic does not move? Spawn only a few cars (3-5) and not all at one spot; make sure the roads form one connected network (no gaps > 0.75 m) and are not tiny pieces; check in the World Editor (F11) that the DecalRoads exist under
Roads. - Transparent signs. Use a PNG with a transparent background and set the Unity material to Transparent/Cutout. The tool exports the alpha as a separate opacity map.