The most efficient, reliable, and developer-friendly way to use the Brave AI Mode API.
Actor page: apify.com/johnvc/brave-ai-mode-api Input schema: apify.com/johnvc/brave-ai-mode-api/input-schema
Track Brave Search's AI Mode answers for any query and get the AI-generated answer, its cited sources, and the supporting web results as structured JSON. Brave is the privacy-first search engine with an independent index, so its AI answers and cited sources can differ from mainstream engines. Use this API to monitor what Brave's AI tells users about your brand, product, or topic.
- Python 3.11 or higher
- An Apify account and API key (get a free key here)
-
Clone the repository
git clone https://github.com/johnisanerd/Apify-Brave-AI-Mode-API.git cd Apify-Brave-AI-Mode-API -
Install dependencies with UV
# Install UV if you do not have it:
curl -LsSf https://astral.sh/uv/install.sh | sh

# Install project dependencies:
uv sync
-
Configure your API key
cp .env.example .env
# Edit .env and add your Apify API key
# Get your free API key at: https://apify.com?fpr=9n7kx3
-
Run an example
# Single example:
uv run python brave-ai-mode-api-example.py

# Batch example (checks several queries in one run):
uv run python brave-ai-mode-api-batch-example.py
export APIFY_API_TOKEN="your_api_key_here"
uv run python brave-ai-mode-api-example.pyMonitor a privacy-first answer surface. Brave uses an independent index, so its AI Mode answers and cited sources are a distinct signal from mainstream search.
Clean, structured output. Each query returns one row: the answer as markdown, structured text blocks, cited references, and the supporting web results.
Built for batch monitoring. Pass a list of queries and check a whole topic set in one run, then schedule it to track changes over time.
MCP-ready. AI agents can call it as a tool through the hosted Apify MCP server.
- Resolve the Brave AI Mode answer for one query or many
- Get the full answer as markdown plus structured text blocks
- See the cited references and the supporting web results
- Target by country and language
- One clean row per query, with a clear
ai_mode_presentflag - Stable JSON shape, easy to diff run-over-run for monitoring
{
  "query": "what is quantum computing"
}{
"queries": ["what is quantum computing", "how does TLS work"],
"country": "us",
"language": "en"
}For a runnable batch script, see brave-ai-mode-api-batch-example.py in this repo.
| Parameter | Type | Required | Default | Description |
|---|---|---|---|---|
query |
str |
one of query/queries | - | A single query, e.g. what is quantum computing. |
queries |
list[str] |
one of query/queries | - | A batch of queries. Merged with query and de-duplicated. |
country |
str |
no | "us" |
Two-letter country code, e.g. us, gb, de. |
language |
str |
no | "en" |
Two-letter language code, e.g. en, es, de. |
Each item in the dataset is one query's AI Mode answer:
{
  "result_type": "ai_mode",
  "query": "what is quantum computing",
  "country": "us",
  "language": "en",
  "ai_mode_present": true,
  "markdown": "Quantum computing is a type of computation that ...",
  "text_blocks": [
    { "type": "heading", "snippet": "What is quantum computing?" }
  ],
  "references": [
    { "index": 1, "title": "Quantum computing - Wikipedia", "link": "https://en.wikipedia.org/..." }
  ],
  "web_results": [
    { "title": "Quantum computing explained", "link": "https://example.com/...", "snippet": "...", "source": "example.com" }
  ]
}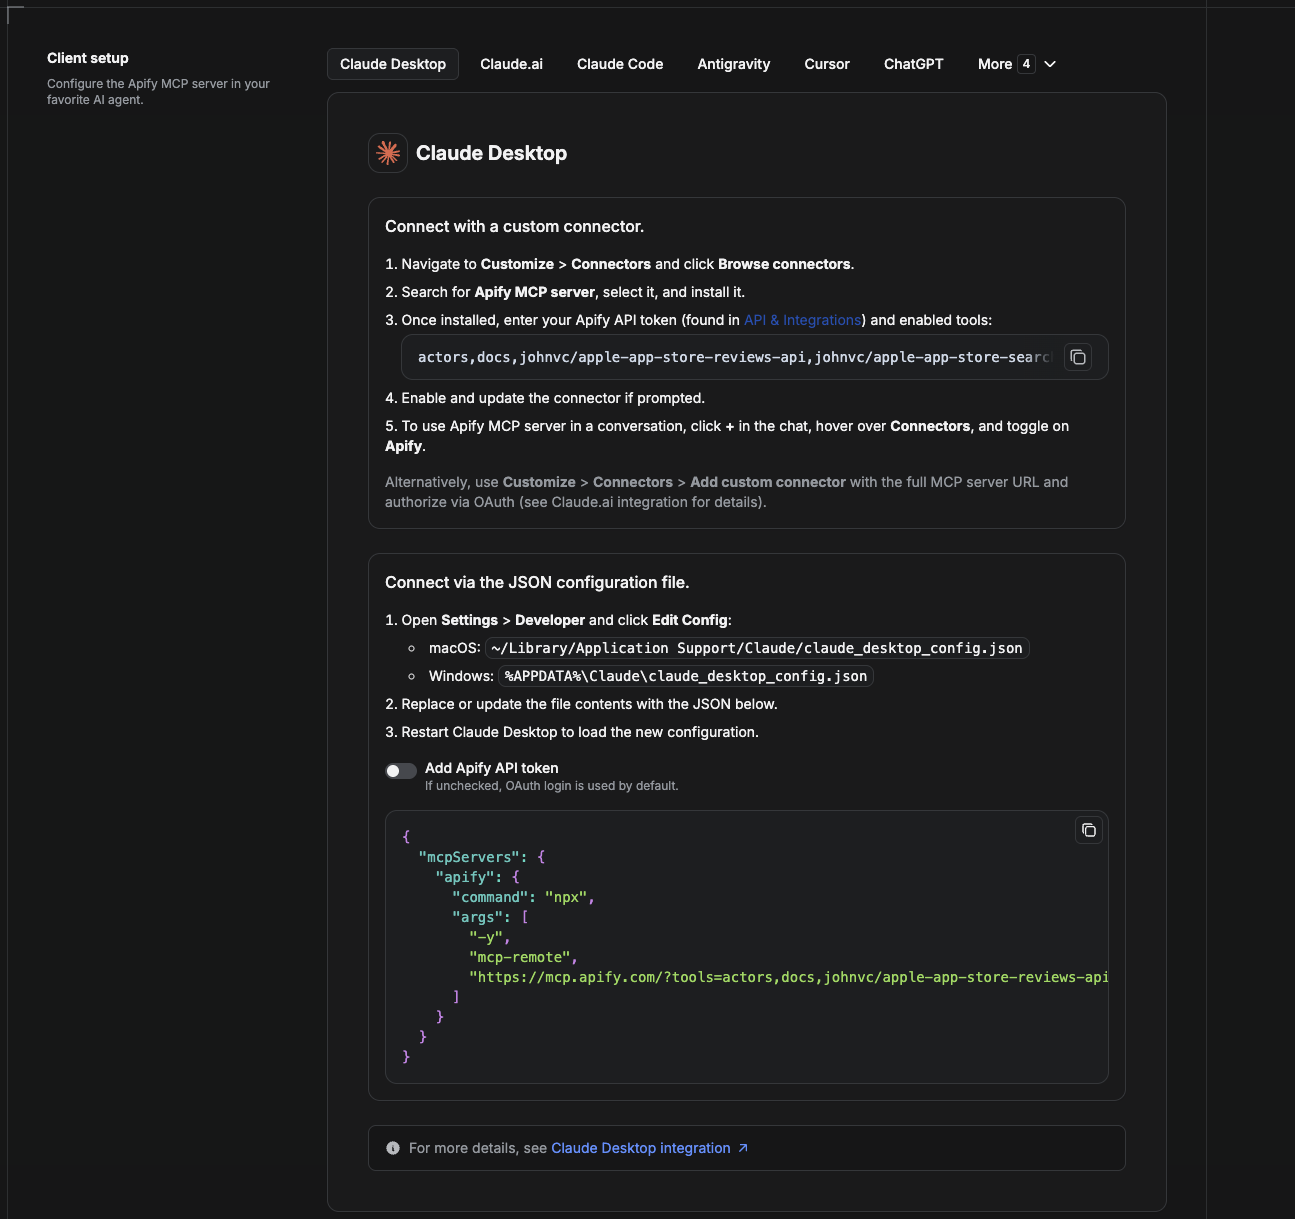
Cowork is the desktop app's automation mode. To give it the Brave AI Mode API as a tool, add the Apify MCP server as a connector.
- Open the Claude desktop app and go to Settings → Connectors (or Settings → Developer → Edit Config to edit
claude_desktop_config.jsondirectly).- macOS:
~/Library/Application Support/Claude/claude_desktop_config.json - Windows:
%APPDATA%\Claude\claude_desktop_config.json
- macOS:
- Add the Apify MCP server, preloaded with only this Actor:
{
  "mcpServers": {
    "apify": {
      "command": "npx",
      "args": [
        "-y",
        "mcp-remote",
        "https://mcp.apify.com/?tools=actors,docs,johnvc/brave-ai-mode-api"
      ]
    }
  }
}- Restart the app. When Cowork first calls the tool, complete the OAuth prompt in your browser, or add your Apify API token in the connector settings to skip OAuth.
- In a Cowork chat, confirm the tool is available and ask it to run the Brave AI Mode API.
Download the desktop app and start a free trial: https://claude.ai/referral/uIlpa7nPLg More help: https://docs.apify.com/platform/integrations/claude-desktop
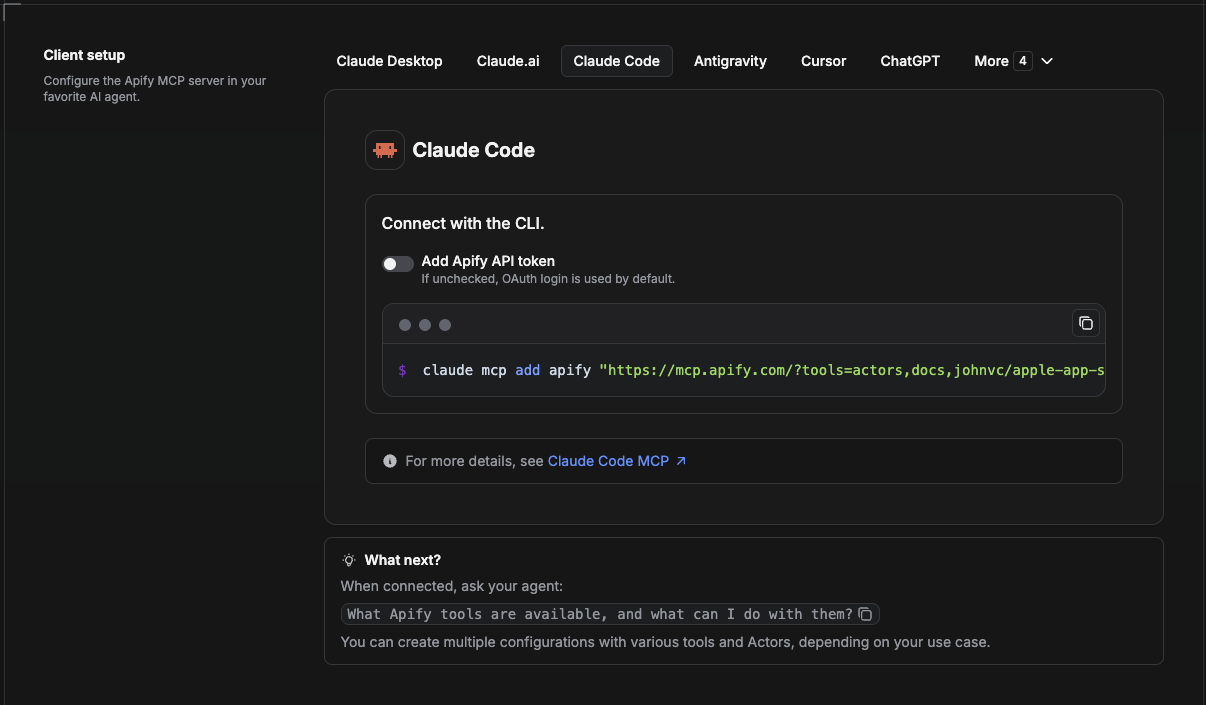
Claude Code is the command-line tool. Add the Actor's MCP server with one command:
claude mcp add --transport http apify \
  "https://mcp.apify.com/?tools=actors,docs,johnvc/brave-ai-mode-api"
To use a token instead of browser OAuth:
claude mcp add --transport http apify \
  "https://mcp.apify.com/?tools=actors,docs,johnvc/brave-ai-mode-api" \
  --header "Authorization: Bearer YOUR_APIFY_TOKEN"
Then verify with claude mcp list, or run /mcp inside a session. Ask Claude Code to call the Brave AI Mode API.
Try Claude Code free: https://claude.ai/referral/uIlpa7nPLg Claude Code MCP docs: https://code.claude.com/docs/en/mcp
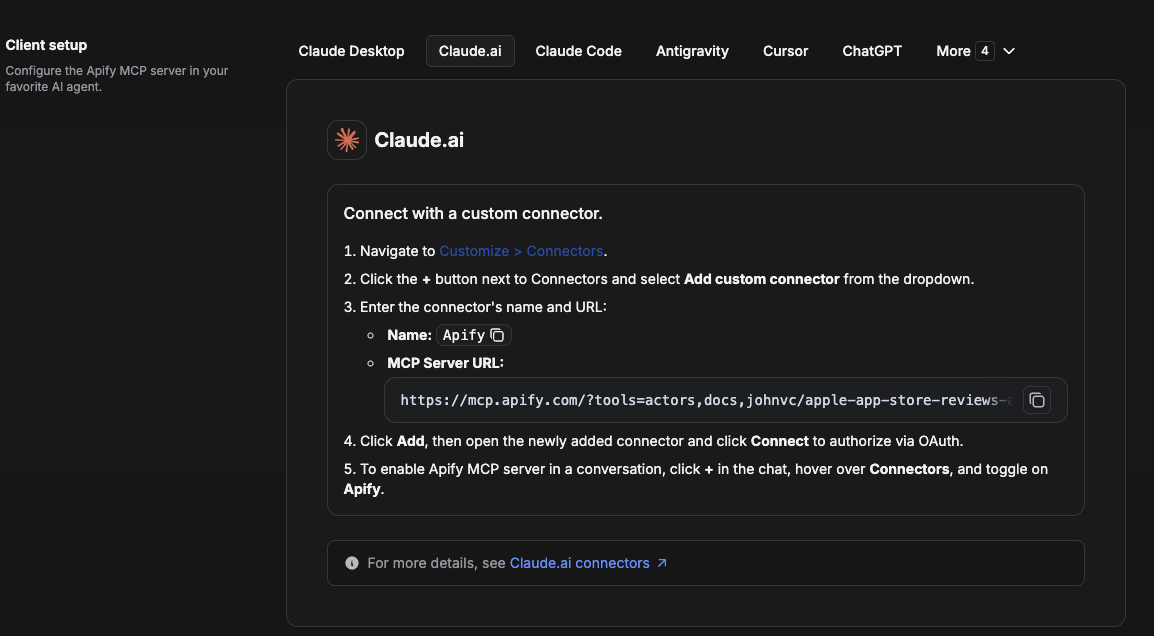
On claude.ai you add Apify as a connector, then enable just this Actor's tool.
- Go to Settings → Connectors → Browse connectors and search for Apify MCP server. Install it (enable or update if prompted).
- When connecting, authenticate with your Apify API token, and enable the tool
johnvc/brave-ai-mode-api. - In any chat, open + → Connectors and turn on Apify.
- Alternatively, choose Add custom connector and paste the full MCP URL
https://mcp.apify.com/?tools=actors,docs,johnvc/brave-ai-mode-api, using OAuth when prompted. - Ask Claude to run the Brave AI Mode API.
Open Claude on the web: https://claude.ai
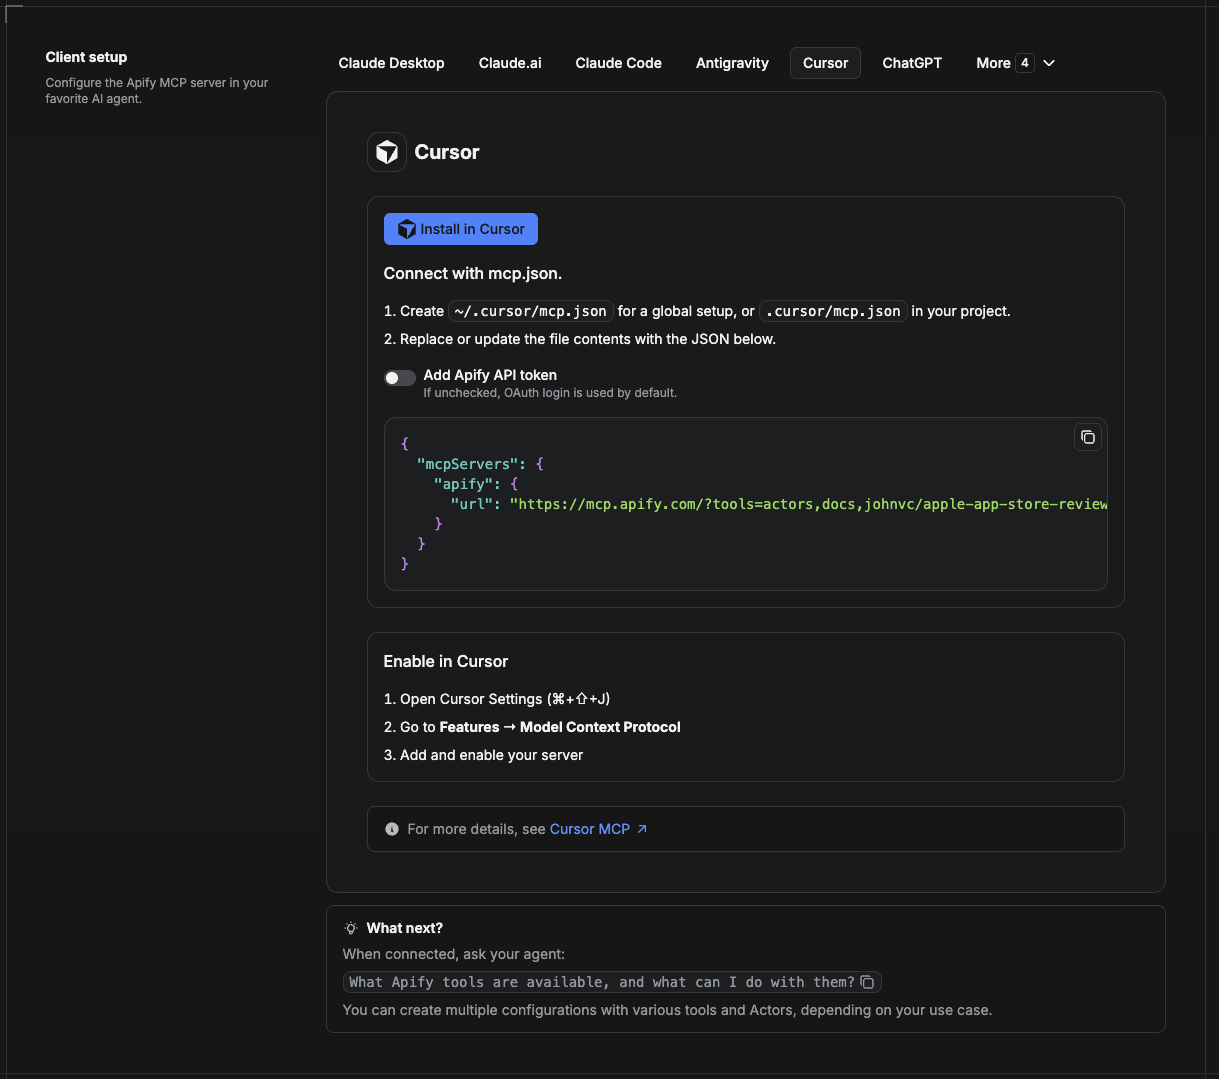
Cursor reads MCP servers from a project file at .cursor/mcp.json.
- In your project, create
.cursor/mcp.json:
{
  "mcpServers": {
    "apify": {
      "url": "https://mcp.apify.com/?tools=actors,docs,johnvc/brave-ai-mode-api"
    }
  }
}- If you prefer token auth over browser OAuth, add a header:
{
  "mcpServers": {
    "apify": {
      "url": "https://mcp.apify.com/?tools=actors,docs,johnvc/brave-ai-mode-api",
      "headers": { "Authorization": "Bearer YOUR_APIFY_TOKEN" }
    }
  }
}- Open Cursor → Settings → MCP and confirm the apify server is connected (green dot).
- In Composer or Chat, ask Cursor to call the Brave AI Mode API.
New to Cursor? Get it here: https://cursor.com/referral?code=XQP4VBLI3NNX
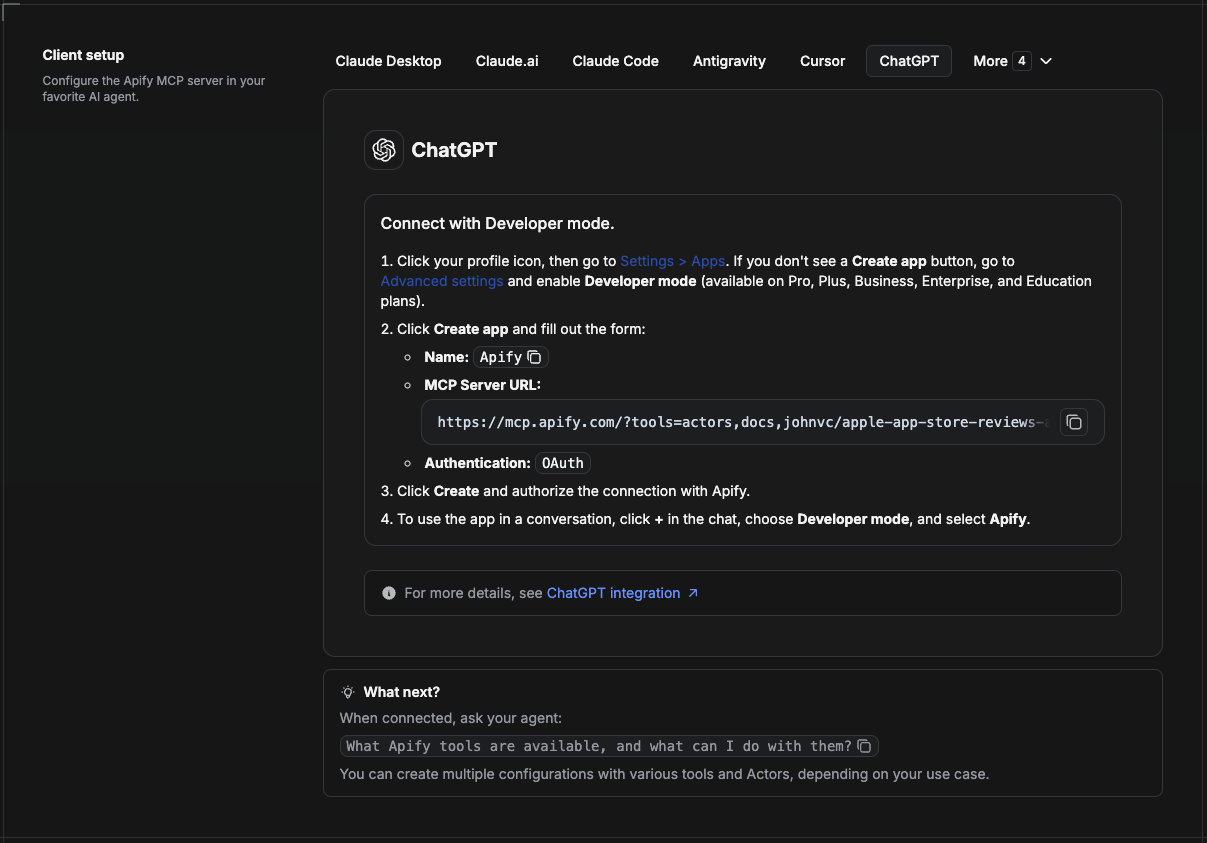
ChatGPT connects to the Apify MCP server through Developer mode (available on ChatGPT Pro, Plus, Business, Enterprise, and Education plans).
- Click your profile icon, then go to Settings > Apps. If you do not see a Create app button, open Advanced settings and enable Developer mode.
- Click Create app and fill out the form:
- Name: Apify
- MCP Server URL:
https://mcp.apify.com/?tools=actors,docs,johnvc/brave-ai-mode-api - Authentication: OAuth
- Click Create and authorize the connection with Apify.
- To use the app in a conversation, click + in the chat, choose Developer mode, and select Apify.
More help: https://docs.apify.com/platform/integrations/mcp
Use the Brave AI Mode API to monitor your brand's visibility in privacy-first AI search.
Last Updated: 2026.07.06