


This page describes compressing video, further than it currently is, in order to produce a ligher weight asset that can be included as an embedded video in a GitHub README page.
TLDR; if you want autoplay and looping (and can do without audio) then AVIF or WebP seem to be the way to go. If you want audio (and can live without autoplay and looping) then a little bit more is involved.
Note: Caniuse lists both AVIF and WebP (here and here) as Baseline (AVIF only reached this milestone in early 2024). This means that they're supported by enough of the browsers in use now that they can be considered essentially universal and used without concern.

Encoding to AVIF seems bizarrely slow on Linux at the moment (on Ubuntu 22.04 using the ffmpeg 20240301 master branch nightly build and also avifenc 0.9.3).
Using the ffmpeg nightly the following command took 4m 40s, which was about 2 seconds per frame, i.e. each second of 30fps video took a whole minute to encode:
$ ffmpeg -i input.mp4 -vcodec libaom-av1 -vf scale=-1:720 -crf 30 output-30.avif
The result can be seen above.
You can find details of what -crf means on the ffmpeg wiki page for the libaom-av1 encoder. The scale=-1:720 scales the video to 720p.
Note: the default 4.4.2 ffmpeg version that's currently available using apt on Ubuntu 22.04 LTS fails with Unable to find a suitable output format if I try the above command, hence the use of the statically linked nightly build found here - these builds are hosted John van Sickle rather than ffmpeg but they're linked to from the ffmpeg download page (see the "Linux Static Builds" section).
The older WebP format results in substantially larger files (2.3MB vs 557KB for the AVIF) with:
$ ffmpeg -i input.mp4 -loop 0 -vf scale=-1:720 output-4.webp
Note that unlike the AVIF encoder, the default is not to loop so, if you want to loop, you have to specify -loop 0. I didn't specify an encoder with -vcodec as ffmpeg has two WebP encoders and I've seen it suggested that it's better to leave it to ffmpeg to decide which to use.
Cranking the -compression_level up from the default 4 to 6 produces little improvement (the file size went down just 5%) and made the encoder even slower than AVIF (4m 50s vs 4m 40s) - at the default compression of 4, WebP is much faster (just 12s).
This is the result with the default compression (4) and quality (75), despite the much larger file size, the quality is noticeably worse than the more modern AVIF format.

If you right-click and select "Open image in new tab" for the AVIF and WebP images and tab back and forward between them, you'll notice far more JPEG-style artifacts around anything that is moving in the WebP image. And also notice that the colors are quite different.
More worryingly, if you look at the upper-right green corner at the end of the clip (before it loops), you'll see noticeable glitching that you don't see in the AVIF.
Before AVIF and WebP, there was the animated GIF. I expected the animated GIF results to be worse than they were.
The above videos are 720p at 24fps, the AVIF is 557KB and the WebP is 2.3MB.
The corresponding animated GIF is 8.2MB (and obviously has a far worse color palette, GIF being limited to just 256 colors).
I extracted the frames at 24fps and 12fps and at 720p and 360p as shown below and recombined them into animated GIFs using gifsicle like so:
$ sudo apt install gifsicle

$ mkdir frames-720-24fps
$ mkdir frames-720-12fps
$ mkdir frames-360-12fps
$ mkdir frames-360-24fps

$ ffmpeg -i input.mp4 -vf scale=-1:720 frames-720-24fps/out-%03d.gif
$ ffmpeg -i input.mp4 -vf scale=-1:360 frames-360-24fps/out-%03d.gif
$ ffmpeg -i input.mp4 -vf scale=-1:720 -r 12/1 frames-720-12fps/out-%03d.gif
$ ffmpeg -i input.mp4 -vf scale=-1:360 -r 12/1 frames-360-12fps/out-%03d.gif

$ gifsicle --delay 4 --loop --optimize=3 frames-720-24fps/*.gif > output-720-24fps.gif
$ gifsicle --delay 8 --loop --optimize=3 frames-720-12fps/*.gif > output-720-12fps.gif
$ gifsicle --delay 4 --loop --optimize=3 frames-360-24fps/*.gif > output-360-24fps.gif
$ gifsicle --delay 8 --loop --optimize=3 frames-360-12fps/*.gif > output-360-12fps.gif
Notes:
gifsicleisn't installed by default on Ubuntu, hence theapt installstep above.- The original video was 24fps so, the
-rargument, to produce a different frame rate, was only needed when extracting the 12fps frames. - A
--delayvalue of 400ms is needed when constructing the 24fps animated GIF and a value of 800ms for 12fps.
The resulting file sizes were:
1.5M output-360-12fps.gif
2.5M output-360-24fps.gif
4.7M output-720-12fps.gif
8.2M output-720-24fps.gif
So, in terms of file size, the 360p 24fps animated GIF is comparable with the 720p 24fps WebP but all these animated GIFs are substantially larger than the 720p 24fps AVIF.
Here's the 360p 12fps animated GIF:

If you're OK without autoplay and looping, see below. In particular, the above AVIF, WebP and animated GIF options don't work if you also want audio.
Before going onto how to really embed a video in this page, let's look at a simple cheat that in some ways is better.

The above isn't really an embedded video, it's just an image and when you click on it, it takes you to YouTube.
This 660x370 image was produced not by screenshoting anything but like so:
- Extract a frame with
ffmpeg -i input.mp4 -vf "select=eq(n\,0)" -vframes 1 frame.png - In Gimp, load the frame and scale it to 660x370.
- Load
youtube-overlay-660x370.pnginto Gimp, copy it and paste on top of the scaled frame. - Load
youtube-corners-mask-660x370.pngand use it to remove the corners (make them transparent) as described in this StackExchange answer. - Export the image using the
.webpsuffix (at the time of writing - early April, 2024 - the version of Gimp (2.10.30) that comes with Ubuntu 22.04 LTS doesn't know about.avif).
That's a rather involved way of achieving much the same effect as viewing the video on YouTube, clicking and dragging on the right-edge of the browser window until the page squashes down to the point where the video is about 660 pixels wide and then screenshoting that.
Note: youtube-overlay-660x370.png has a tiny bit of red at left end of the timeline - i.e. what you'd see if you let the video had run for a second or so - I think this adds to the effect.
The upside of all this is that you can leave YouTube to worry about compression etc. and just upload your original video. It also gives the end user all the YouTube functionality (e.g. I watch an awful lot of content at double-speed) but does have the downside that they'll be subjected to ads (unless they have YouTube Premium).
One downside is that you have to use a relatively small image like the one above if you want the effect to work well both when viewed e.g. in portrait mode on a small mobile device and when viewed on a high resolution screen.
To see what I mean, this similar image was created by simply screenshotting the actual video on YouTube while being viewed on a 4K monitor:

If you're also looking at this on a 4K monitor, it'll look fine but on a small screen the image is scaled down and the controls all look tiny. The smaller image above will look reasonable on any device.
I tried using the <img> tag with the srcset attribute like so:
<img
  srcset="youtube-660x370.jpg, youtube-1600x900.jpg 2.4x"
  src="youtube-1600x900.jpg"
  alt="YouTube image" />
But GitHub just strips out the srcset attribute.
The small image above is a .webp file while the large one is a .jpg. If you're using GitHub with a light theme, both will look fine, but if you're using a dark theme, the large one will look odd as the small areas beyond the rounded corners will be white rather than transparent.
This is because JPEG doesn't support transparency so, these areas have to be some color (white in this case) whereas AVIF does support transparency.
An alternative would be to use the classic loseless format PNG but this is a lot less disk efficient - the WebP image above is just 36KB whereas the corresponding PNG is 115KB.
I use H.264 below rather than the newer H.265 format because H.264, unlike H.265, is viewable on pretty much everything including resource constrained devices like the Raspberry Pi 4 and earlier (the 5 can handle H.265 and apparently, with a little effort, Pi 4s can now also handle it). H.264 encoding is super fast compared with AVIF above (it's been around so long that the encoders are highly optimized and many devices include hardware H.264 encoding and decoding support). I found that the file sizes produced compare very favorably to AVIF (despite AVIF being a much newer format) at a similar quality.
Compressing video using ffmpeg:
$ ffmpeg -i input.mp4 -vcodec libx264 -vf scale=-1:720 -preset veryslow -crf 28 output-28-vs.mp4
The above command scales the video to 720p using the libx264 and the slowest, i.e. best preset, and a crf of 28.
It's the crf value that does the magic, i.e. tells ffmpeg how much of a hit you're prepared to take on quality.
The crf range is from 0 to 51 and the ffmpeg wiki says here that the "subjectively sane range is 17–28".
Important: crf values are not directly comparable between encoders, e.g. the ffmpeg wiki page for the AV1 encoder says that -crf 23 with the AV1 encoder is roughly equivalent to -crf 19 with the H.264 encoder.
For some size comparisons, I tried my input video at different crf values using slow and veryslow (marked with vs in the output filename):
256M input.mp4
2.9M output-18.mp4
2.4M output-18-vs.mp4
624K output-28.mp4
616K output-28-vs.mp4
424K output-51.mp4
The input was a 4K 30fps video encoded on camera with H.264.
veryslow produced a noticeable improvement when the crf value was 18 but a less dramatic improvement when the crf value was 28.
Using veryslow introduced about a 25% speed penalty compared to slow on my system.
There is a noticeable difference between 18 and 28 but the output is still very acceptable e.g. for some kind of technical demonstration video, i.e. where the primary intent isn't to capture much in the way of cinematic beauty. At 51, you can sort of make out what's going on if you've seen the original but it does look like zooming in close on a piece of pointillist art.
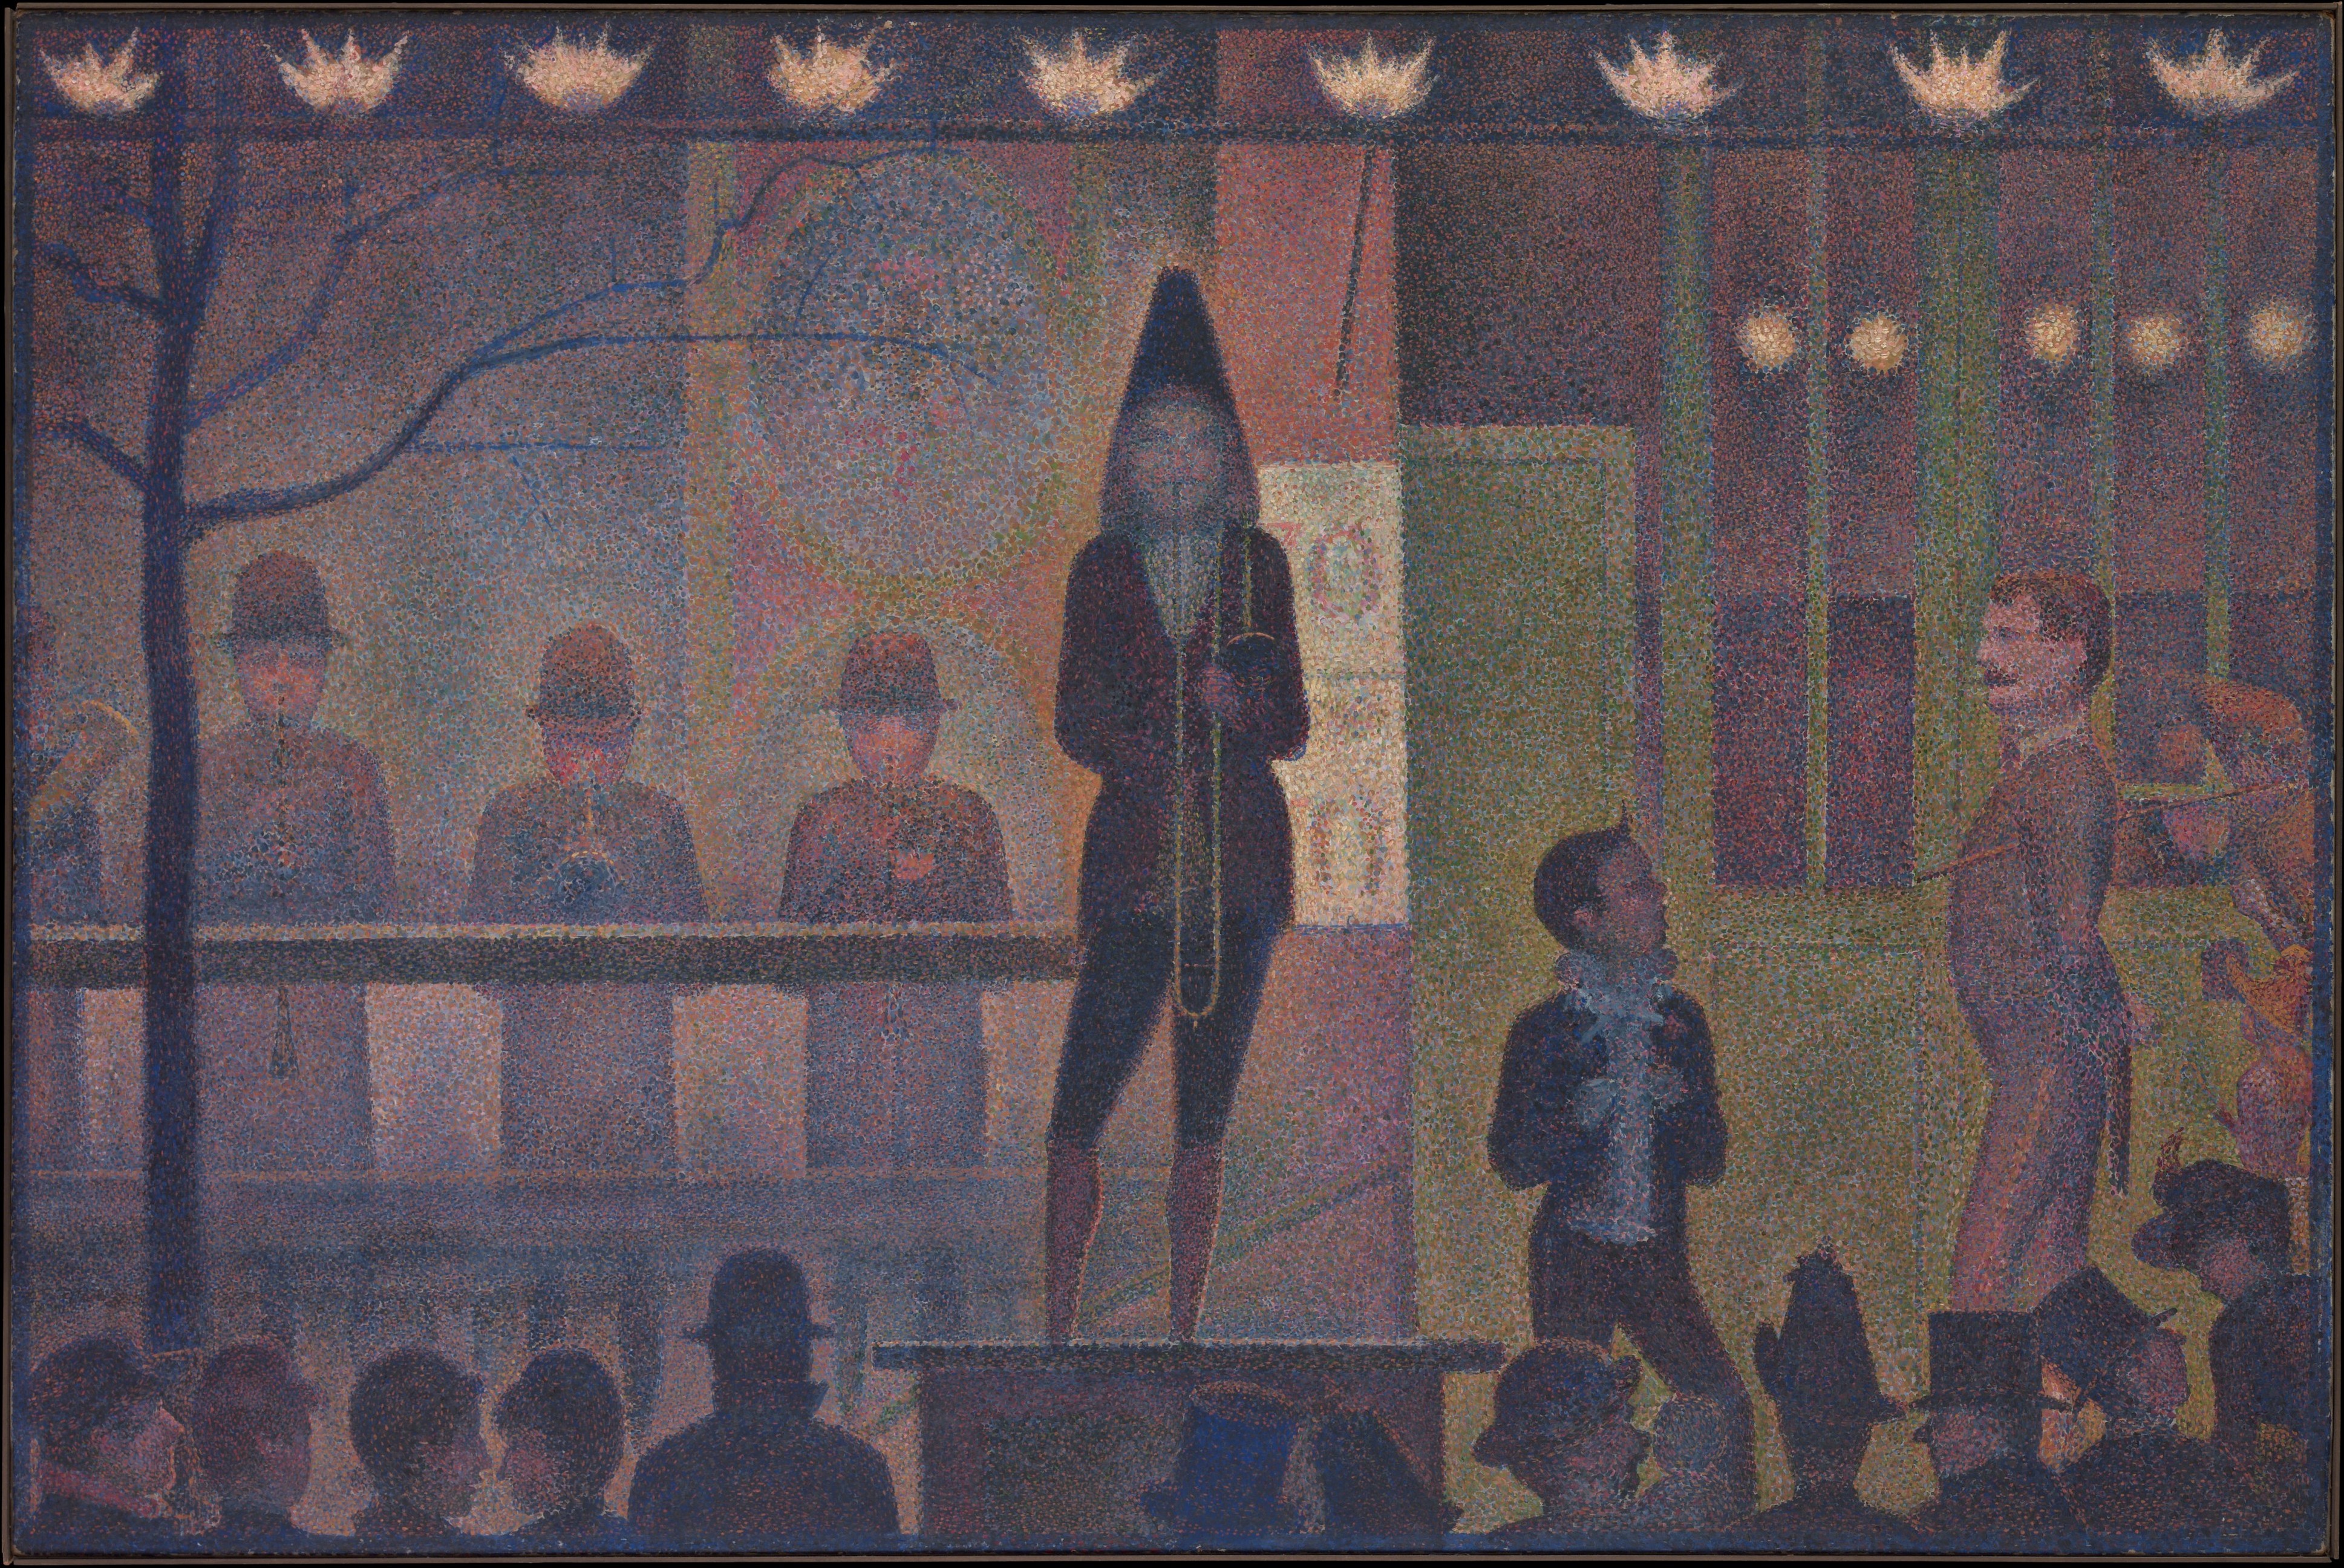
According to a Web Almanac report from 2022, if your total page "weight" is less than 2MB then you're in the bottom 50% of pages viewed and at less than 8MB, you're still in the bottom 75%.
While a lot of people consider 200KB as large for an asset, my impression is that in 2024, 2MB is considered fine for a single asset.
So, for an .mp4 that's purpose is to take the place of an animated GIF in a GitHub README page, e.g. to demo something or other, one could either just stick to a crf value of 28 or, if it comes in below 2MB, adjust the crf value until the resulting image is about 2MB (if you're targetting a given size there are options to achieve this directly with ffmpeg but they're somewhat involved).
I've included output-28-vs.mp4 here alongside this README.
You might assume that including it as an embedded video here would be as simple as using the <video> tag or using image markdown, i.e.  but it's not.
Note: the standard image markdown works with AVIF and WebP files (and was used up above).
Despite the use of video in GitHub markdown becoming generally available back in May 2021 (see this SO answer for a history of handling video in GitHub markdown), the video asset itself still needs to be uploaded using the GitHub markdown editor and is stored outside your repo.
So, if you've got a page like this README, navigate to it on the GitHub website and click the "Edit this file" icon (the one that looks like a pencil) and then drag your video asset to some point in the file (or click the text at the bottom of the editor that says "Attach files by dragging & dropping, selecting or pasting them." and a file selector will pop up).
At the point where you dropped the video, you'll end up with a URL that looks something like this:
https://github.com/george-hawkins/uart-over-wifi/assets/5216161/c7b6b85e-407a-4bf8-8f03-6cde71cb92ea
                                                 ^^^^^^         ^^^^^^^^^^^^^^^^^^^^^^^^^^^^^^^^^^^^
I.e. your video has been uploaded to some assets area that isn't really part of your repo (i.e. if you clone the repo, you won't get this assets area) and has been assigned an arbitrary UUID as its name.
So, how do you mark up this URL such that it's treated as embedded video? The answer, somewhat surprisingly, is that you don't have to do anything - if you leave this URL as it is, GitHub will recognize it and replace it with a <video> tag (and a non-removable title bar making clear that it's a video) when the markdown is rendered on the GitHub site.
Trying to wrap it up in any other way (beyond surrounding it with < and > to make clear it's a real link) breaks its display as an embedded video so, essentially one is locked into magic specific to the GitHub ecosystem for this.
output-28-vs.mp4
Note: it's interesting that even though the video was assigned a UUID as its name when it was uploaded, GitHub displays its original name in the title bar above the video.
There appears to be no way to enable autoplay or looping for such videos.
On the page embedded-examples.md, you can see the results for many different attempts to include my .mp4 video in a GitHub markdown page. As of early April 2024, only the first two work (the upload URL with and without < / > surrounding it). Perhaps with time some of the others will be supported too.