Important
Basically it's a work of 15 minutes.
Do STEP 1 TO STEP 5 below
- Simply copy/paste the code from Macro.cfg and printer.cfg over your original config.
- Additionally paste your serial numbers from old printer.cfg to new printer.cfg.
- Copy/paste the Machine start G-Code in (Orca) slicer.
- Set nozzle size in (Orca) slicer settings AND printer.cfg (e.g. 0.6mm, 0.4mm,...)
Caution
- Stock Sovol hardware required. 0.6mm nozzle preconfigured. For 0.4mm nozzle minor code adjustment required in printer.cfg. See below on the end of this readme (Step 4).
- Stock Sovol SV08 Firmware 2.4.6 required, this might not work with older and newer firmware in the future!
- You will have to use all files / settings together for optimal function (Orca Machine start G-Code / printer.cfg / Macro.cfg)
- You will have to paste your serial number from old to new printer.cfg! See printer.cfg section! Do not forget!
- Do not implement if you don't know what you are doing (knowledge about parameters in Klipper configs, how to troubleshoot,…. required)
- Make backups of your current settings / configs!
- This will work with PLA too. You have to change temp settings to PLA temps in Macro.cfg (see global_variables gcode)
- If using a 12V fan replacement for the mainboard with a buck converter, then be sure the fan spins up again after shutting off when temperature is low / idle.
- Use at own risk, this is WORK IN PROGRESS.
Tip
- Optionally uncomment some gcode options if hardware installed (like Neopixel Nozzle LED, chamber fan, etc) -> Search for "uncomment" in gcode to see and unlock the options. It is already preconfigured but not active.
Must be used with optimized printer.cfg and Macro.cfg for correct print start (no purge line and poop blob on bed) and avoid bed scratching in certain cases!

Orca Machine start G-Code:
START_PRINT EXTRUDER_TEMP=[first_layer_temperature] BED_TEMP=[bed_temperature_initial_layer_single]
Copy/Paste over old start gcode in SV08 slicer profile. I reduced the code to a single line in the slicer profile, so start gcode is inside Macro.cfg (see next step)
Tip
Be sure to have backups of original Macro.cfg and printer.cfg with your serial numbers!
You can compare your original code with this new code here to see all changes (paste original code in left column, new code in right column): https://editor.mergely.com

(full code in downloadable file)
Copy&Paste new code over old code in (Orca) slicer Device Tab (= Klipper Mainsail) -> Machine -> Macro.cfg (Save & Reboot) Be sure to replace the whole code!
(full code in downloadable file)
paste over old code in Orca Device Tab -> Machine -> printer.cfg (Save & Reboot)
Be sure the tabs stops are still inserted in section [quad_gantry_level] coordinates. Be sure to replace the whole code! Then:
Caution
YOU MUST PASTE YOUR PRINTER/KLIPPER SERIAL IN FOLLOWING SECTIONS:
....

[mcu] # NEED YOUR SERIAL PASTED HERE
serial: PASTE SERIAL HERE!
restart_method: command

[mcu extra_mcu] # NEED YOUR SERIAL PASTED HERE
serial: PASTE SERIAL HERE!
restart_method: command

......
......
Check if your serial numbers are adopted in printer.cfg as described above!
IF YOU WANT TO KEEP YOUR OLD Z-OFFSET AND BED MESH VALUES THEN LEAVE YOUR ORIGINAL LAST PART IN GREEN LETTERS STARTING WITH SAVE_CONFIG
......

#*# <---------------------- SAVE_CONFIG ---------------------->
#*# DO NOT EDIT THIS BLOCK OR BELOW. The contents are auto-generated.
#*#
#*# [probe]
#*# z_offset = 1.0
#*#
#*# [input_shaper]
#*# shaper_type_x = zv
#*# shaper_freq_x = 60.0
#*# shaper_type_y = mzv
#*# shaper_freq_y = 42.8
#*#
#*# [extruder]
#*# control = pid
#*# pid_kp = 33.838
#*# pid_ki = 5.223
#*# pid_kd = 47.752
#*#
#*# [heater_bed]
#*# control = pid
#*# pid_kp = 73.571
#*# pid_ki = 1.820
#*# pid_kd = 783.849
- Reboot machine
- Set nozzle diameter in printer.cfg and (Orca) slicer! See Step 4.
- Be sure your serial numbers are pasted from old printer.cfg in new printer.cfg
- Be sure temperatures for nozzle and bed are adjusted in (Orca) slicer and Macro.cfg (see global_variables). Default are PETG temperatures. For PLA lower temp values required.
- Uncomment hardware upgrade code in Macro.cfg and printer.cfg for Neopixel nozzle LED and chamber fan if installed. -> Search for "uncomment" in gcode to see and unlock the options. It is already preconfigured but not active. Neopixel wiring instructions see Nadirs tutorial: https://www.printables.com/model/938796-sv08-cn3d-shroud-v3-extra-fan-magnets-klicky-led
- (optional PID Tuning (Menu in LCD display))
- Calibrate Z-offset (Menu in LCD display) - Important!
- Quad Gantry Level (Menu in LCD display) - Important
- Bed Mesh (Menu in LCD display) - Important
- Auto-Calibrate (= Input Shaping Menu in LCD display) - Important
- Belt Test - Important
- The individual printer calibration settings will be stored in modified printer.cfg (section SAVE_CONFIG)
Set your 0.4mm or 0.6mm (Orca) slicer presets.
Then modify (Orca) slicer printer settings and set nozzle diameter in Extruder 1 tab (Nozzle diameter: 0.4 or 0.6 mm).
In Addition change this line in printer.cfg:
nozzle_diameter: 0.600 # 0.400 MOD for 0.6mm nozzle install
to
nozzle_diameter: 0.400
(Default = 0.6mm)
Important
Set global variables in Macro.cfg:
Many global variables are defined in _global_var inside Macro.cfg! E.g. Preheat temperature of nozzle and bed.
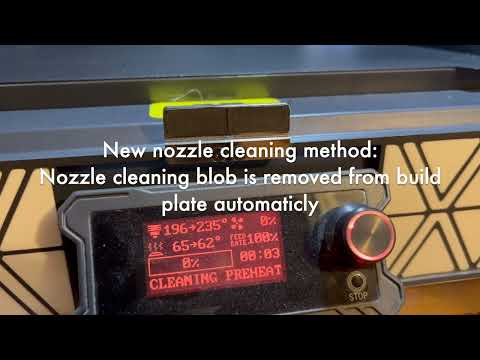
If the cleaning blob doesn't stick on the bed prior kick away, then raise bed preheat temp. If it sticks even after kick attempt, then lower bed temp in variables. It needs to be balanced according your filament, bed surface,...
Tip
- It is NOT recommended to print PETG with the stock 0,4mm nozzle without the nozzle screw! It may damage your bed and toolhead! Replace with upgrade nozzle or 3rd party upgrade by e.g. Microswiss
- Check all fans in Mainsail with sliders
- I recommend to upgrade your SV08 with this mod to avoid nozzle cleaning blobs and other residuals getting into the Z-belt mechanics: https://www.printables.com/model/1257347-sovol-sv08-z-belt-cover
- To fix your bed (TACO SHAPE) do this fix: https://www.printables.com/model/1073040-sovol-sv08-taco-bed-fix Heat soaking and other voodoo is no solution, this taco bed fix (metal spacers in the center between bed and printer base plate) eliminates the root cause for bad first layers. The bed sinks down when heated because it is not supported in the center.
- For PETG prints use the smooth side of the PEI plate. PETG sticks too much on coarse side.
Why 0.6mm nozzle and PETG as filament?
-
Why PETG? I can put my prints in the dish washer at 70°C or use outside without deformation. Therefore higher temps in Macro.cfg global_variables gcode.
-
These settings are optimized for PETG and 0.6mm nozzle, but it can be adapted for PLA and standard 0.4mm nozzle in Orca / Macro.cfg again.
-
I installed the new Sovol upgrade nozzle with 0.6mm diameter for even faster prints and more reliability (no clogging). The maximum volumetric flow increased from 15mm3/s to 26mm3/s with PETG! It's possible with Sovol SV08. Orca slicer can compensate bigger nozzles with quality settings magic (Adaptive layer height button, Smooth button, fuzzy skin, ....), except very fine details.
Note
This guide and all changes have been made with the best intentions but in the end, it's your responsibility and only your responsibility to apply those changes and modifications to your printer. Neither the author, contributors nor Sovol is responsible if things go bad, break, catch fire, or start WW3. You do this at your own risk!