


- SlicerModalityConverter
SlicerModalityConverter is an open-source 3D Slicer extension designed for medical image-to-image (I2I) translation.
The ModalityConverter module integrates multiple deep learning models trained for different kind of I2I translation (MRI-to-CT, CBCT-to-CT, CT-to-PET), providing a user-friendly interface.
The Synthetic Image Quality Assessment module provides a quantitative evaluation of synthetic images generated by image-to-image translation models using independent deep learning models.
This extension is available in the official 3D Slicer Extensions Index, under the Image Synthesis category (from version 5.9.0 onwards).
You can install it directly through the Extension Manager in 3D Slicer ≥ 5.9.0, or manually for earlier versions (< 5.9.0).
Here is a short video tutorial showing how to install extensions both via the Extension Manager and manually.
- Support for multiple pre-trained deep learning models
- GPU acceleration support for faster processing
- Easy custom models integration for advanced users
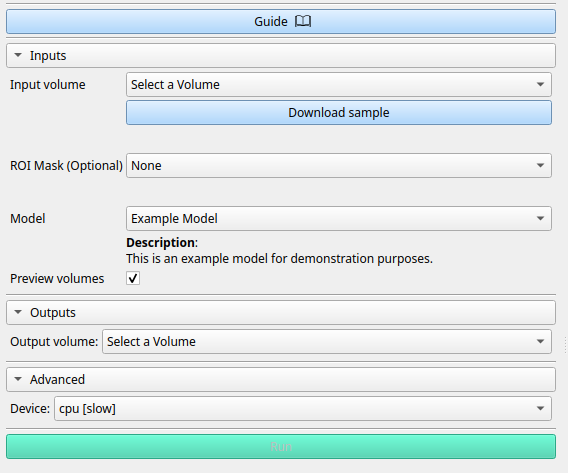
- Select an input image
- Choose a pre-trained model from the dropdown menu. Selecting each model will display detailed information on the translation modality, specific processing and inference output
- Optionally provide a binary mask to focus the translation on specific regions
- Click "Run" to generate the synthetic image
This extension is intended for research purposes only. If a model is applied to an input image of the wrong type (i.e. using a CT or CBCT instead of an MRI for an MRI-to-sCT model), the output will be wrong or unpredictable.
| Modality | Anatomy | Original Study | More Info |
|---|---|---|---|
| T1w-MRI → CT | Brain | Raggio et al., FedSynthCT-Brain: A federated learning framework for multi-institutional brain MRI-to-CT synthesis (Li et al. architecture) | Read more |
| T1w-MRI → CT | Brain | Raggio et al., FedSynthCT-Brain: A federated learning framework for multi-institutional brain MRI-to-CT synthesis (Fu et al. architecture) | Read more |
| T1w-MRI → CT | Brain | Raggio et al., FedSynthCT-Brain: A federated learning framework for multi-institutional brain MRI-to-CT synthesis (Spadea, Pileggi et al. architecture) | Read more |
| CBCT → CT | Head & Neck | Raggio et al., A Privacy-Preserving Federated Learning Framework for Generalizable CBCT to Synthetic CT Translation in Head and Neck | Read more |
| CT → PET | Chest/Lung | Salehjahromi, Karpinets et al., Synthetic PET from CT improves diagnosis and prognosis for lung cancer: Proof of concept | Read more |
- Click Download sample to open the Sample Data module.
- Download the MRHead volume.
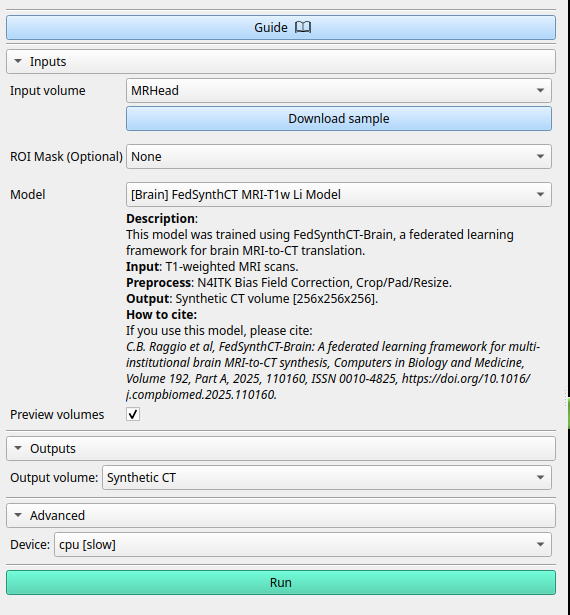
- In the ModalityConverter module, select the MRHead volume as Input volume.
- From the Model list, choose the desired model (e.g.,
[Brain] FedSynthCT MRI-T1w Li Model). - (Optional) Check Preview volumes if you want to visualize intermediate volumes generated during processing.
- Choose the Output volume.
- In the Advanced section, select the device from the Device list. A GPU device provides faster inference.
At this point, the interface should look like this:
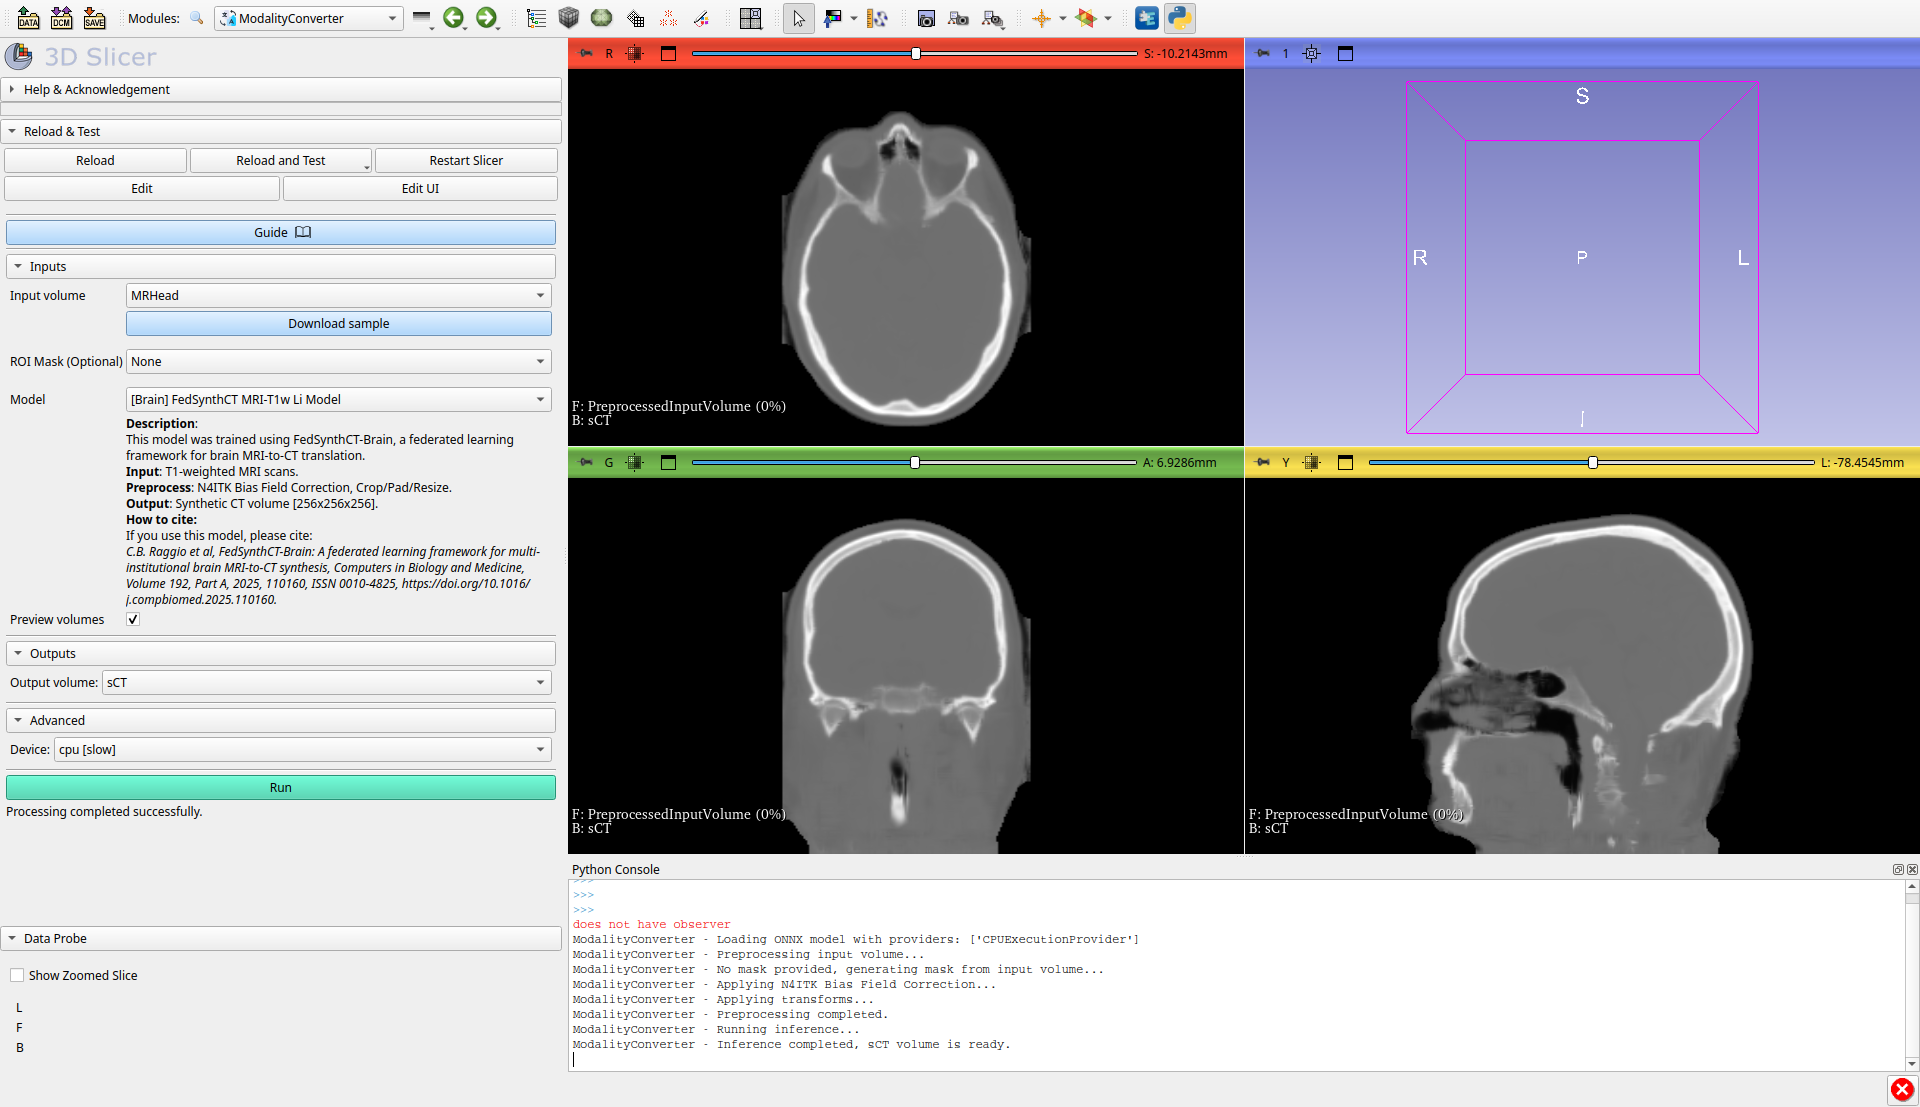
- Click Run to start the inference. The resulting volume will appear once the process is complete:
Full example
ModalityConverterVideoExample.mp4
To add your own model to the ModalityConverter module of the ModalityConverter Slicer extension, follow these 3 steps. The integration is designed to be modular and automatic once the proper structure is respected.
🧠 Step 1 — Implement a New Model Class
Create a Python class in the directory:
.../ModalityConverter/ModalityConverter/ModalityConverterLib/ModelsImpl/
Your class must inherit from the BaseModel abstract class and implement the required methods. Here is the base structure:
from ModalityConverterLib.ModelBase import BaseModel, register_model

@register_model("your_unique_model_key")
class YourModelClass(BaseModel):
    def __init__(self, modelKey: str, device: str = "cpu"):
        super().__init__(modelKey, device)

    def _loadModelFromPath(self, modelPath):
        # Load the model using your framework (e.g. torch, onnx, etc.)
        pass

    def runInference(self, inputVolume, outputVolume, inputMask=None, showAllFiles=True):
        # Define the inference procedure
pass- The
@register_model("your_unique_model_key")decorator is mandatory and must match the key used inmetadata.json. - Implement
_loadModelFromPath(modelPath)to define how your model is loaded (e.g.torch.load,onnxruntime, etc.). - Implement
runInference(...)to define how the model performs inference and writes results to theoutputVolume.
You can also optionally implement preprocess(...) and helper methods for preprocessing input volumes, applying transforms, etc.
For a full example, see the classes FedSynthBrainBaseModel and FedSynthBrainLiModel provided in the source tree.
🏷️ Step 2 — Add Your Model Entry to the Metadata File
Open the file:
.../ModalityConverter/ModalityConverter/Resources/Models/metadata.json
Add a new entry in the following format:
"your_unique_model_key": {
  "url": "https://example.com/path/to/your_model_file.onnx",
  "display_name": "Your Model Display Name",
  "description": "A detailed HTML-formatted description of your model. <b>Include citations, inputs, and outputs.</b>",
  "module_name": "YourModelClass"
}your_unique_model_key: must match the string used in the@register_model(...)decorator and the model file name.url: direct link to download the model file (e.g.,.pth,.onnx, etc.).module_name: must match the name of the class and the module.py you've defined (e.g. module:YourModelClass.py, class name:YourModelClass).description: supports HTML tags to format citations, inputs, and outputs. E.g., use<b>,<cite>,<br/>. The following template can be used:
[MODEL_DESCRIPTION]<br><b>Input</b>: [MODALITY]<br><b>Preprocess</b>: [PRE_PROCESSING_DESCRIPTION]<br><b>Output</b>: [SYNTHETIC_OUTPUT_MODALITY] [OUTPUT_DIMENSION].<br><b>How to cite:</b><br>If you use this model, please cite:<br><cite>[CITATION]</cite>📦 Step 3 — Name and Upload Your Model File
Save your model file (e.g. your_unique_model_key.onnx) and host it at the url specified in the JSON. The model filename must start with the same key used in the decorator and the metadata (e.g., your_unique_model_key.onnx or your_unique_model_key.zip).
Place the model in:
.../ModalityConverter/ModalityConverter/Resources/Models/
If the model is not already present locally, the system will automatically download it from the provided URL when selected in the GUI.
Full Example
Here is a basic example to get started:
-
Implement a new model class
a. Go to
.../ModalityConverter/ModalityConverter/ModalityConverterLib/ModelsImplb. Create a python module:
ExampleModel.pyc. Create a new custom model class:
from ModalityConverterLib.ModelBase import BaseModel, register_model

@register_model("a_model_unique_key")
class ExampleModel(BaseModel):
    def _loadModelFromPath(self, modelPath):
        # Upload the model from the OS as you prefer
        model = ...
        return model

    def runInference(self, inputVolume, outputVolume, inputMask=None, showAllFiles=True):
        # Customize your preprocess, run inference and show the output
        ...
-
Update Metadata File at
.../ModalityConverter/ModalityConverter/Resources/Models/metadata.json{ "...": { "..." }, "a_model_unique_key": { "url": "https://example.com/examplemodel.ext", "display_name": "ExampleModel", "description": "ExampleModel description", "module_name": "ExampleModel" } } -
Export the pretrained model file (
a_model_unique_key.extension) and host it at theurlspecified in the JSON. The model filename must start with the same key used in the decorator and the metadata (a_model_unique_key). -
Reload the module and enjoy your model! Once your model class is implemented and the metadata updated:
- It will appear automatically in the dropdown menu of the module UI.
- It will be downloaded and loaded dynamically as needed.
- Your inference and preprocessing logic will run when selected.
| Requirement | Description |
|---|---|
| Class location | ModalityConverterLib/ModelsImpl/ |
| Required methods | _loadModelFromPath(...), runInference(...) |
| Model key decorator | @register_model("your_model_key") |
| Metadata file | Add an entry to metadata.json |
| Model file naming | Must start with the same your_model_key used in the decorator and JSON |
| Download support | Model file is auto-downloaded from the provided URL if it is not present locally |
Once a synthetic image is generated, its accuracy can be assessed even in the absence of a ground truth image. This module enables such evaluation.
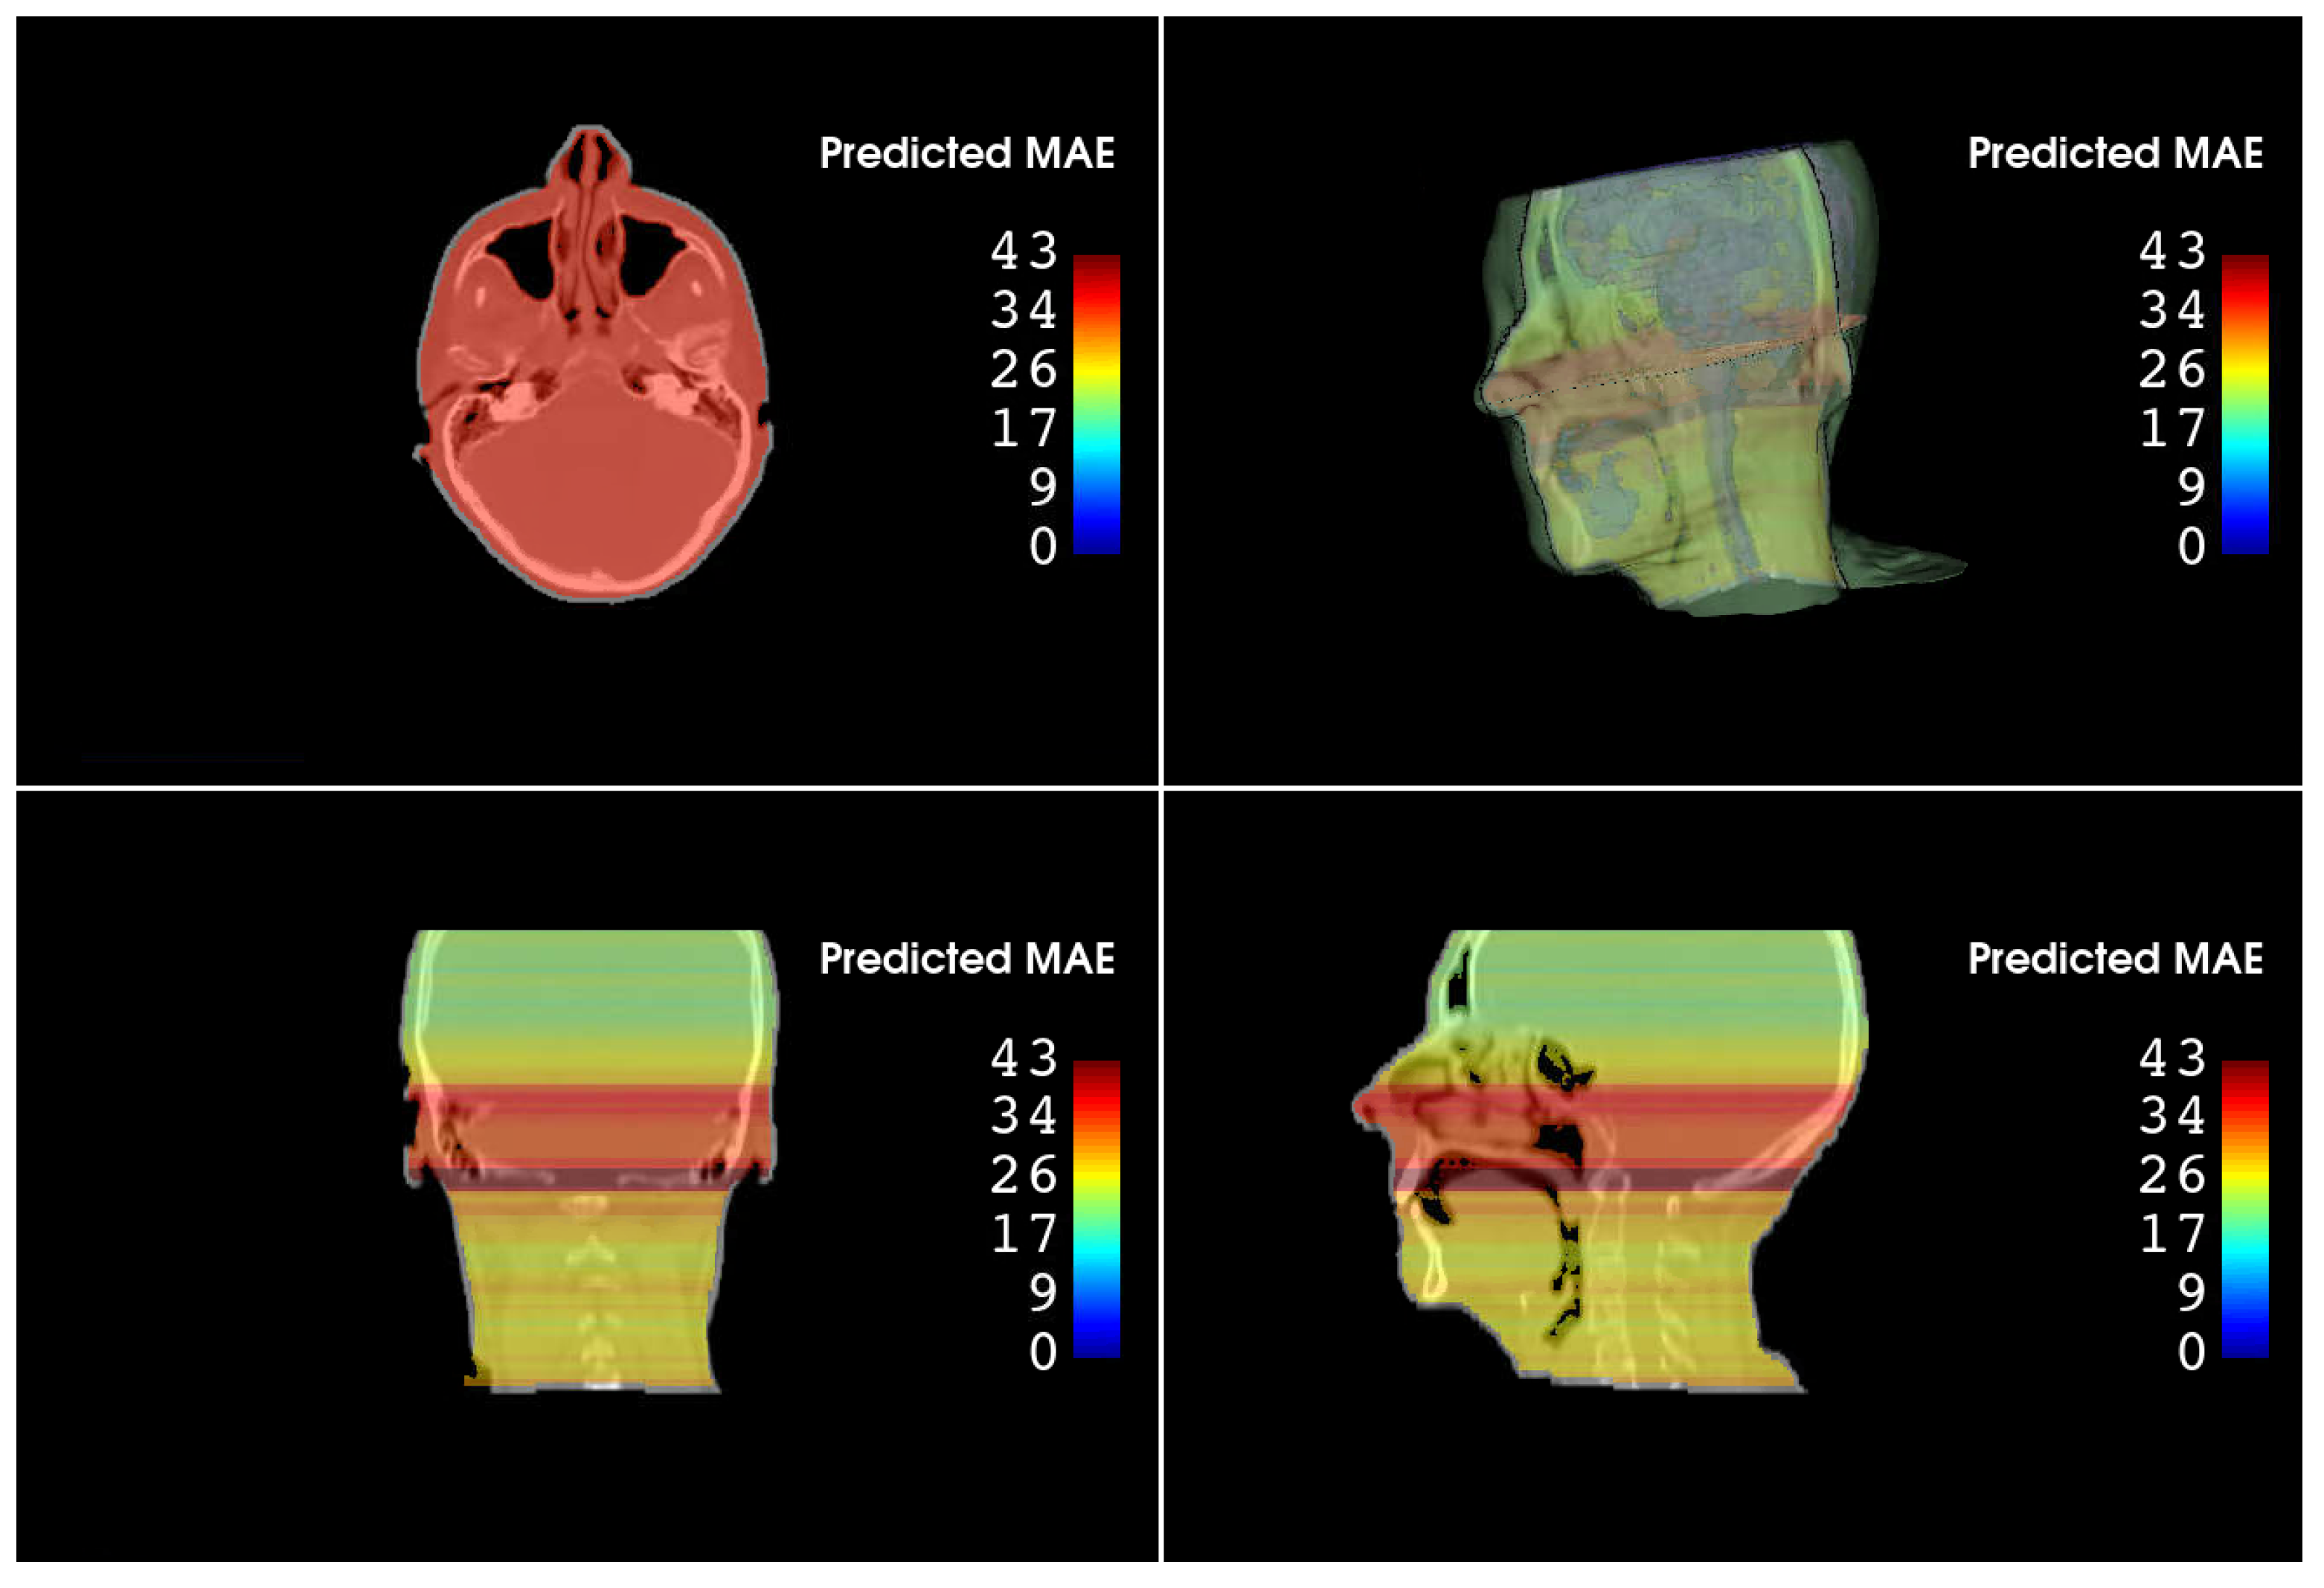
Example of 2D MAE prediction for a synthetic CT. Source: Zaffino et al
| Modality Assessment | Anatomy | Original Study | More Info |
|---|---|---|---|
| Synthetic CT | Brain | Zaffino et al., Toward Closing the Loop in Image-to-Image Conversion in Radiotherapy: A Quality Control Tool to Predict Synthetic Computed Tomography Hounsfield Unit Accuracy | Read more |
The integration process is the same procedure as for ModalityConverter, but you should implement it in the SyntheticImageQualityAssurance module.
Integrating new models for different modalities is encouraged!
Once you have integrated and tested your custom model locally, simply create a pull request in the original repository to request integration of your model into the 3D Slicer extension.
If you require any further information or have any queries, please send an email to: ciro.raggio@kit.edu.
Please cite the relevant publication when using models integrated in this module. Each model's description includes its corresponding citation information.
The SlicerModalityConverter extension should be cited as follows:
Raggio C.B., Zaffino P., Spadea M.F., SlicerModalityConverter: An Open-Source 3D Slicer Extension for Medical Image-to-Image Translation, 2025, https://github.com/ciroraggio/SlicerModalityConverter .