🚧 Work in progress 🚧
This is a 'NetHook' (chook) made for Mastercam 2021.
It can automate the process of exporting CAD entities within levels to individual files of a specified CAD format.
Similar to the Save Some function within Mastercam; it would be used when you want to save a CAD entity as a separate file of a certain CAD format.
Note: If you clone or fork this repo and you are using Visual Studio, there are post build events which require admin access; therefore you must either run visual studio as admin or remove the post build events if building in debug mode.
- Mastercam 2020
- Mastercam 2021
- Mastercam 2022? (seems to work)
❔ Note: This chook may be compatible with Mastercam 2018 & 2019 if the NETHook3_0.dll reference is updated to the proper file location for those versions; this has not been tested yet
Download the Level-Exporter.InstallerMC2021.msi from releases and choose the Mastercam 2020 or 2021 chooks directory.
Usually located at C:\Program Files\Mastercam 2021\Mastercam\chooks
Download the zip from releases and extract the files to the Mastercam Chooks directory, usually located at:
C:\Program Files\Mastercam 2021\Mastercam\chooks
The Mastercam chooks directory should contain
Level-Exporter.dllMicrosoft.Xaml.BehaviorsLevel-Exporter.ft
💡 See the Readme folder (Level-Exporter/ReadMe) within the project for additional context on debugging
- Clone this repository
- Install Visual Studio 2019
- In Visual Studio, open
Level-Exporter.sln(located in Mastercam-Level-Exporter/Level-Exporter) - Right click the Level-Exporter project and set the Debug properties
- Make sure to point to the proper Mastercam.exe and working directory
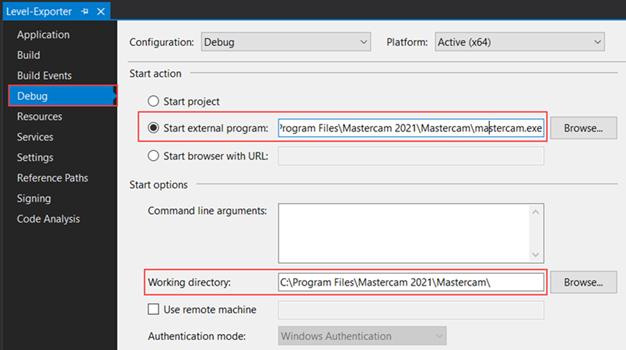
- Set configuration to Debug/x64
- Click the Start button or press F5
- Visual studio post build events will try to copy the necessary files to the proper Mastercam directories
- A debug session of Mastercam will open and you will be able to set breakpoints and test things out.
- If you get errors related to the
NETHook3_0.dll, you may have to update the reference, see the Readme folder.

NETHook3_0.dll is usually one level up from the chooks folder: C:\Program Files\Mastercam 2021\Mastercam

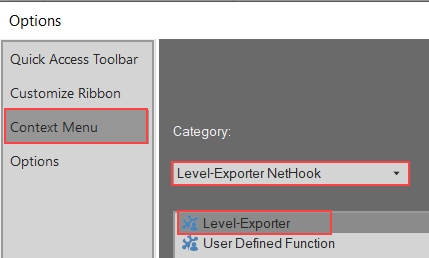
By adding it to the context menu, it will appear in the right click menu.
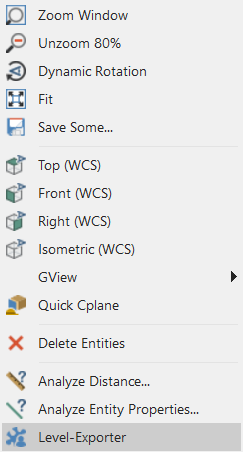
- Organize the CAD entities of your Mastercam session into different levels
⚠️ Levels that have no entities are ignored, and will be cleared from Mastercam- When naming levels in Mastercam, avoid using symbols (such as ()%#* etc.)
- If the level names in Mastercam are left blank, they will be named 'level' in the level-exporter
- You can name levels within the level-exporter, to use for the file export (this will not affect the level names within Mastercam)
- Open the Level-Exporter by using the
Run Add-Infeature under theHometab, and look for thelevel-exporter.dll- Alternatively if you've added it to the Mastercam ribbon, click on the icon
- Alternatively if you've added it to the context menu, right click and select the Level-Exporter
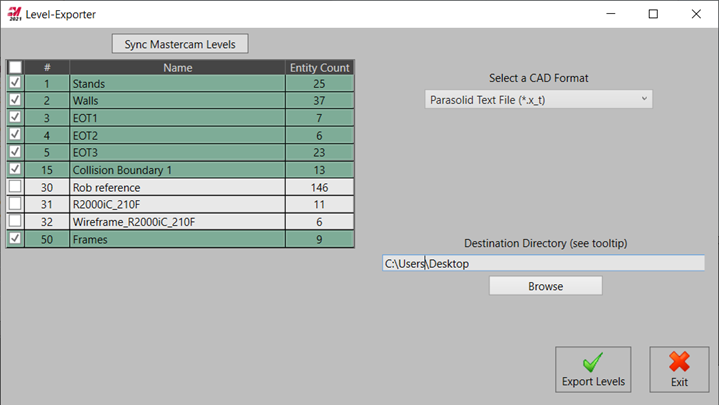
- Click on the
Get Mastercam Levelsbutton- If you update the levels in Mastercam, you can click the
Sync Mastercam levelsbutton to update the list in the level-exporter
- If you update the levels in Mastercam, you can click the
- Select the checkbox next to the levels you would like to export (select the checkbox in the header to select or deselect all levels)
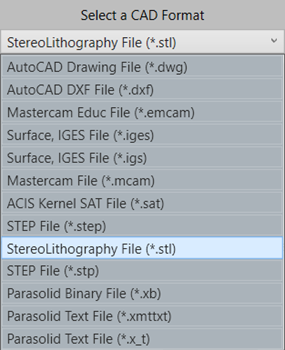
- Select a CAD format from the drop down menu
- If Stl is selected:
- Default resolution is 0.02
- Value must be a value between 0.02 - 5.0; a lower value means a bigger file size.
- If set to 0, Mastercam's system tolerance will be used (from Mastercam configuration)
⚠️ If Iges is selected, a dialogue for a comment will open in Mastercam after clicking export; you must fill in a comment and press enter.
- If Stl is selected:
- Select a destination/output directory
⚠️ If this is left blank, aSave Somedialogue will open for every level selected; you can then select the name, file extension, and destination for each level.- The level names in the level-exporter will be used for the exported file names.
- Click
Export Levels
🥳 📁 Each selected level will be saved as a separate CAD file to the specified directory. 🏁