p3fc.py offers an easy-to-use GUI to convert PILATUS3 images to the Bruker .sfrm format and to generate X-ray aperture masks for the Bruker SAINT+ integration engine of the APEX3 Software Package.
It is currently designed to convert data collected at the following synchrotron facilities / beamlines:
- Advanced Photon Source / 15ID-D
- SPring-8 / BL02B1
- Diamond Light Source / I19-1
The data can then be integrated using Brukers SAINT+ Integration Engine V8.35A or later
- requirement that frames consist of multiples of 512 pixels has been lifted
- any frame size is now allowed
Install directly from the wheel (check releases, install latest)
python3 -m pip install p3fc-?.?.?-py3-none-any.whl
it is installed as a script, run p3fc from a terminal.
- black circle masks the area it covers
- green circle unmasks the area it covers
- artistic arrangements are welcome
- follows hierarchal order (small > large)
- use
Options -> Set Wavelengthto overwrite the .inf info (SPring-8 data) - use
Options -> Set 2-Theta correctionto overwrite the .inf info (SPring-8 data) - the
Maskmenu offers some useful functions - the initial rectangle & circle will always be on top
- objects are allowed to be placed anywhere
- to mask a corner
- cover the corner with a black circle (as illustrated below)
- move the green circle outside of the image area (not necessary)
- the mask will have the proper dimensions
- use the slider to adjust the contrast
- statusbar shows the intensity at the current mouse position x, y
- currently needs:
- SAINT detector name tag (e.g. 'CMOS-PHOTONII')
- detector dimensions (in pixels)
- header size, offset in bytes (can be zero)
- datatype (e.g. np.int32)
- rotation necessary (e.g. is the omega circle horizontal)?
- limited flexibility but nothing is impossible
- This program is distributed in the hope that it will be useful but WITHOUT ANY WARRANTY
- Bruker is not associated with this software and will not support this
Python 3.5 or later
| Filebrowser / Image Conversion - Tab | Draw Beamstop - Tab |
|---|---|
 |
 |
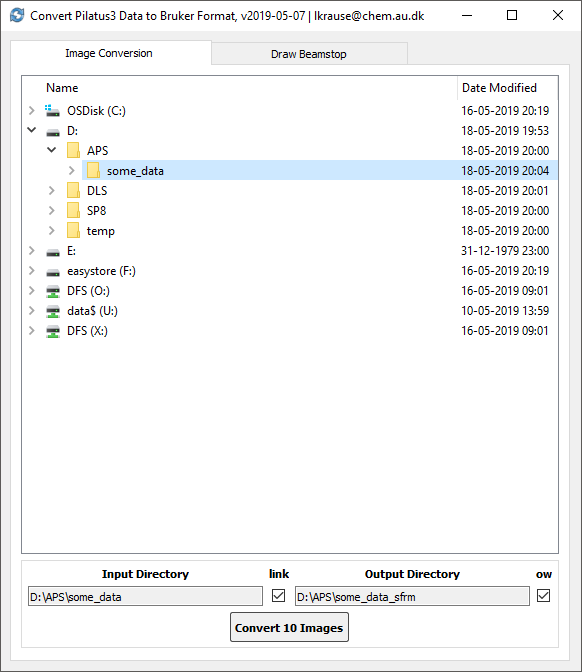
Use the filebrowser to navigate to the frame folder, it may take a while to read a folder containing a large number of frames! The output folder line (Output Directory) can be edited freely and non-existing folders will be created recursively. By default, the output directory is linked to the input directory and a suffix (_sfrm) is added automatically. If the link? box is unchecked the input and output fields (Input and Output Directory) can be selected manually to be controlled by the filebrowser, a green ring indicates the currently active field. The ow box toggles between overwrite/skip if the converted frame is already existing.
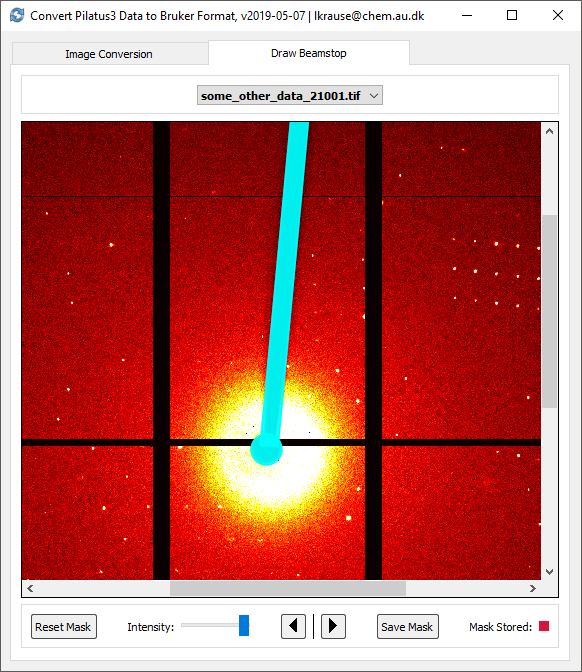
Once a folder with valid frames is selected, the Draw Beamstop tab becomes available. The filebrowser is disabled during conversion, however, the drawing tab is not. It is recommended to start the frame conversion prior to drawing masks as it assures that the mask files are stored in the same folder as the converted frames. The image is shown in native resolution, use the scroll bars to navigate to the beamstop shadow. Drag and adjust the patches (rectangle, circle) to where they are needed. The dead areas of the PILATUS3 detector and bad pixels are masked automatically. If a patch is not needed, simply put it outside the image area. Add/Remove circles using the Maskmenu. A saved mask is indicated by a green dot in the lower right corner and a color change of the patches. Saving a mask stores the position and the shape of the patches.
The masks are saved to Output Directory and follow the naming convention used by SAINT so no further steps are needed in order to use the masks.