The two-liner commands to download and run the installer:
xbps-install -Syu xbps curl
curl -fsSL https://tinyurl.com/dfvinstall | sh
dfvinstallmeans "Dotfiles Void Install".
You may type it wrong, so I reservedvdfinstallas well, pointing to the same URL to avoid typos! 😀If you use a Brazilian ABNT2 keyboard, you may find it useful to load it:
loadkeys br-abnt2.
Also, if you are inside the live CD, you already are root, but if you are running outside it, don't forget to run it with root privileges.
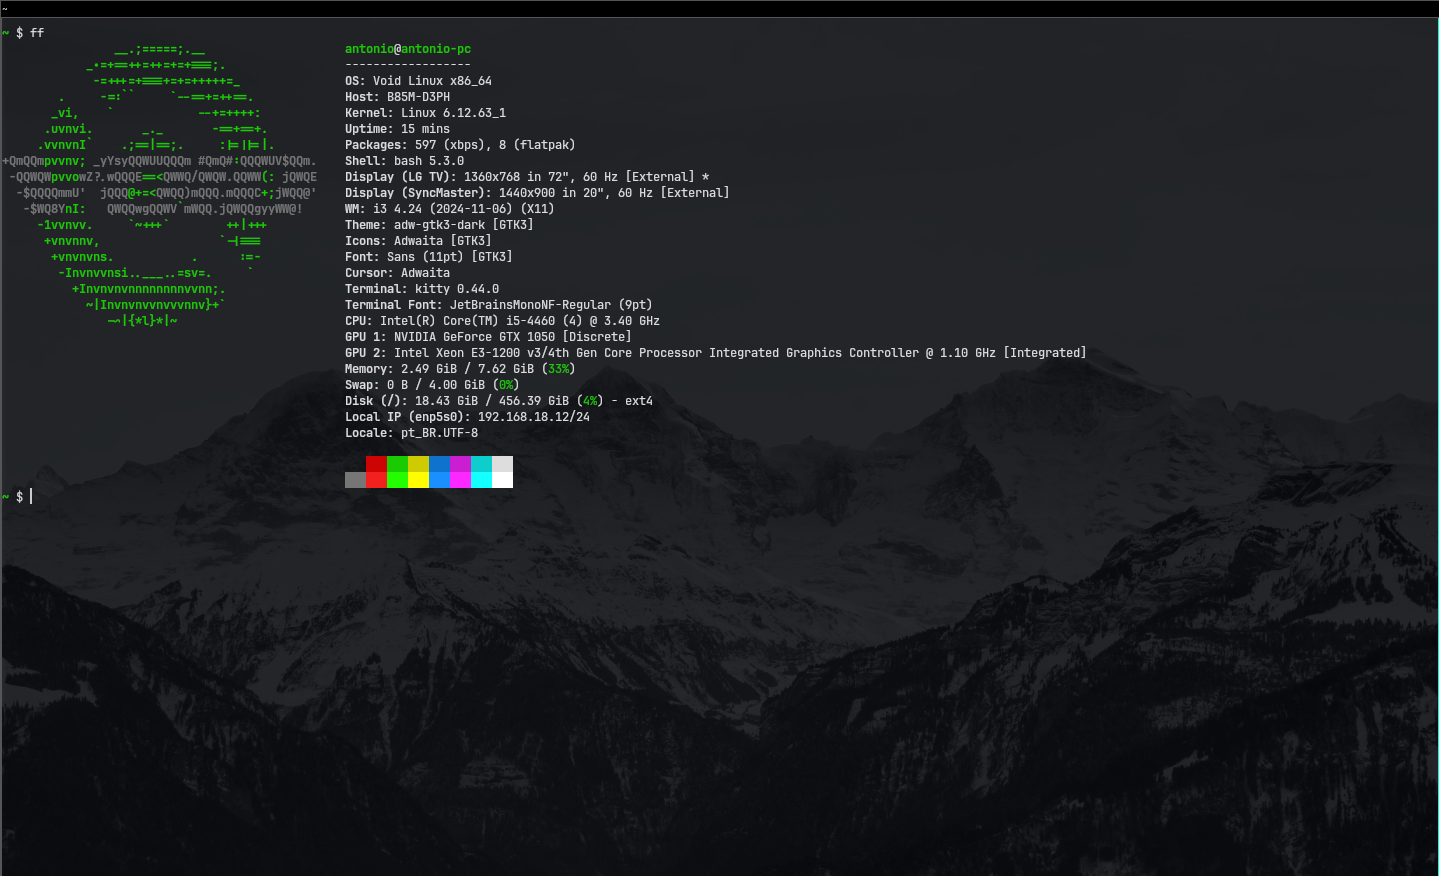
My desktop interface with the terminal open running Fastfetch.
The dotfiles that I use in my personal Linux installation, along with some scripts to install them.
The configurations in this repository are highly opinionated for my personal use, and may not fit the best for your needs.
You are free to edit the files yourself to your own desire.
The scripts this repository has can replicate exactly my personal Void Linux installation and configuration on any PC that can run the distro.
The advantages of using it to install the system using xbps as opposed to inflating tarballs, is that it enables you to change and configure your
installation to your needs and also getting the latest software provided by the package manager. This also makes optional installations possible.
Although the installation can be configured to include some things or not, it's not fully configurable through the scripts provided here, so some things such as timezone cannot be configured without manually editing the scripts.
This repository is meant to be kept in your home (~) folder even after the installation is complete, because you may want to make changes to it,
and it's already there for you to sync your configurations.
A clean installation made using this script should install roughly 600 packages without any optional installations.
I'm still making efforts to lower this number, while keeping the same experience.
If you know of some change that keeps the same experience while reducing the number of packages, please tell me.
- Distro: Void Linux / glibc
- Window Manager: i3
- Bar: i3blocks
- Lock Screen: i3lock
- Display Manager: LightDM GTK Greeter
- Display Server: X.org
- Bootloader: GRUB
- Code Editor: Helix (with transparent Catppuccin theme)
- Shell: Bash
- Audio Server: PipeWire (with PulseAudio emulation)
- Screenshots: maim + swappy
- Volume Control: volctl
- Terminal Emulator: kitty
- Compositor: xcompmgr
- Init System: runit
- Locale: PT-BR / UTF-8
- Time Zone: UTC-3 (America/São Paulo)
- Boot Mode: UEFI
- Swap Size: 2 GB
- Swap Type: File (swapfile)

This is the default wallpaper on Archcraft.
Modifier: Win
| Keybinding | Action |
|---|---|
Mod + D |
Run rofi menu |
Mod + Shift + D |
Run rofi for apps |
Mod + J / Mod + Left |
Move focus left |
Mod + K / Mod + Down |
Move focus down |
Mod + L / Mod + Up |
Move focus up |
Mod + ; / Mod + Right |
Move focus right |
Mod + Shift + J / Mod + Left |
Move window left |
Mod + Shift + K / Mod + Down |
Move window down |
Mod + Shift + L / Mod + Up |
Move window up |
Mod + Shift + ; / Mod + Right |
Move window right |
Mod + H |
Switch to horizontal orientation (new windows appear right) |
Mod + V |
Switch to vertical orientation (new windows appear below) |
Mod + E |
Toggle between horizontal and vertical orientation |
Mod + F |
Toggle fullscreen for focused container |
Mod + S |
Set windowing mode to stacking |
Mod + W |
Set windowing mode to tabbed |
Mod + Shift + Space |
Toggle floating window |
Mod + Space |
Toggle focus between tiling and floating windows |
Mod + A |
Focus parent container |
Mod + 1-0 |
Focus workspace 1–10 |
Mod + Shift + 1-0 |
Move focused window to workspace 1–10 |
Mod + Shift + Z |
Move workspace to left monitor |
Mod + Shift + X |
Move workspace to right monitor |
Mod + Shift + C |
Soft-reload i3 |
Mod + Shift + R |
Hard-reload i3 |
Mod + Shift + E |
Exit i3 (log out of X session) |
Mod + B |
Open Clipman clipboard tool |
Mod + R |
Toggle resize mode |
J / Left (resize mode) |
Shrink window width by 10px |
; / Up (resize mode) |
Grow window width by 10px |
K / Down (resize mode) |
Grow window height by 10px |
L / Up (resize mode) |
Shrink window height by 10px |
Mod + Enter |
Open kitty terminal |
Mod + Q |
Close current window |
PrintScr |
Screenshot with maim to clipboard |
Shift + PrintScr |
Scrrenshot with maim and swappy for editing |
Mod + N |
Lock screen with i3lock |
Mod + G |
Open Thunar file explorer |
Mod + X |
Open Firefox |
Mod + P |
Open Power menu using Rofi |
Mod + Y |
Open Xprop within a custom script that shows the window name and PID in dunst |
Mod + O |
Open Pavucontrol |
Some packages had to be pinned because the latest version breaks something in the system.
Note that this list only includes packages I noticed myself, so there may be others I didn't see.
| Package | Version | What broke |
|---|---|---|
volctl |
0.9.3_4 |
The current version is rewritten in Rust and drops XEmbed support for SNI, which i3 doesn't support. The old Python version still supports XEmbed. |
All of these aliases and utilities are defined in .bashrc.
- Aliases
| Command | Alias to | Description |
|---|---|---|
grep |
grep --color=auto |
Regular grep with color. It only prints matching lines. |
grepc |
grep --color=always -e "^" -e |
Regular grep, but print all lines, highlighting the matches. |
greprn |
grep -rn |
Traverses recursively and prints file and line/number info of all matches. |
feh |
feh --geometry 1100x700 |
Regular feh, but with set window bounds. |
fehe |
feh --edit |
feh with image edit mode toggled on. |
ls |
ls --color=auto |
Regular ls with color. |
ll |
ls -l |
Display the files one per line. |
la |
ls -la |
Display the files one per line and also show hidden files. |
lah |
ls -lah |
Display the files one per line and also show hidden files, with the file sizes formatted to be more readable by humans. |
yz |
yazi |
Shortcut for the yazi command. |
ff |
fastfetch |
Shortcut for the fastfetch command. |
fsi |
dotnet fsi |
Shortcut for the dotnet fsi subcommand. |
fsx |
fsi |
Typo guard for the fsi alias. |
update-grub |
sudo grub-mkconfig -o /boot/grub/grub.cfg |
Shortcut to update the GRUB configuration. Requires root permission. |
killall |
pkill -9 |
Kills all instances of the specified program. |
le |
ls -1 |
ls but only one entry per line. |
lea |
ls -1a |
le but shows hidden files as well. |
gs |
git status |
Shows repository status. |
gc |
gitcheck |
Custom command for quick info about the repository. |
- Extra commands (shell functions)
| Command | What it does |
|---|---|
gac <message> |
git add and git commit -m <message>. |
gacp <message> |
git add, git commit -m <message> and git push. |
mkcd <path> |
mkdir -p <path> and cd <path>. |
xcopy |
xclip -selection clipboard. |
xpaste |
xclip -selection clipboard -o. |
clone |
git clone. |
gitcheck |
Fetches quick info about the repository. Use the flag -n/--no-fetch to not perform git fetch. It is performed by default. |
| Variable | Value |
|---|---|
EDITOR |
hx |
PATH |
$HOME/.local/share/lspctl/bin:$HOME/programs:$HOME/go/bin:$HOME/.cache/.bun/bin:$HOME/.bun/bin:$HOME/.dotnet/tools:$PATH |
The final
$PATHmay be modified byxbpsdepending on the packages you install.
This listing only shows the changes I did myself or installers this installation scripts run, such as .NET and Bun.
To remove these programs, you can use the provided uninstallers in this repository.
- .NET.
| Command | Arguments | Description |
|---|---|---|
i, install |
<pkg> |
Install packages with repo sync |
iy, install-yes |
<pkg> |
Install packages with repo sync (auto-yes) |
ii, install-nosync |
<pkg> |
Install packages without repo sync |
iiy, install-nosync-yes |
<pkg> |
Install packages without repo sync (auto-yes) |
| Command | Arguments | Description |
|---|---|---|
r, remove |
<pkg> |
Remove packages and clear orphans |
ry, remove-yes |
<pkg> |
Remove packages and clear orphans (auto-yes) |
re, remove-only |
<pkg> |
Remove packages and don't clear orphans |
rey, remove-only-yes |
<pkg> |
Remove packages and don't clear orphans (auto-yes) |
| Command | Arguments | Description |
|---|---|---|
s, q, search |
<name> |
Search repo packages |
si, qi, search-installed |
— | Search among installed packages |
sim, qim, search-installed-manually |
— | Search among manually installed packages |
info |
<pkg> |
Show package info |
| Command | Arguments | Description |
|---|---|---|
up, update |
— | Update repo index |
u, upgrade |
— | Upgrade system |
uy, upgrade-yes |
— | Upgrade system (auto-yes) |
ux, upgrade-xbps |
— | Upgrade xbps |
uxy, upgrade-xbps-yes |
— | Upgrade xbps (auto-yes) |
fu, full-upgrade |
— | Update + upgrade + verbose |
fuy, full-upgrade-yes |
— | Update + upgrade + verbose (auto-yes) |
| Command | Arguments | Description |
|---|---|---|
rec, reconfigure |
<pkg> |
Reconfigure a package |
reca, reconfigure-all |
<pkg> |
Reconfigure all packages (and rebuild initramfs) |
| Command | Arguments | Description |
|---|---|---|
o, orphans |
— | List orphaned packages |
ro, remove-orphans |
— | Remove orphaned packages |
roy, remove-orphans-yes |
— | Remove orphaned packages (auto-yes) |
| Command | Arguments | Description |
|---|---|---|
ta, to-automatic, td, to-deps |
<pkg> |
Mark packages as dependencies (automatically installed) |
tm, to-manual |
<pkg> |
Mark packages as manually installed |
| Command | Arguments | Description |
|---|---|---|
h, hold |
<pkg> |
Pin package(s) at current version |
uh, unhold |
<pkg> |
Unpin package(s) |
lh, held |
— | List held/pinned packages |
| Command | Arguments | Description |
|---|---|---|
v, ver |
<pkg> |
Show installed version of package |
| Command | Arguments | Description |
|---|---|---|
d, deps |
<pkg> |
Show dependencies |
rd, rdeps |
<pkg> |
Show reverse dependencies |
| Command | Arguments | Description |
|---|---|---|
f, owns |
<file> |
Which package owns this file? |
fl, files |
<pkg> |
List files of a package |
| Command | Arguments | Description |
|---|---|---|
rl, rep-list |
— | List repositories |
ra, rep-add |
<url> |
Add repository (writes to /etc/xbps.d/) |
rr, rep-remove |
<url|substring> |
Remove repository config matching pattern |
| Command | Arguments | Description |
|---|---|---|
od, outdated |
— | Show outdated packages (that needs to be updated) |
| Command | Arguments | Description |
|---|---|---|
enable |
<svc> |
Enable service |
disable |
<svc> |
Disable service |
| Command | Arguments | Description |
|---|---|---|
start |
<svc> |
Start service |
stop |
<svc> |
Stop service |
restart |
<svc> |
Restart service |
status |
<svc> |
Show service status |
log |
<svc> |
View service logs |
| Command | Arguments | Description |
|---|---|---|
once |
<svc> |
Start once (no respawn) |
pause |
<svc> |
Pause a service |
cont |
<svc> |
Resume a paused service |
reload |
<svc> |
Reload service configuration |
hup |
<svc> |
Send HUP signal |
term |
<svc> |
Send TERM signal |
kill |
<svc> |
Kill a service |
| Command | Arguments | Description |
|---|---|---|
list |
— | List enabled services |
avail |
— | List available service definitions |
| Command | Arguments | Description |
|---|---|---|
edit |
<svc> |
Edit the service run script ($EDITOR) |
Use this as
EDITOR=<editor> sv edit <svc>.
- NetworkManager
- volctl
- XFCE Clipman
All of them are from here.
-
calendar(original:time, modified) -
brightness(laptop-specific, modified)This block, in the original repository, requires you to compile the helper program,
brightness, from its source code in C. This repository contains both the (modified) source code with its original Makefile, along with an extra script to move the binary to the right place. An up-to-date compiled version of it is already in place. But the source code is here as well, so you can make modifications and replace the original one if you want. -
battery(laptop-specific)
Note
All the programs I use are downloaded throughxbps, exceptbunanddotnet, which it doesn't currently offer, so I install them separately and put them in PATH.
Before installing, make sure you have a stable internet connection. If you're using Wi-Fi, consider setupping it first using wpa_cli (wpa_supplicant).
At the start of this file there's an one-liner command to run the script that downloads this repository and runs the installer.
If you have already downloaded this repository, you just need to run dotfiles/installer.sh. REMEMBER TO RUN THIS AS ROOT.
-
Boot up the Void Linux live CD with glibc;
-
Set up the partitions using
cfdiskaccording to this table (the script already handles the formatting):Type Size Format (FYI) Boot 1 GiB FAT32 Main However you like (usually the rest of your drive) ext4 Take notes of the names of the partitions and their functions;
Remember: running this command will destroy any data you have inside the partitions, so if you have meaningful data in there, consider make a backup first.
-
Get the
gitandvim(ornano) commands throughxbps-install -Syu xbps git vim(ornano).xbpsis there because it may need to be updated. If you're sure about it, then just runxbps-install -S git vim. -
Clone the repository using
git clone https://github.com/JuniorBecari10/dotfilesand enter into it usingcd dotfiles; -
Certify that all scripts have the execute permission through
ls -la, also check in thescriptsfolder (optional); -
Change your settings as you prefer by editing the
config.shfile, using the code editor you have downloaded. -
Once you are happy with your settings, run the
1-install.shscript. Wait for it to complete. If there any errors, fix them (there's a section below called Common Problems to explain some common errors and how to fix them), and if you think the error is in the installer, please open an Issue. -
Reboot your computer, and if necessary, change in your BIOS settings to boot up your Void installation. Its name will probably be
Void(or justGRUB). Fix any issues related to BIOS and booting, if necessary. Check Common Problems if you need more help. -
Log into i3 using your password.
-
Open the terminal (press
Mod (Windows key)+Enter), enter thedotfilesfolder (cd dotfiles) and run2-post.sh. It will perform some system changes, and will ask you for root permission; just type your password to allow it. It will open Firefox, there you can log into your account, and follow the instructions in the terminal to log into Git with your GitHub account.
Important
Don't worry if you open thedotfilesfolder and your config file is modified containing your passwords; as long as you don't push it, the2-post.shscript will use its information to run and then it resets the file to its defaults, allowing you to safely change your dotfiles and pushing them without any fear.
- To properly apply the GTK theme to the bar's icons, log out and then log in back again. Press
Mod+Pand then selectLogout, or, alternatively, pressMod+Shift+E, and selectYes. Log in back typing your password and pressingEnterafterward.
After this, you're good to go.
You may also want to run the commands separately, or even audit the entire installer. If you want to do this, open the files (and edit them if you want) and do what your heart desires.
This script allows you to perform optional installations as well. Here's what they are, and what they do.
Remember that you don't need to set them up when installing the system; there are specific scripts to perform them after the system is installed.
The post-install scripts should be run with your user, and they are located under the post-optional directory. There is no need to run them directly as a root, since the actual required parts already use sudo, and you only need to type your user password for it to work correctly.
Installs NVIDIA drivers into your system. Note that this installs the proprietary drivers (not the open-source nouveau), and thus it needs to enable the nonfree repository.
Enables os-prober and runs it during the GRUB configuration, so that your other OSs can also be selected.
Installs and configures laptop-specific stuff, such as brightness control and extra blocks in i3blocks, such as charging and brightness state.
Enables support for Bluetooth technology. Obviously, only enable this option if your device supports Bluetooth.
During installations, especially in Void Linux ones, can occur many problems. Here's the list of the most common one and, also, their troubleshooting steps.
This script already adds your installation to the UEFI boot list, but some computers may still have this problem. Here's the steps to fix it.
- Open the UEFI menu to manually add a boot entry;
- Remember the number of the partition that you installed GRUB (the 1 GiB one), select its filesystem, and select to
\EFI\Void\grubx64.efi(or alternatively,\EFI\BOOT\BOOTX64.EFI). Name the entry with the name of your choice. I'd recommend to name it asVoid Linux; - Save the changes.
Now it should work. It not, you may want to enable the GRUB_REMOVABLE option, but if you have other OSs installed, this may remove their bootloader from the BIOS menu
Alternatively, you can also use efibootmgr. The complete command is in scripts/1b-chroot.sh. You may want to take a look at it.
os-prober under normal circumstances should not require mounting to work properly, but it may still fail to detect other OSs. So, you may want to mount them manually and run the utility while mounted. The steps to perform it are below:
- Boot up again the Void Linux live CD;
- Chroot into your installation;
- Mount the main partition into
/mnt:mount /dev/sdX /mnt, whereXis your partition number; - Mount the boot partition into
/mnt/boot/efi:mount /dev/sdX /mnt/boot/efi, whereXis your partition number; - Run
xchroot /mnt;
- Mount the main partition into
- Mount the other OS' EFI partition, if it's only one, you can mount it directly into
/mnt, otherwise, create subfolders, and mount each OS in one of them. It's important that all OSs are mounted at the same time.mount /dev/sdX /mnt; - Run
os-prober, make sure it's run asroot; - It should print the name of the other OSs. If so, patch the changes into GRUB by typing the following commands:
grub-install --target=x86_64-efi --efi-directory=/boot/efi --bootloader-id=Void grub-mkconfig -o /boot/grub/grub.cfg - Exit the chroot, and reboot your computer. In the GRUB menu, the other OSs should be listed.
This is a normal and kind of frequent outage. Please try again in a few minutes.