**List the names and NetID for your partners here.**
In this lab, you will modify a robotic creature (ConeBot) that is originally designed by Dr. Rei Lee, a friend of our lab. The ConeBot is a shy robot that hides under a small traffic cone. It is adventuring the world by itself but hopes people don't notice it at all.
Today, you will work with a close relative of ConeBot, CloneBot. Though closely related, CloneBot's personality (robotality?) is quite the opposite of ConeBot. It is outgoing and loves to hangout with people. You will work with CloneBot and design its legendary adventure.
This lab uses Wizard of Oz prototyping--that is, the Wizard (that is you) controls the robot and gives it the intelligence it does not have it. The point of Wizard of Oz prototyping is to gather data about how people will respond to an intelligent robot, so that you have the information you need to design the robot well.
For this week's lab (and also the following week), you will work in groups of 3.
- Smart Phone (Laptop or Tablets also work) -- The main required feature is that the phone needs to connect to WiFi and display a webpage.
- To work in a group of 3 (encouraged) or 4 people (if necessary).
**^^^ List the names and NetID for your partners above. ^^^**
- Log in to your github, go to
YourGithubUsername/Mobile_HRI_Lab_Hub/. - Click "Sync fork" -> "Update branch"
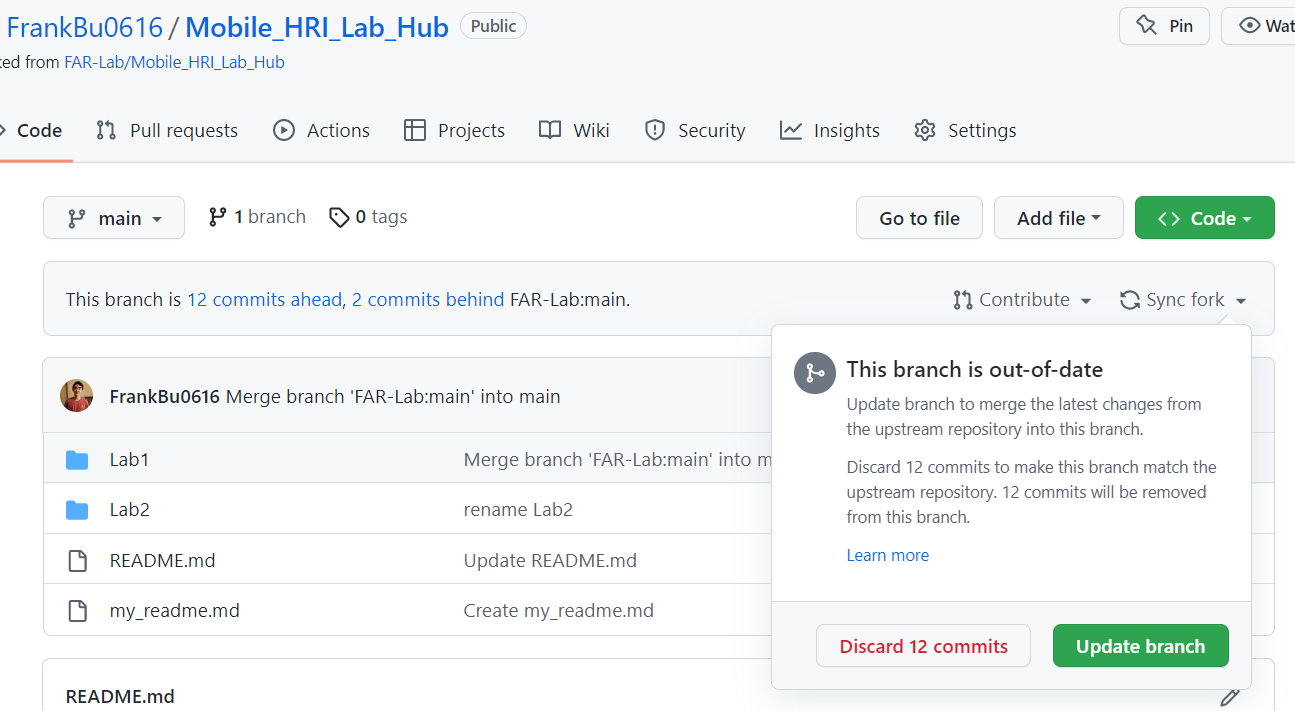
- Now your Lab Hub should be updated with the latest lab.
For this assignment, you are going to:
B) Plan
- 5 Storyboards
- Any reflections you have on the process
- Video sketch of 3 prototyped interactions (selected from the 5 storyboards)
- Submit the items above in the Lab1 folder of your class [Github page], either as links or uploaded files. Each group member should have the updated lab page linked to their own Lab Hub. Better yet, you could replicate the data in your own repo so that you don't lose anything if your partner modifies or deletes their files later.
Just as you copied your Lab 0/Readme.md, create a new file "NetID_Readme.md" under your Lab 1 folder. Leave the original "Readme.md" intact. This NetID_Readme.md page in your own repository should be edited to include the work you have done (the deliverables mentioned above). Following the format below, you can delete everything but the headers and the sections between the stars. Write the answers to the questions under the starred sentences. Include any material that explains what you did in this lab hub folder, and link it in your README.md for the lab.
Each group member must submit their own submission, even if most of the material is identical to their group members. Upload the link to your "NetID_Readme.md" to Canvas.
Labs are due on Tuesdays before class.
Form your 3-4 person team.
Follow the instructions here to build your robot! The instructions are arranged in stages. At the beginning of each stage, each group must select one (and only one) representitive to pick up parts from us.
After you finish your robot, plug in power from the USB battery pack. Follow the instructions below to connect to your robot.
- Connect to WiFi "MobileHRI-x", where x is the number assigned to the ESP-32. (ESP-32 should flash once.) The password is "12345678"
- Open a brower, in the address line, type in 192.168.4.1
- You should be see a control interface. Try out different buttons and see what they do.
To stage an interaction with your CloneBot, think about:
Setting: Where is this interaction happening? (e.g., an office, the kitchen) When is it happening?
Players: Who is involved in the interaction? Who else is there? Reflect on the design of current day home mobile robots like Roomba. Think through all the people who are in the setting.
Activity: What is happening between the actors?
Goals: What are the goals of each player? (e.g., picking up a pen, opening the fridge).
Leverage the possible motions of Clonebot and the extra degree of freedom provided by the motor on the top.
**Describe your setting, players, activity and goals here.**
Storyboards are a tool for visually exploring a users interaction with a device. They are a fast and cheap method to understand user flow, and iterate on a design before attempting to build on it. Take some time to read through this explanation of storyboarding in UX design. Sketch five storyboards of the interactions you are planning. It does not need to be perfect, but must get across the behavior of the CloneBot and the other characters in the scene.
**Include pictures of your storyboards here**
Select 3 of the 5 storyboards to act out. Try physically enacting the 3 interactions you planned with your teammates. (Do not plug in the CloneBot just yet.) Record these video clips, and submit them (Unlisted Youtube links are fine).
**Are there things that seemed better on paper than acted out?**
**Are there new ideas that occur to you or your collaborators that come up from the acting?**
We are not quite finished with the lab from last week.
As I mention, ROS is managed through packages. We have this crazy file structure that looks like a python package but haven't really made a package. In the last bit of today's lab, let's actually build our package.
Go back to the construct website and log in to your previous Rosject.
In your code editor, open the file mobilehri_ws/src/my_package/setup.py.
Replace what's inside with the following code snippet.
from setuptools import setup

package_name = 'my_package'

setup(
    name=package_name,
    version='0.0.0',
    packages=[package_name],
    data_files=[
        ('share/ament_index/resource_index/packages',
            ['resource/' + package_name]),
        ('share/' + package_name, ['package.xml']),
    ],
    install_requires=['setuptools'],
    zip_safe=True,
    maintainer='user',
    maintainer_email='user@todo.todo',
    description='TODO: Package description',
    license='TODO: License declaration',
    tests_require=['pytest'],
    entry_points={
        'console_scripts': [
            'talker = my_package.hri_publisher:main',       # NEW!
            'listener = my_package.hri_subscriber:main',    # NEW!
        ],
    },
)
By adding entry points that linked to the main functions in our hri_publisher and hri_subscriber files, we basically create shortcuts for ROS to call our script in Terminal.
Now, let's build our package. Open a terminal:
cd ~/mobilehri_ws/
colcon build          # ignore the warning/err about setup.py being deprecated.
source install/setup.bash
Remember that we need to source ROS every time? In order to use your customized ROS packages, you must source them individually as well! To do so, source the setup.bash file within workspace/install.
Now, you can call your scripts through ROS the following way:
# In terminal 1
cd ~/mobilehri_ws/
source install/setup.bash
ros2 run my_package talker
# In terminal 2
cd ~/mobilehri_ws/
source install/setup.bash
ros2 run my_package listenerYou may notice that the listener does not receive messages published before it is created. As Wendy mentioned in class, the messaging system established through publishers and subscribers are not reliable. They are in fact asynchronous. Publishers are unaware of the subscribers existence.
To have a more reliable interaction, you will need a new type of mechanism called service and client. We will talk more about this later.