| layout | default |
|---|---|
| title | L7: CPX as a Mouse |
| description | Use the CPX as a programmable USB mouse with MakeCode. Start with discrete cursor moves from button presses, then build a smooth, continuous mouse driven by the built-in accelerometer. |
| image | https://img.youtube.com/vi/bOm1qXTDi-o/hqdefault.jpg |
| parent | Circuit Playground Express |
| has_toc | true |
| comments | true |
| nav_exclude | false |
| usetocbot | true |
{: .no_toc }
{: .no_toc .text-delta }
- TOC {:toc}
<iframe width="100%" src="https://www.youtube.com/embed/bOm1qXTDi-o" title="Using the Circuit Playground Express as a programmable USB mouse in MakeCode" frameborder="0" allow="accelerometer; autoplay; clipboard-write; encrypted-media; gyroscope; picture-in-picture; web-share" allowfullscreen></iframe>
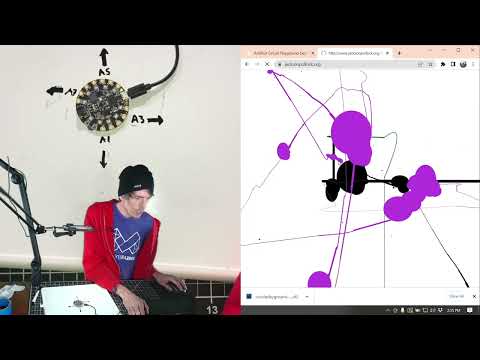
**Video.** The CPX working as a USB mouse, which we'll build in this lesson—first nudging the cursor with the A and B buttons, then steering it continuously by tilting the board.
{: .fs-1 }
In Lesson 7 of our CPX series, we will learn how to use the CPX as a programmable mouse. We'll begin by making a discrete mouse that shifts the mouse cursor by small amounts with button A and B presses before building a more complex accelerometer-based mouse with continuous input.
In this lesson, we will show how to use the CPX as a programmable mouse.
In this lesson, we will show how to use the CPX's built-in accelerometer to make smooth, continuous mouse input.
<iframe width="100%" src="https://www.youtube.com/embed/vnqNmQnbpO8" title="YouTube video player" frameborder="0" allow="accelerometer; autoplay; clipboard-write; encrypted-media; gyroscope; picture-in-picture; web-share" allowfullscreen></iframe>
All project examples below provide tutorials with example MakeCode code.
- Mouse Painter, John Park
- Make it a Mouse, Anne Barela
In the next lesson, we'll learn how to hook up external sensors like potentiometers using analog input on the CPX.
← Previous Lesson
CPX as a Keyboard
Next Lesson →
Analog Input on the CPX