The Hugging Face Hub provides a nice user interface for searching for models and learning more about them. At times, you may find it convenient to be able to do the same thing without leaving the development environment. Fortunately, Hugging Face also provides a Python package which allows you to find models through code.
Use the huggingface_hub package to find the most downloaded model for
text classification.
HfApi and ModelFilter from the huggingface_hub package is already
loaded for you.
Instructions
- Create the instance of the API to the Hugging Face Hub.
- Return a list of one item which is the most downloaded model text classification task.
- Store the returned object as a list named
modelList.
Answer
# Create the instance of the API
api = HfApi()

# Return the filtered list from the Hub
models = api.list_models(
    filter=ModelFilter(task="text-classification"),
    sort="downloads",
    direction=-1,
  	limit=1
)

# Store as a list
modelList = list(models)

print(modelList[0].modelId)
There may be situations where downloading and storing a model locally (i.e. a directory on your computer) is desired. For example, if working offline.
Practice downloading and saving here. An instance of AutoModel is
already loaded for you under the same name.
Instructions
- Instantiate the model class for the
distilbert-base-uncased-finetuned-sst-2-englishmodel. - Save the model as the
modelIdunder "models/".
Answer
modelId = "distilbert-base-uncased-finetuned-sst-2-english"

# Instantiate the AutoModel class
model = AutoModel.from_pretrained(modelId)

# Save the model
model.save_pretrained(save_directory=f"models/{modelId}")
The datasets on Hugging Face range in terms of size, information, and features. Therefore it's beneficial to inspect it before committing to loading a dataset into your environment.
Let's inspect the "derenrich/wikidata-en-descriptions-small" dataset.
Note: this exercise may take a minute due to the dataset size.
Instructions
- Import
load_dataset_builder. - Create the dataset builder to inspect the dataset.
- Print the features for the dataset.
Answer
# Load the module
from datasets import load_dataset_builder

# Create the dataset builder
reviews_builder = load_dataset_builder("derenrich/wikidata-en-descriptions-small")

# Print the features
print(reviews_builder.info.features)
Hugging Face built the dataset package for interacting with datasets.
There are a lot of convenient functions, including
load_dataset_builder which we just used. After inspecting a dataset to
ensure its the right one for your project, it's time to load the
dataset! For this, we can leverage input parameters for load_dataset
to specify which parts of a dataset to load, i.e. the "train" dataset
for English wikipedia articles.
The load_dataset module from the datasets package is already loaded
for you. Note: the load_dataset function was modified for the purpose
of this exercise.
Instructions
- Load the
"wikimedia/wikipedia"dataset and save aswikipedia.
Answer
# Load the train portion of the dataset
wikipedia = load_dataset("wikimedia/wikipedia", language="20231101.en", split="train")

print(f"The length of the dataset is {len(wikipedia)}")
There will likely be many occasions when you will need to manipulate a dataset before using it within a ML task. Two common manipulations are filtering and selecting (or slicing). Given the size of these datasets, Hugging Face leverages arrow file types.
This means performing manipulations are slightly different than what you might be used to. Fortunately, there's already methods to help with this!
The dataset is already loaded for you under wikipedia.
Instructions
- Filter the dataset for rows with the term "football" in the
textcolumn and save asfiltered. - Select a single example from the filtered dataset and save as
example.
Answer
# Filter the documents
filtered = wikipedia.filter(lambda row: "football" in row["text"])

# Create a sample dataset
example = filtered.select(range(1))

print(example[0]["text"])
Hugging Face has an ecosystem of libraries that allow users to leverage
tools at different levels. The pipeline module from the transformers
library is a great place to get started with performing ML tasks. It
removes the requirement for training models, allowing for quicker
experimentation and results. It does this by being a wrapper around
underlying objects, functions, and processes.
Getting started with pipeline can be done by defining a task or model. This helps with quick experimentation as you become familiar with the library.
Create your first pipelines for sentiment analysis. The input is a
sentence string that is already loaded for you.
Instructions
- Import
pipelinefrom thetransformerslibrary. - Create the first pipeline by specifying the task "sentiment-analysis"
and save as
task_pipeline. - Create another pipeline but only specify the model,
distilbert-base-uncased-finetuned-sst-2-englishand save asmodel_pipeline. - Predict the sentiment of
inputusing both pipelines.
Answer
# Import pipeline
from transformers import pipeline

# Create the task pipeline
task_pipeline = pipeline(task="sentiment-analysis")

# Create the model pipeline
model_pipeline = pipeline(model="distilbert-base-uncased-finetuned-sst-2-english")

# Predict the sentiment
task_output = task_pipeline(input)
model_output = model_pipeline(input)

print(f"Sentiment from task_pipeline: {task_output[0]['label']}; Sentiment from model_pipeline: {model_output[0]['label']}")
AutoClasses offer more control for machine learning tasks, and they can
also be used with pipeline() for quick application. It's a nice
balance of control and convenience.
Continue with the sentiment analysis task and combine AutoClasses with the pipeline module.
AutoModelForSequenceClassification and AutoTokenizer from the
transformers library have already been imported for you and the input
text is saved as input.
Instructions
- Download the model and tokenizer for
"distilbert-base-uncased-finetuned-sst-2-english"and save asmodelandtokenizer, respectively. - Create the pipeline using
modelandtokenizerand save assentimentAnalysis. - Predict the output using
sentimentAnalysisand save asoutput.
Answer
# Download the model and tokenizer
model = AutoModelForSequenceClassification.from_pretrained("distilbert-base-uncased-finetuned-sst-2-english")
tokenizer = AutoTokenizer.from_pretrained("distilbert-base-uncased-finetuned-sst-2-english")

# Create the pipeline
sentimentAnalysis = pipeline(task="sentiment-analysis", model=model, tokenizer=tokenizer)

# Predict the sentiment
output = sentimentAnalysis(input)

print(f"Sentiment using AutoClasses: {output[0]['label']}")
One of the great benefits of the pipeline() module is the ease at
which you can experiment with different models simply by changing the
"model" input. This is a good way to determine which model works best
for a particular task or dataset that you are working with.
Experiment with two sentiment analysis models by creating pipelines for each, then using them to predict the sentiment for a sentence.
pipeline from the transformers library is already loaded for you.
The example input sentence is saved as input.
Instructions
- Create a pipeline for labeling text as positive or negative, using the
model
"distilbert-base-uncased-finetuned-sst-2-english", and save asdistil_pipeline. - Predict the sentiment for the
inputand save asdistil_output. - Repeat the same steps for the model,
"kwang123/bert-sentiment-analysis"and save asbert_pipelineandbert_output.
Answer
# Create the pipeline
distil_pipeline = pipeline(task="sentiment-analysis", model="distilbert-base-uncased-finetuned-sst-2-english")

# Predict the sentiment
distil_output = distil_pipeline(input)


# Create the pipeline
distil_pipeline = pipeline(task="sentiment-analysis", model="distilbert-base-uncased-finetuned-sst-2-english")

# Predict the sentiment
distil_output = distil_pipeline(input)

# Create the second pipeline and predict the sentiment
bert_pipeline = pipeline(task="sentiment-analysis", model="kwang123/bert-sentiment-analysis")
bert_output = bert_pipeline(input)

print(f"Bert Output: {bert_output[0]['label']}")
print(f"Distil Output: {distil_output[0]['label']}")
An important step to performing an NLP task is tokenizing the input text. This makes the text more understandable and manageable for the ML models, or other algorithms.
Before performing tokenization, it's best to run normalization steps, i.e. removing white spaces and accents, lowercasing, and more. Each tokenizer available in Hugging Face uses it's own normalization and tokenization processes.
Let's take a look at what normalization the distilbert-base-uncased
tokenizer applies to the input_string, "HOWDY, how aré yoü?".
Instructions
- Import
AutoTokenizerfromtransformers. - Download the tokenizer for
distilbert-base-uncasedusingAutoTokenizerand save astokenizer. - Run the normalization process for the
tokenizer.
Answer
# Import the AutoTokenizer
from transformers import AutoTokenizer

# Download the tokenizer
tokenizer = AutoTokenizer.from_pretrained("distilbert-base-uncased")

# Normalize the input string
output = tokenizer.backend_tokenizer.normalizer.normalize_str(input_string)

print(output)
Most models in Hugging Face will have an associated tokenizer that will help prepare the input data based on what the model expects. After normalization, the tokenizer will split the input into smaller chunks based on the chosen algorithm. This is known as "pre-tokenization".
Let's explore the different types of pre-tokenization by performing this
process with two tokenizers on the same input. We will be using
DistilBertTokenizer and GPT2Tokenizer which have already been loaded
for you. The input text string, "Pineapple on pizza is pretty good, I
guess" is saved as input.
Instructions
- Download the
"gpt2"tokenizer and save asgpt_tokenizer. - Use
gpt_tokenizerto create the tokens from theinput. - Repeat the same two steps for
"distilbert-base-uncased-finetuned-sst-2-english".
Answer
# Download the gpt tokenizer
gpt_tokenizer = GPT2Tokenizer.from_pretrained("gpt2")

# Tokenize the input
gpt_tokens = gpt_tokenizer.tokenize(text=input)

# Repeat for distilbert
distil_tokenizer = DistilBertTokenizer.from_pretrained(
    "distilbert-base-uncased-finetuned-sst-2-english"
)
distil_tokens = distil_tokenizer.tokenize(text=input)

# Compare the output
print(f"GPT tokenizer: {gpt_tokens}")
print(f"DistilBERT tokenizer: {distil_tokens}")
Text classification is the process of labeling an input text into a
pre-defined category. This can take the form of sentiment - positive
or negative - spam detection - spam or not spam - and even
grammatical errors.
Explore the use of a text-classification pipeline for checking an
input sentence for grammatical errors.
pipeline from the transformers library is already loaded for you.
Instructions
- Create a pipeline for the task
text-classificationand use the model"abdulmatinomotoso/English_Grammar_Checker", saving the pipeline asclassifier. - Use the
classifierto predict the grammatical correctness of the input sentence provided and save asoutput.
Answer
# Create a pipeline
classifier = pipeline(
    task="text-classification",
  model="abdulmatinomotoso/English_Grammar_Checker"
)

# Predict classification
output = classifier("I will walk dog")

print(output)
Another task under the text classification umbrella is Question Natural Language Inference, or QNLI. This determines if a piece of text contains enough information to answer a posed question. This requires the model to perform logical reasoning which are important for Q&A applications.
Performing different tasks with the text-classification pipeline can
be done by choosing different models. Each model is trained to predict
specific labels and optimized for learning different context within a
text.
pipeline from the transformers library is already loaded for you.
Instructions
- Create a text classification QNLI pipeline using the model
"cross-encoder/qnli-electra-base"and save asclassifier. - Use this classifier to predict if the text contains information to answer the question.
Answer
# Create the pipeline
classifier = pipeline(task="text-classification", model="cross-encoder/qnli-electra-base")

# Predict the output
output = classifier("Where is the capital of France?, Brittany is known for their kouign-amann.")

print(output)
Zero-shot classification is the ability for a transformer to predict a label from a new set of classes which it wasn't originally trained to identify. This is possible through its transfer learning capabilities. It can be an extremely valuable tool.
Hugging Face pipeline() also has a zero-shot-classification task.
These pipelines require both an input text and candidate labels.
Build a zero-shot classifier to predict the label for the input text,
a news headline that has been loaded for you.
pipelines from the transformers library is already loaded for you.
Note that we are using our own version of the pipeline function to
enable you to learn how to use these functions without having to
download the model.
Instructions
- Build the pipeline for a zero-shot-classification task and save as
classifier. - Create a list of the labels - "politics", "science", "sports" - and
save as
candidate_labels. - Predict the label of
textusing the classifier and candidate labels.
Answer
# Build the zero-shot classifier
classifier = pipeline(task="zero-shot-classification", model="facebook/bart-large-mnli")

# Create the list
candidate_labels = ["politics", "science", "sports"]

# Predict the output
output = classifier(text, candidate_labels)

print(f"Top Label: {output['labels'][0]} with score: {output['scores'][0]}")
Summarization is a useful task for reducing large piece of text into something more manageable. This could be beneficial for multiple reasons like reducing the amount of time a reader needs to spend to obtain the important point of a piece of text.
The Hugging Face pipeline() task, "summarization", builds a s
summarization pipeline which is a quick way to perform summarization on
a piece of text. You'll do that by creating a new pipeline and using it
to summarize a piece of text from a Wikipedia page on Greece.
pipeline from the transformers library and the original_text have
already been loaded for you.
Instructions
- Create the summarization
pipelineusing the task "summarization" and save assummarizer. - Use the new pipeline to create a summary of the text and save as
summary_text. - Compare the length of the original and summary text.
Answer
# Create the summarization pipeline
summarizer = pipeline(task="summarization", model="cnicu/t5-small-booksum")

# Summarize the text
summary_text = summarizer(original_text)

# Compare the length
print(f"Original text length: {len(original_text)}")
print(f"Summary length: {len(summary_text[0]['summary_text'])}")
The pipeline() function, has two important parameters: min_length
and max_length. These are useful for adjusting the length of the
resulting summary text to be short, longer, or within a certain number
of words. You might want to do this if there are space constraints
(i.e., small storage), to enhance readability, or improve the quality of
the summary.
You'll experiment with a short and long summarizer by setting these two parameters to a small range, then a wider range.
pipeline from the transformers library and the original_text have
already been loaded for you.
Instructions
- Create a summarization pipeline using a
min_lengthof 1 andmax_lengthof 10; save asshort_summarizer. - Summarize the
original_textusing theshort_summarizerand save the result asshort_summary_text. - Repeat these steps for a summarization pipeline that has a minimum length of 50 and maximum of 150; save as
long_summarizerandlong_summary_text, respectively.
Answer
# Create a short summarizer
short_summarizer = pipeline(task="summarization", model="cnicu/t5-small-booksum", min_length=1, max_length=10)

# Summarize the input text
short_summary_text = short_summarizer(original_text)

# Print the short summary
print(short_summary_text[0]["summary_text"])


# Create a short summarizer
short_summarizer = pipeline(task="summarization", model="cnicu/t5-small-booksum", min_length=1, max_length=10)

# Summarize the input text
short_summary_text = short_summarizer(original_text)

# Print the short summary
print(short_summary_text[0]["summary_text"])

# Repeat for a long summarizer
long_summarizer = pipeline(task="summarization", model="cnicu/t5-small-booksum", min_length=50, max_length=150)

long_summary_text = long_summarizer(original_text)

# Print the long summary
print(long_summary_text[0]["summary_text"])
Often times, you'll be working on projects where summarization will occur over an entire dataset or list of items, not just a single piece of text. Fortunately, this can be done by passing in a list of text items. This will return a list of summarized texts.
You'll build a final summarization pipeline and use it to summarize a
list of text items from the wiki dataset.
pipeline from the transformers library and the dataset wiki have
already been loaded for you.
Instructions
- Create a list of text items to summarize from the
wikidataset and save astext_to_summarize. - Create a summarization pipeline using a
min_lengthof 20 and amax_lengthof 50 and save assummarizer. - Summarize the first three items in the
text_to_summarizelist settingtruncationtoTrue. - Create a for-loop that will print each text summary.
Answer
# Create the list
text_to_summarize = [w["text"] for w in wiki]

# Create the pipeline
summarizer = pipeline("summarization", model="cnicu/t5-small-booksum", min_length=20, max_length=50)

# Summarize each item in the list
summaries = summarizer(text_to_summarize[:3], truncation=True)

# Create for-loop to print each summary
for i in range(0,3):
  print(f"Summary {i+1}: {summaries[i]['summary_text']}")
Just like text inputs, image inputs will typically require
pre-processing before using with a pipeline for an image-based machine
learning task, such as image classification. Some common transformations
include cropping and resizing. Fortunately, Hugging Face provides
modules for performing these steps via the image_transforms module in
the transformers library.
Use this module to apply a transformation to a fashion image.
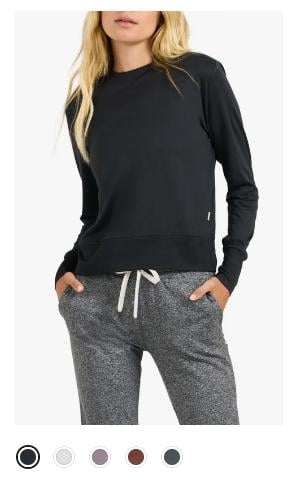
image_transforms from the transformers library has already been
loaded for you, as well as the JPEG saved as original_image.
Instructions
- Convert the image to a numpy array.
- Crop the center of the image to keep a new 200 x 200 image using
image_transformsand save ascropped_image.
Answer
# Create the numpy array
image_array = np.array(original_image)

# Crop the center of the image
cropped_image = image_transforms.center_crop(image=image_array, size=(200, 200))

imgplot = plt.imshow(cropped_image)
plt.show()
Image classification is the process of labeling an image based on the content. This is useful for many reasons from improving search to saving agriculture crops from disease. It is also helpful for identifying clothing items in fashion photos.
Build an image classification pipeline using a model trained on identifying clothing items to classify the image you just cropped.
Both pipeline from the transformers library and the image, saved as
cropped_image, have already been loaded for you.
Instructions
- Create the image classifier pipeline using the model provided and save
as
image_classifier. - Predict the class of the
cropped_imageand save asresults. - Print the predicted
"label"of the result.
Answer
# Create the pipeline
image_classifier = pipeline(task="image-classification",
                      model="abhishek/autotrain_fashion_mnist_vit_base")

# Predict the class of the image
results = image_classifier(cropped_image)

# Print the results
print(results[0]["label"])
Document question and answering is a multi-modal ML task which analyzes an image of a document, such as a contract, converts it to text, and allows a question to be asked about the text. This is useful when there are many scanned documents which need to be searched, for example financial records.
Build a pipeline for document question and answering, then ask the
pre-loaded question Which meeting is this document about?.
pipeline from the transformers library and the question are
already loaded for you. Note that we are using our own pipeline and dqa
functions to enable you to learn how to use these functions without some
of the extra setup. Please visit the Hugging Face documentation to dive
deeper.
Instructions
- Create a pipeline for
document-question-answeringand save asdqa. - Save the path to the image,
document.png, asimage. - Get the answer for the
questionof theimageusing thedqapipeline and save asresults.
Answer
# Create the pipeline
dqa = pipeline(task="document-question-answering", model="naver-clova-ix/donut-base-finetuned-docvqa")

# Set the image and question
image = "document.png"
question = "Which meeting is this document about?"

# Get the answer
results = dqa(image=image, question=question)

print(results)
Visual question and answering is an ML task that attempts to provide the best answer for a question about an image. The model will analyze the content of the image and return a label as the answer.
For example, if asking about the clothes a model is wearing, the model may return clothing items as the label. Such a task can be beneficial for people who are visually impaired or as a classification method (similar to image classification but more open-ended).
pipeline from the transformers library and both the question and
image are already loaded for you.
Instructions
- Create a visual question and answering pipeline by setting the
tasktovisual-question-answeringand save asvqa. - Use the
vqapipeline to get an answer for theimageandquestion, then save asresults.
Answer
# Create pipeline
vqa = pipeline(task="visual-question-answering", model="dandelin/vilt-b32-finetuned-vqa")

# Use image and question in vqa
results = vqa(image=image, question=question)

print(results)
The sampling rate of an audio file determines the resolution. The higher the sampling rate, the higher the resolution which provides more detail about the sound wave itself.
When performing ML tasks it is important to ensure each file has the same sampling rate. This will maintain consistency and prepare the audio files based on what the model expects regarding number of data points per audio file.
The dataset, audio_file, and Audio from the datasets library are
already loaded for you.
Instructions
- Save the old sampling rate, for reference, as
old_sampling_rate. - Resample the
audiocolumn to a new rate of 16,000 kHz and save toaudio_file. - Compare the old and new sampling rates.
Answer
# Save the old sampling rate
old_sampling_rate = audio_file[1]["audio"]["sampling_rate"]

# Resample the audio files
audio_file = audio_file.cast_column("audio", Audio(sampling_rate=16_000))

# Compare the old and new sampling rates
print("Old sampling rate:", old_sampling_rate)
print("New sampling rate:", audio_file[1]["audio"]["sampling_rate"])
There will be occasions where you will want, or need, to filter a dataset based on a specific criteria. A common example of this is filtering for audio files that are under a specified duration.
The librosa and numpy libraries, as well as the dataset, have
already been loaded for you. Note: we have modified the librosa
library for the purposes of this exercise, but the functionality and
pattern is the same.
Instructions
- Loop over each
rowof the audio paths in thedatasetand calculate the duration, appending to theold_durations_list. - Create a new column called
durationusingold_durations_listand save todataset. - Filter the
datasetfor audio under 6.0 seconds using a lambda function and the columnduration; save asfiltered_dataset. - Save the new durations as a list called
new_durations_list.
Answer
# Create a list of durations
old_durations_list = []

# Loop over the dataset
for row in dataset["path"]:
    old_durations_list.append(librosa.get_duration(path=row))

# Create a new column
dataset = dataset.add_column("duration", old_durations_list)


# Create a list of durations
old_durations_list = []

# Loop over the dataset
for row in dataset["path"]:
    old_durations_list.append(librosa.get_duration(path=row))

# Create a new column
dataset = dataset.add_column("duration", old_durations_list)

# Filter the dataset
filtered_dataset = dataset.filter(lambda d: d < 6.0, input_columns=["duration"], keep_in_memory=True)


# Create a list of durations
old_durations_list = []

# Loop over the dataset
for row in dataset["path"]:
    old_durations_list.append(librosa.get_duration(path=row))

# Create a new column
dataset = dataset.add_column("duration", old_durations_list)

# Filter the dataset
filtered_dataset = dataset.filter(lambda d: d < 6.0, input_columns=["duration"], keep_in_memory=True)

# Save new durations
new_durations_list = filtered_dataset["duration"]

print("Old duration:", np.mean(old_durations_list))
print("New duration:", np.mean(new_durations_list))
Audio classification can be used for any task that requires labeling a piece of audio based on its content. A common use case is identifying spoken languages.
You will do just that using an example from the common_language
dataset. The model, facebook/mms-lid-126 from Meta is a common model
used for this task given its coverage of languages.
pipeline from the transformers library as well as the dataset have
been loaded for you. It has been modified for the purposes of this
exercise.
Instructions
- Create the pipeline for audio classification and save as
classifier. - Extract the sample audio and sentence and save as
audioandsentence, respectively. - Predict the label for the audio using the
classifierand save asprediction.
Answer
# Create the pipeline
classifier = pipeline(task="audio-classification", model="facebook/mms-lid-126")

# Extract the sample
audio = dataset[1]["audio"]["array"]
sentence = dataset[1]["sentence"]

# Predict the language
prediction = classifier(audio)

print(f"Predicted language is '{prediction[0]['label'].upper()}' for the sentence '{sentence}'")
You've been tasked with generating text from a dataset of audio files. Accuracy is important, so you need to make sure you choose the best model for automatic speech recognition. You also don't have the time to train your own model.
Compare the predictions between the Wav2Vec and Whisper models by instantiating two pipelines for automatic speech recognition. You want to test out the functionality, so you should try it out on one example first.
pipeline from the transformers package is already loaded for you.
Likewise, the dataset has already been loaded for you, resampled, and
saved as english. One audio file with it's associated metadata is
saved as example.
Instructions
- Instantiate the first automatic speech recognition pipeline for the "wav2vec2" model from Meta.
- Predict the text from the
exampleaudio. - Repeat these two steps for the "whisper-tiny" model from OpenAI in order to compare the predictions.
Answer
# Create an ASR pipeline using Meta's wav2vec model
meta_asr = pipeline(task="automatic-speech-recognition", model="facebook/wav2vec2-base-960h")

# Predict the text from the example audio
meta_pred = meta_asr(example["audio"]["array"])["text"].lower()

# Repeat for OpenAI's Whisper model
open_asr = pipeline("automatic-speech-recognition", model="openai/whisper-tiny")
open_pred = open_asr(example["audio"]["array"])["text"].lower()

# Print the prediction from both models
print("META:", meta_pred)
print("OPENAI:", open_pred)
The Wav2Vec and Whisper models predicted very similar text with only some minor differences. Luckily, for the first this example record, you have the true sentence for reference. You can use Word Error Rate (WER) to determine which model quantitatively performed the best.
load from the evaluate package has already loaded for you. Likewise,
the example and predictions - meta_pred and open_pred - were saved
from the previous exercise.
Instructions
- Instantiate the word error rate metric object and save as
wer. - Save the true sentence of the example as
true_sentence. - Compute the word error rate for each model prediction and save as
meta_werandopen_wer, respectively.
Answer
# Create the word error rate metric
wer = load("wer")

# Save the true sentence of the example
true_sentence = example["sentence"].lower()

# Compute the wer for each model prediction
meta_wer = wer.compute(predictions=[meta_pred], references=[true_sentence])
open_wer = wer.compute(predictions=[open_pred], references=[true_sentence])

print(f"The WER for the Meta model is {meta_wer} and for the OpenAI model is {open_wer}")
You were able test the functionality and understand the performance on one example from the dataset. Now, let's evaluate the models over the first 100 audio files to make a final decision about which is best for this dataset.
In order to do this efficiently, you can create a function that will iterate over the rows of the dataset and yield a set of audio and true sentence pairs on each iteration.
The dataset, english, ASR models - meta_asr and open_asr - and
pandas have all been loaded for you.
Instructions
- Create the
data()function to iterate over the first 3 rows of the dataset. - Within
data(), predict the text for each audio file using both themeta_asrandopen_asrpipelines. - Append the results as a dictionary in the
outputlist.
Answer
# Create the data function
def data(n=3):
    for i in range(n):
        yield english[i]["audio"]["array"], english[i]["sentence"].lower()

# Predict the text for the audio file with both models
output = []
for audio, sentence in data():
    meta_pred = meta_asr(audio)["text"].lower()
    open_pred = open_asr(audio)["text"].lower()
    # Append to output list
    output.append({"sentence": sentence, "metaPred": meta_pred, "openPred": open_pred})

output_df = pd.DataFrame(output)


# Create the data function
def data(n=3):
    for i in range(n):
        yield english[i]["audio"]["array"], english[i]["sentence"].lower()

# Predict the text for the audio file with both models
output = []
for audio, sentence in data():
    meta_pred = meta_asr(audio)["text"].lower()
    open_pred = open_asr(audio)["text"].lower()
    # Append to output list
    output.append({"sentence": sentence, "metaPred": meta_pred, "openPred": open_pred})

output_df = pd.DataFrame(output)

# Compute the WER for both models
metaWER = wer.compute(predictions=output_df["metaPred"], references=output_df["sentence"])
openWER = wer.compute(predictions=output_df["openPred"], references=output_df["sentence"])

# Print the WER
print(f"The WER for the meta model is {metaWER} and for the open model is {openWER}")
Fine-tuning a model requires several steps including identifying the model to fine-tune, preparing the dataset, creating the training loop object, then saving the model.
A model trained on English text classification has been identified for you, but it's up to you to prepare the imdb dataset in order to fine-tune this model to classify the sentiment of movie reviews.
The imdb dataset is already loaded for you and saved as dataset.
Instructions
- Import
AutoModelForSequenceClassificationandAutoTokenizer. - Load the model "distilbert-base-uncased-finetuned-sst-2-english" and save as
model. - Create a tokenizer object based on the model and save as
tokenizer. - Use
tokenizeron thetextin the dataset and save asdataset.
Note: parameters are auto-set for the tokenizer and map functions to improve performance for this exercise.
Answer
# Import modules
from transformers import AutoModelForSequenceClassification, AutoTokenizer

model_name = "distilbert-base-uncased-finetuned-sst-2-english"


# Import modules
from transformers import AutoModelForSequenceClassification, AutoTokenizer

model_name = "distilbert-base-uncased-finetuned-sst-2-english"

# Load the model
model = AutoModelForSequenceClassification.from_pretrained(model_name)

# Load the tokenizer
tokenizer = AutoTokenizer.from_pretrained(model_name)


# Import modules
from transformers import AutoModelForSequenceClassification, AutoTokenizer

model_name = "distilbert-base-uncased-finetuned-sst-2-english"

# Load the model
model = AutoModelForSequenceClassification.from_pretrained(model_name)

# Load the tokenizer
tokenizer = AutoTokenizer.from_pretrained(model_name)

# Use tokenizer on text
dataset = dataset.map(lambda row: tokenizer(row["text"], padding=True, max_length=512, truncation=True), keep_in_memory=True)
To fine-tune a model, it must be trained on new data. This is the process of the model learning patterns within a training dataset, then evaluating how well it can predict patterns in an unseen test dataset. The goal is to help the model build an understanding of patterns while also being generalizable to new data yet to be seen.
Build a training object to fine-tune the "distilbert-base-uncased-finetuned-sst-2-english" model to be better at identifying sentiment of movie reviews.
The training_data and testing_data dataset are available for you.
Trainer and TrainingArguments from transformers are also loaded.
They were modified for the purpose of this exercise.
Instructions
- Create the training arguments object setting the output directory to
./results. - Create the trainer object by passing in the model, training arguments,
training_dataandtesting_data. - Start the trainer.
Answer
# Create training arguments
training_args = TrainingArguments(output_dir="./results")

# Create the trainer
trainer = Trainer(
    model=model,
    args=training_args,
    train_dataset=training_data,
    eval_dataset=testing_data
)

# Start the trainer
trainer.train()
Now that the model is fine-tuned, it can be used within pipeline
tasks, such as for sentiment analysis. At this point, the model is
typically saved to a local directory (i.e. on your own computer), so a
local file path is needed.
You'll use the newly fine-tuned distilbert model. There is a sentence,
"I am a HUGE fan of romantic comedies.", saved as text_example.
Note: we are using our own pipeline module for this exercise for
teaching purposes. The model is "saved" (i.e. not really) under the path
./fine_tuned_model.
Instructions
- Create the classifier pipeline for
"sentiment-analysis"and use the model saved in"./fine_tuned_model". - Classify the text,
text_example, and save the results asresults.
Answer
# Create the classifier
classifier = pipeline(task="sentiment-analysis", model="./fine_tuned_model")

# Classify the text
results = classifier(text=text_example)

print(results)
Generating text can be accomplished using Auto classes from the Hugging
Face transformers library. It can be a useful method for developing
content, such as technical documentation or creative material.
You'll walk through the steps to process the text prompt, "Wear sunglasses when its sunny because", then generate new text from it.
AutoTokenizer and AutoModelForCausalLM from the transformers
library are already loaded for you.
Instructions
- Get the tokenizer and the model for 'gpt2' then save as
tokenizerandmodel, respectively. - Tokenize the
promptusing thetokenizerand save asinput_ids. - Generate new text using the
modeland save as output. - Decode the output and save as
generated_text.
Answer
# Set model name
model_name = "gpt2"

# Get the tokenizer and model
tokenizer = AutoTokenizer.from_pretrained(model_name)
model = AutoModelForCausalLM.from_pretrained(model_name)


# Set model name
model_name = "gpt2"

# Get the tokenizer and model
tokenizer = AutoTokenizer.from_pretrained(model_name)
model = AutoModelForCausalLM.from_pretrained(model_name)

prompt = "Wear sunglasses when its sunny because"

# Tokenize the input
input_ids = tokenizer.encode(prompt, return_tensors="pt")


# Set model name
model_name = "gpt2"

# Get the tokenizer and model
tokenizer = AutoTokenizer.from_pretrained(model_name)
model = AutoModelForCausalLM.from_pretrained(model_name)

prompt = "Wear sunglasses when its sunny because"

# Tokenize the input
input_ids = tokenizer.encode(prompt, return_tensors="pt")

# Generate the text output
output = model.generate(input_ids, num_return_sequences=1)

# Decode the output
generated_text = tokenizer.decode(output[0])

print(generated_text)
Generating text can be done for modalities other than text, such as images. This has a lot of benefits including faster content creation by generating captions from images.
You'll create a caption for a fashion image using the Microsoft GIT model ("microsoft/git-base-coco").
AutoProcessor and AutoModelForCausalLM from the transformers
library is already loaded for you along with the image.
Instructions
- Get the processor and model and save with the same names, respectively.
- Process the
imageusing the processor and save aspixels. - Generate the output and save as
output. - Decode the
outputand save ascaption.
Answer
# Get the processor and model
processor = AutoProcessor.from_pretrained("microsoft/git-base-coco")
model = AutoModelForCausalLM.from_pretrained("microsoft/git-base-coco")

# Process the image
pixels = processor(images=image, return_tensors="pt").pixel_values

# Generate the ids
output = model.generate(pixel_values=pixels)

# Decode the output
caption = processor.batch_decode(output)

print(caption[0])
Embeddings are playing an increasingly big role in ML and AI systems. A common use case is embedding text to support search.
The sentence-transformers package from Hugging Face is useful for
getting started with embedding models. You'll compare the embedding
shape from two different models - "all-MiniLM-L6-v2" and
"sentence-transformers/paraphrase-albert-small-v2". This can determine
which is better suited for a project (i.e. because of storage
constraints).
The sentence used for embedding, "Programmers, do you put your comments
(before|after) the related code?", is saved as sentence.
SentenceTransformer from the sentence-transformers package was
already loaded for you.
Instructions
- Create the first embedder using
SentenceTransformerand the modelall-MiniLM-L6-v2, then save asembedder1. - Use
embedder1to generate an embedding for thesentenceand save asembedding1. - Repeat these two steps for the
paraphrase-albert-small-v2model.
Answer
# Create the first embedding model
embedder1 = SentenceTransformer("all-MiniLM-L6-v2")

# Embed the sentence
embedding1 = embedder1.encode([sentence])

# Create and use second embedding model
embedder2 = SentenceTransformer("sentence-transformers/paraphrase-albert-small-v2")
embedding2 = embedder2.encode([sentence])

# Compare the shapes
print(embedding1.shape == embedding2.shape)

# Print embedding1
print(embedding1)
The similarity, or closeness, between a query and the other sentences, or documents, is the foundation for semantic search. This is a search method which takes into account context and intent of the query. Similarity measures, such as cosine similarity, are used to quantify the distance between the query and each sentence within the dimensional space. Results of a search are based on the closest sentences to the query.
You will use semantic search to return the top two Reddit threads relevant to the user query, "I need a desktop book reader for Mac".
The embedder and sentence_embeddings are already loaded for you
along with util.semantic_search().
Instructions
- Generate embeddings for the query and save as
query_embedding. - Use
util.semantic_searchto compare the query embedding with the sentence embeddings and save ashits. - Complete the
for-loopto print the results fromhits[0].
Answer
query = "I need a desktop book reader for Mac"

# Generate embeddings
query_embedding = embedder.encode([query])[0]

# Compare embeddings
hits = util.semantic_search(query_embedding, sentence_embeddings, top_k=2)

# Print the top results
for hit in hits[0]:
    print(sentences[hit["corpus_id"]], "(Score: {:.4f})".format(hit["score"]))