Finally, an admin panel that Serverpod deserves!
You've built an amazing Serverpod app with powerful endpoints, robust models, and a beautiful frontend. But when it comes to managing your data, you're stuck writing custom endpoints, building one-off admin pages, or worse—directly accessing the database.
That's where Serverpod Admin comes in. This is the missing piece that transforms your Serverpod backend into a fully manageable system.
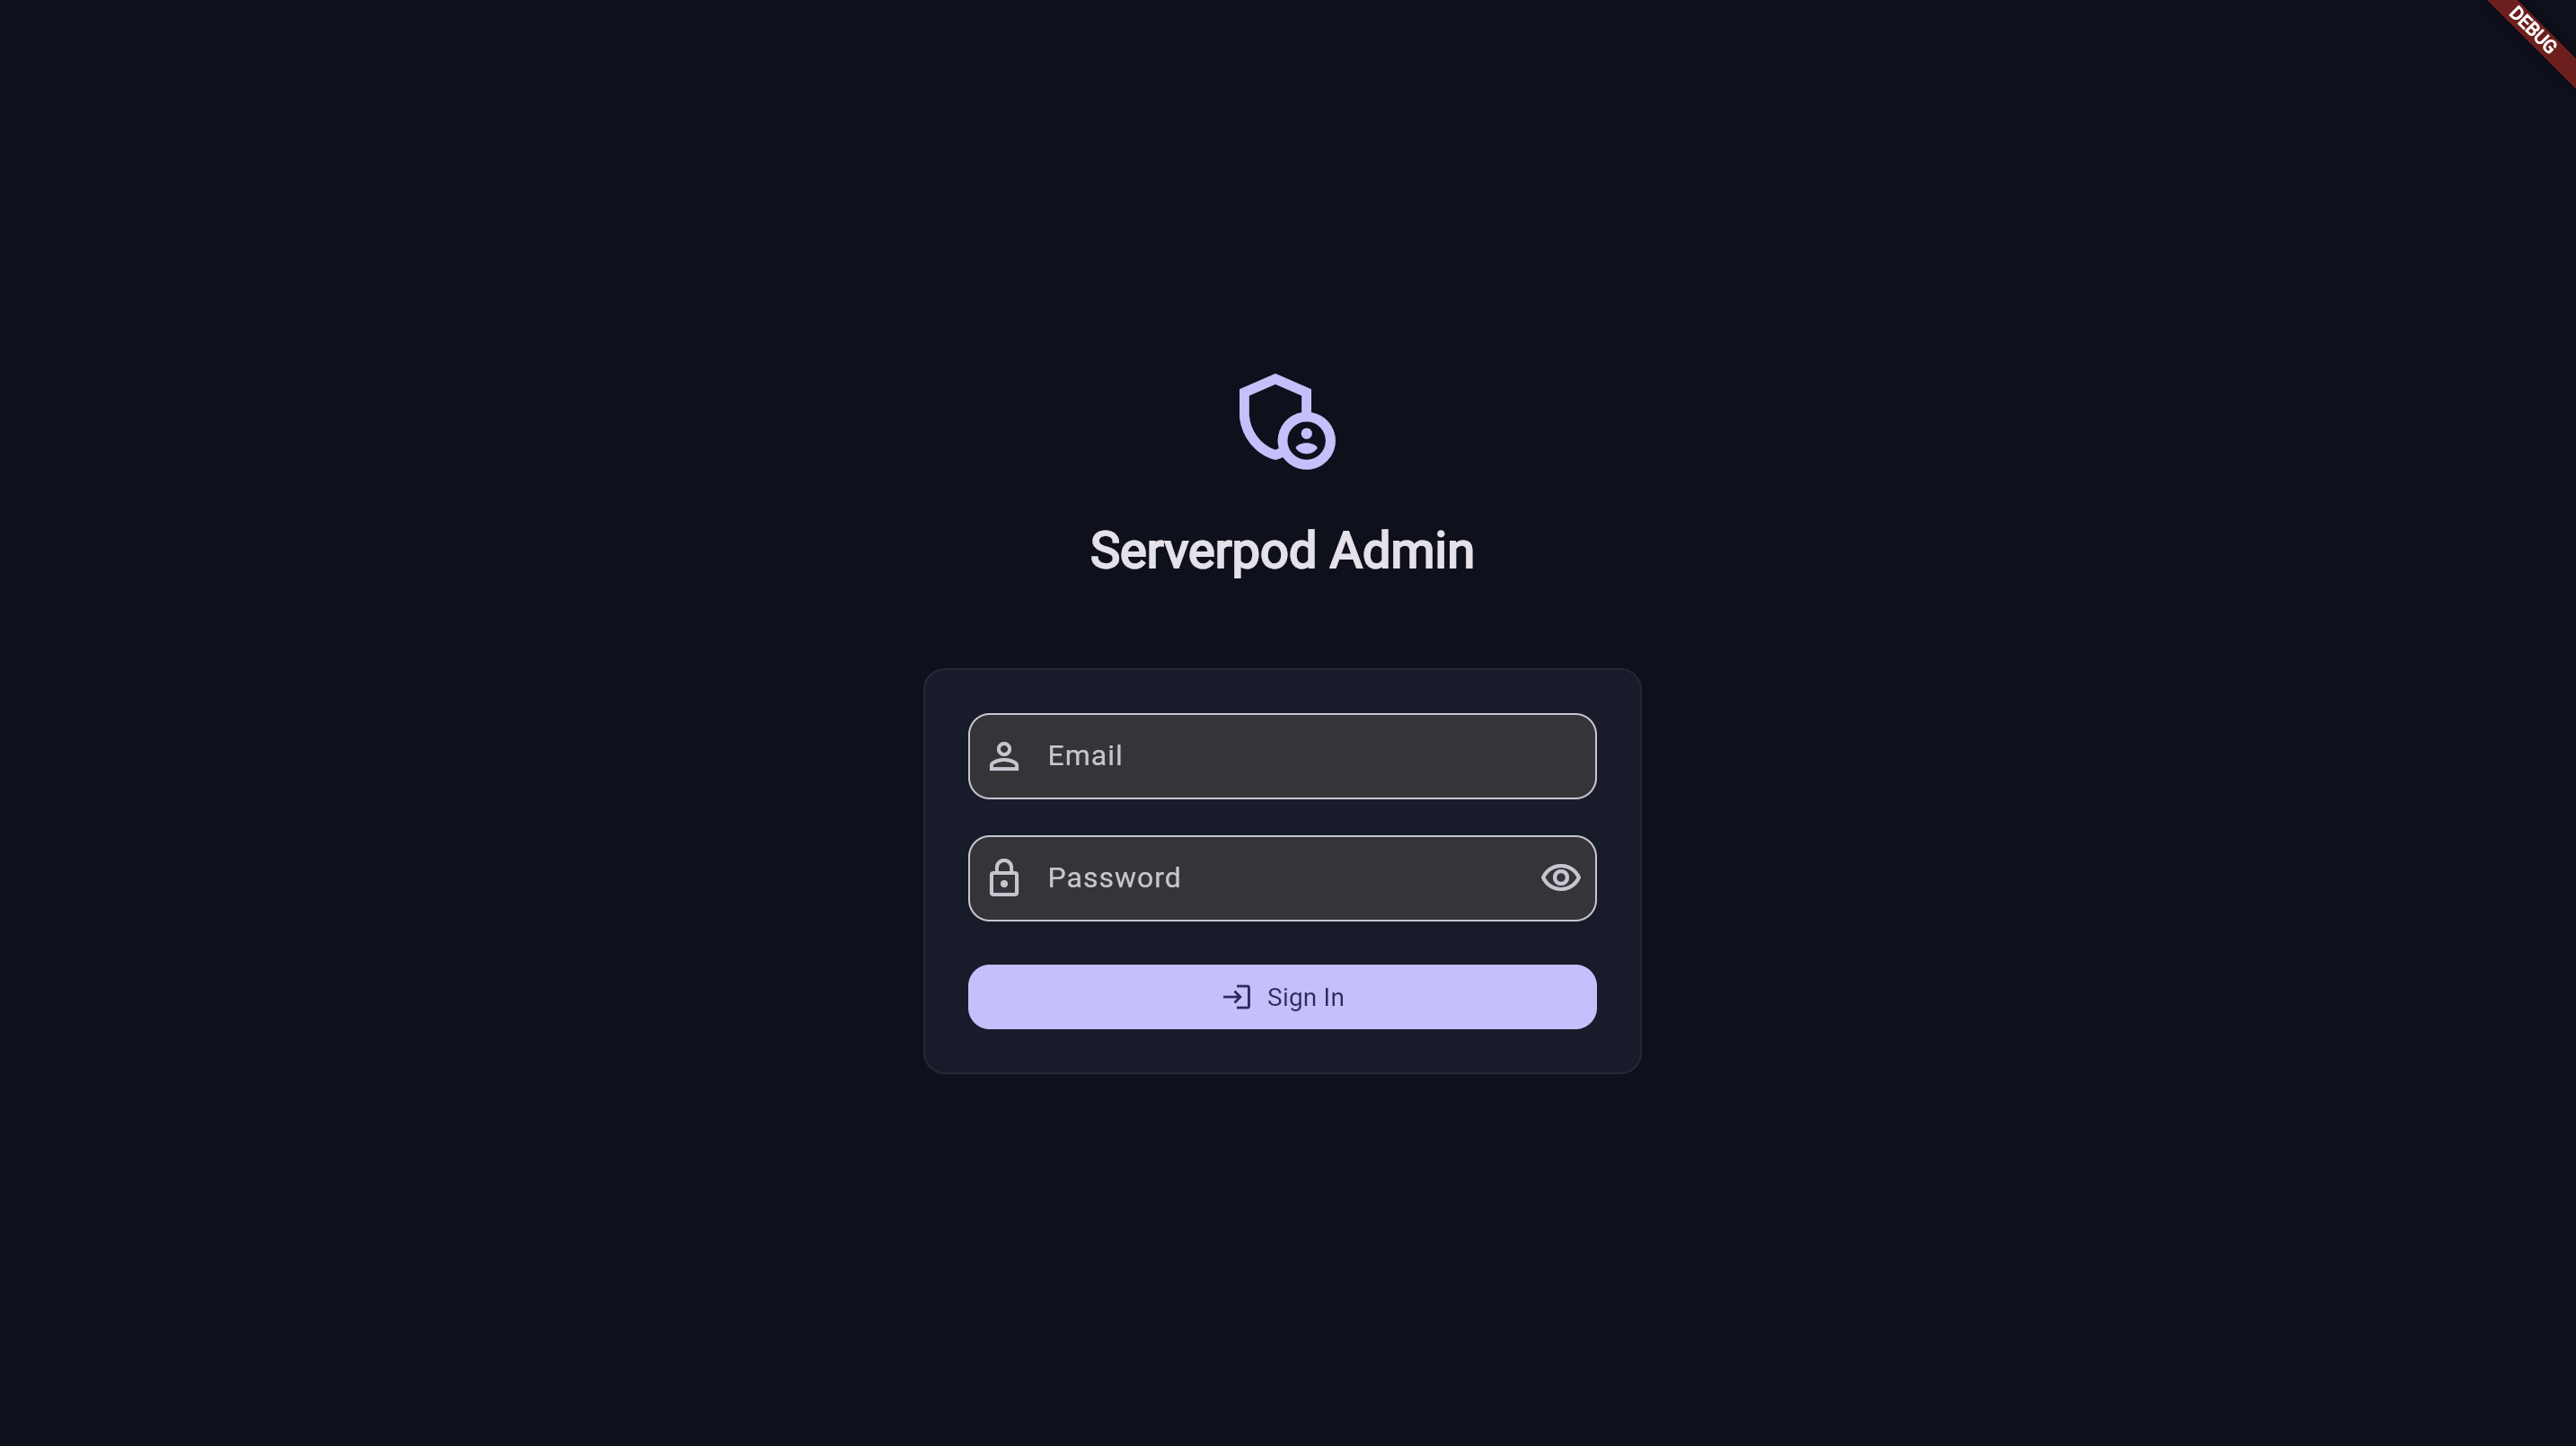
Secure login screen for admin users. Only users with the serverpod.admin scope can access the dashboard.
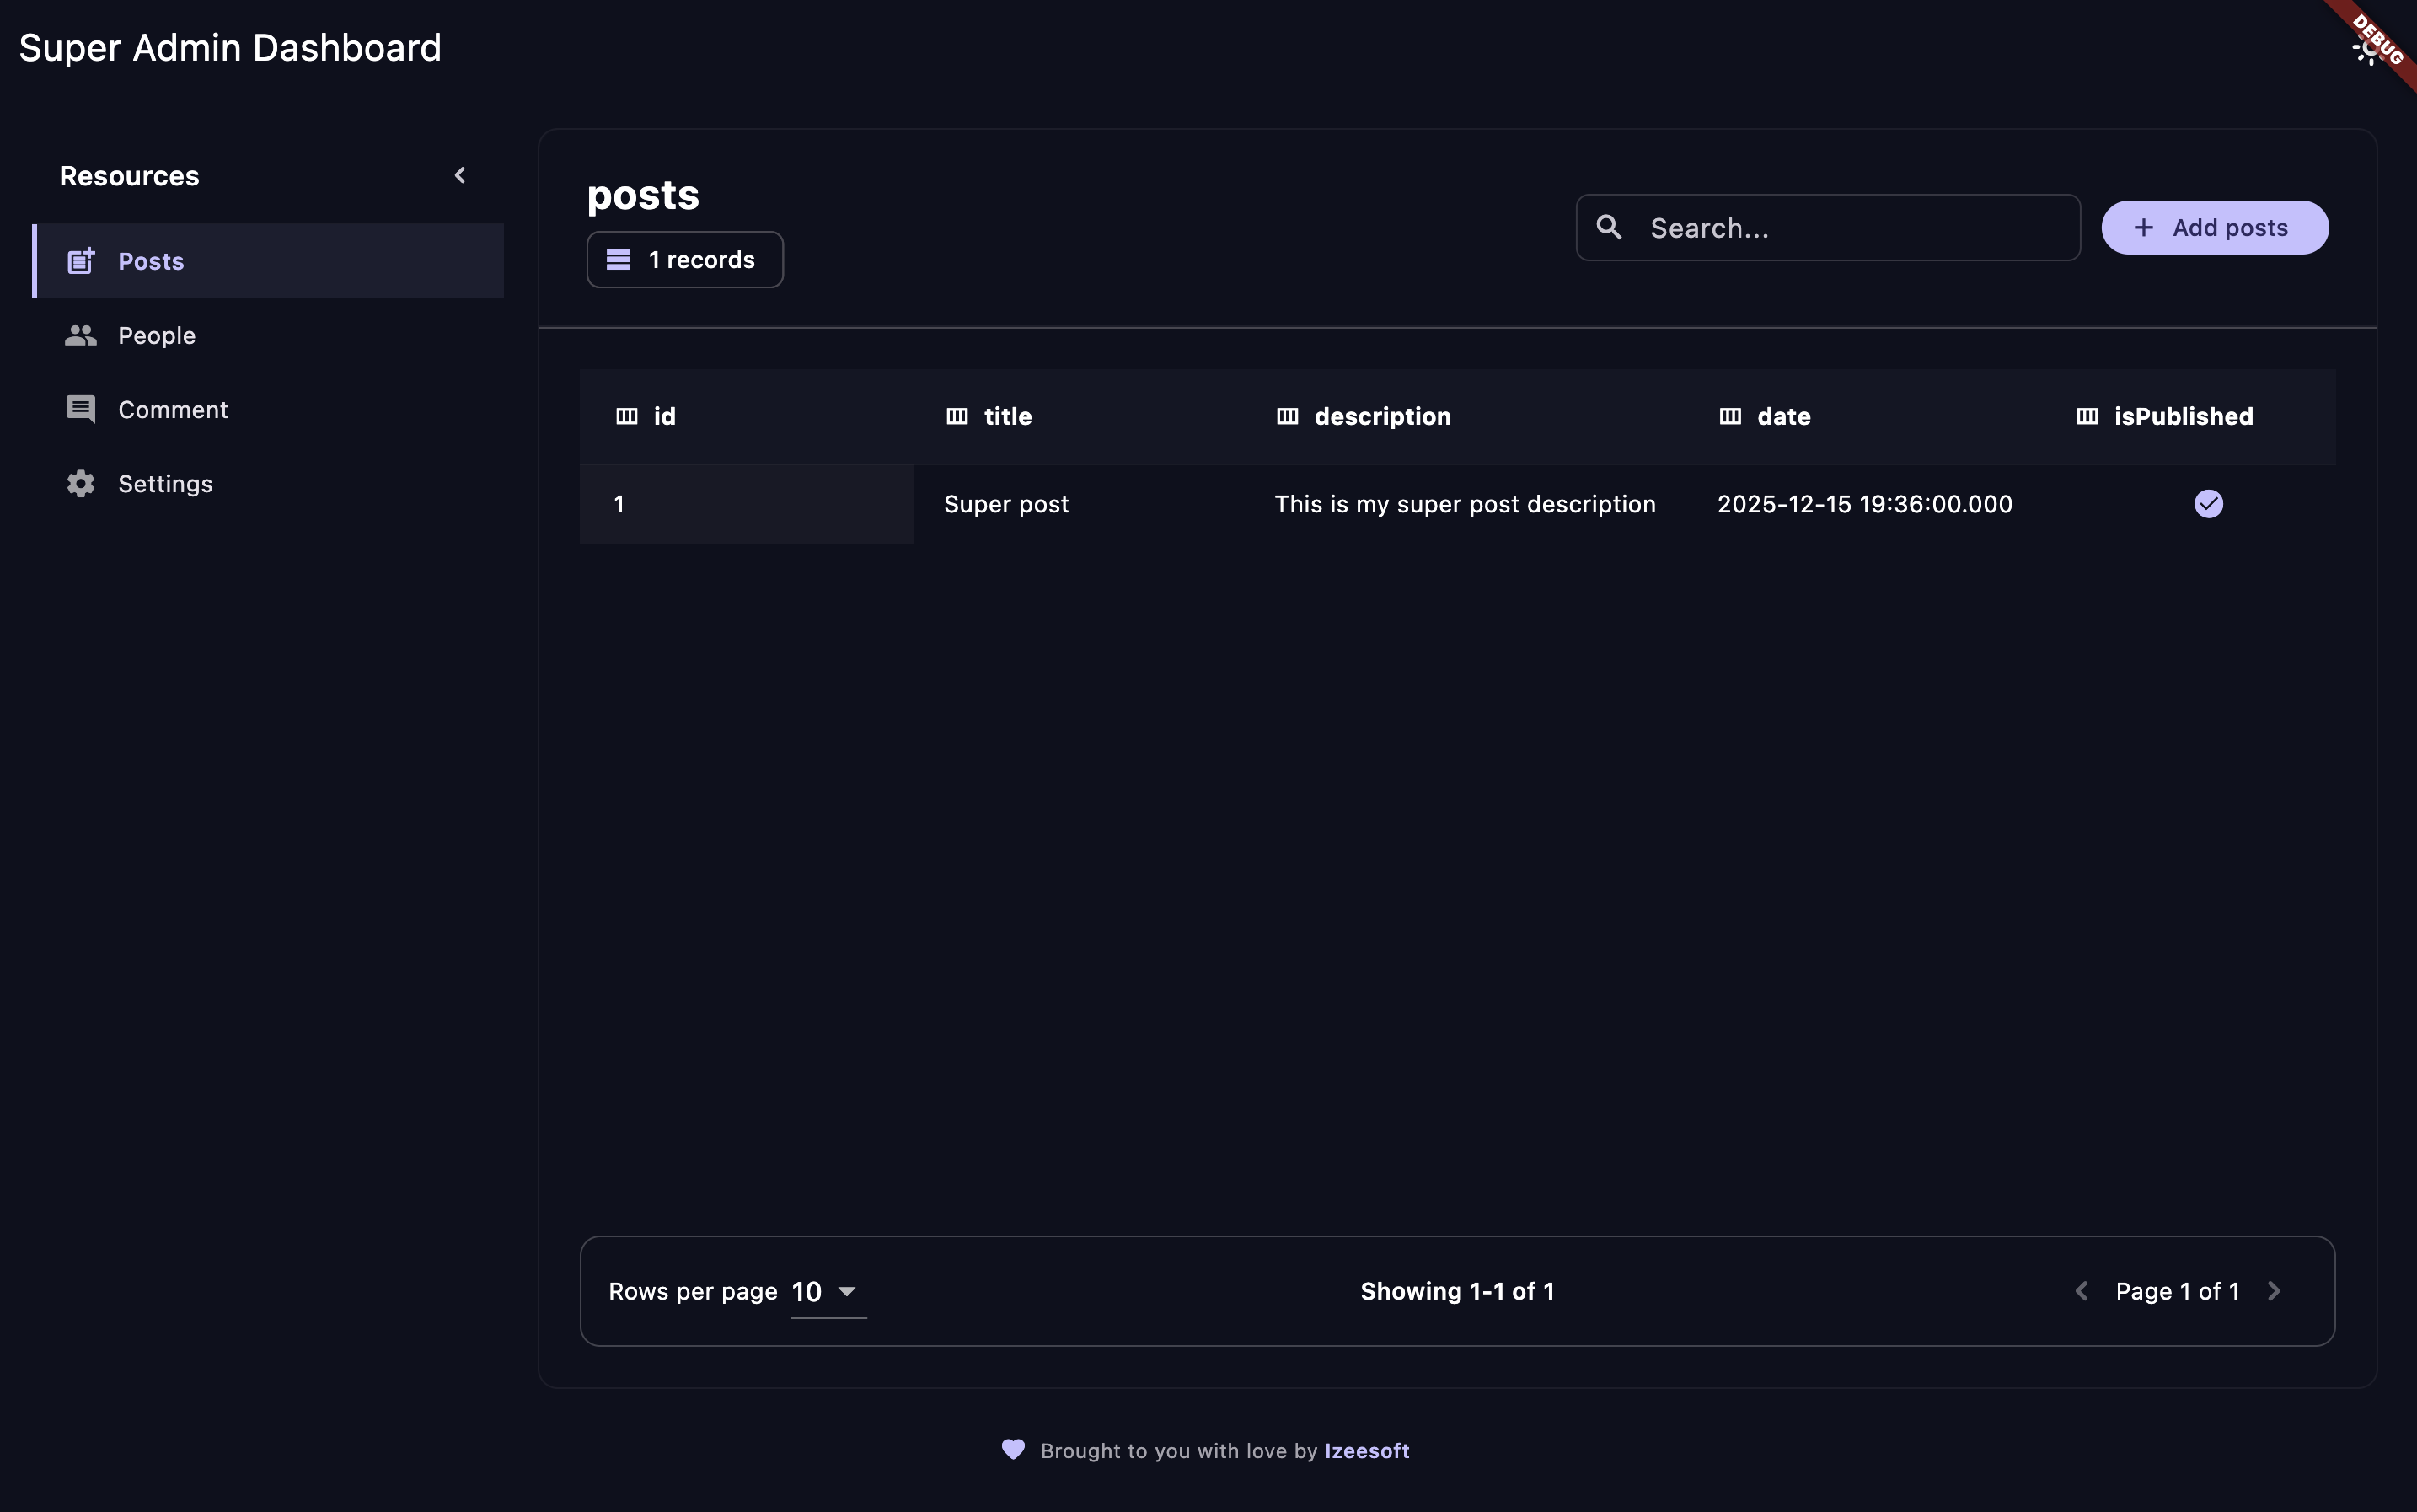
Browse and manage all your data with a beautiful, intuitive interface.
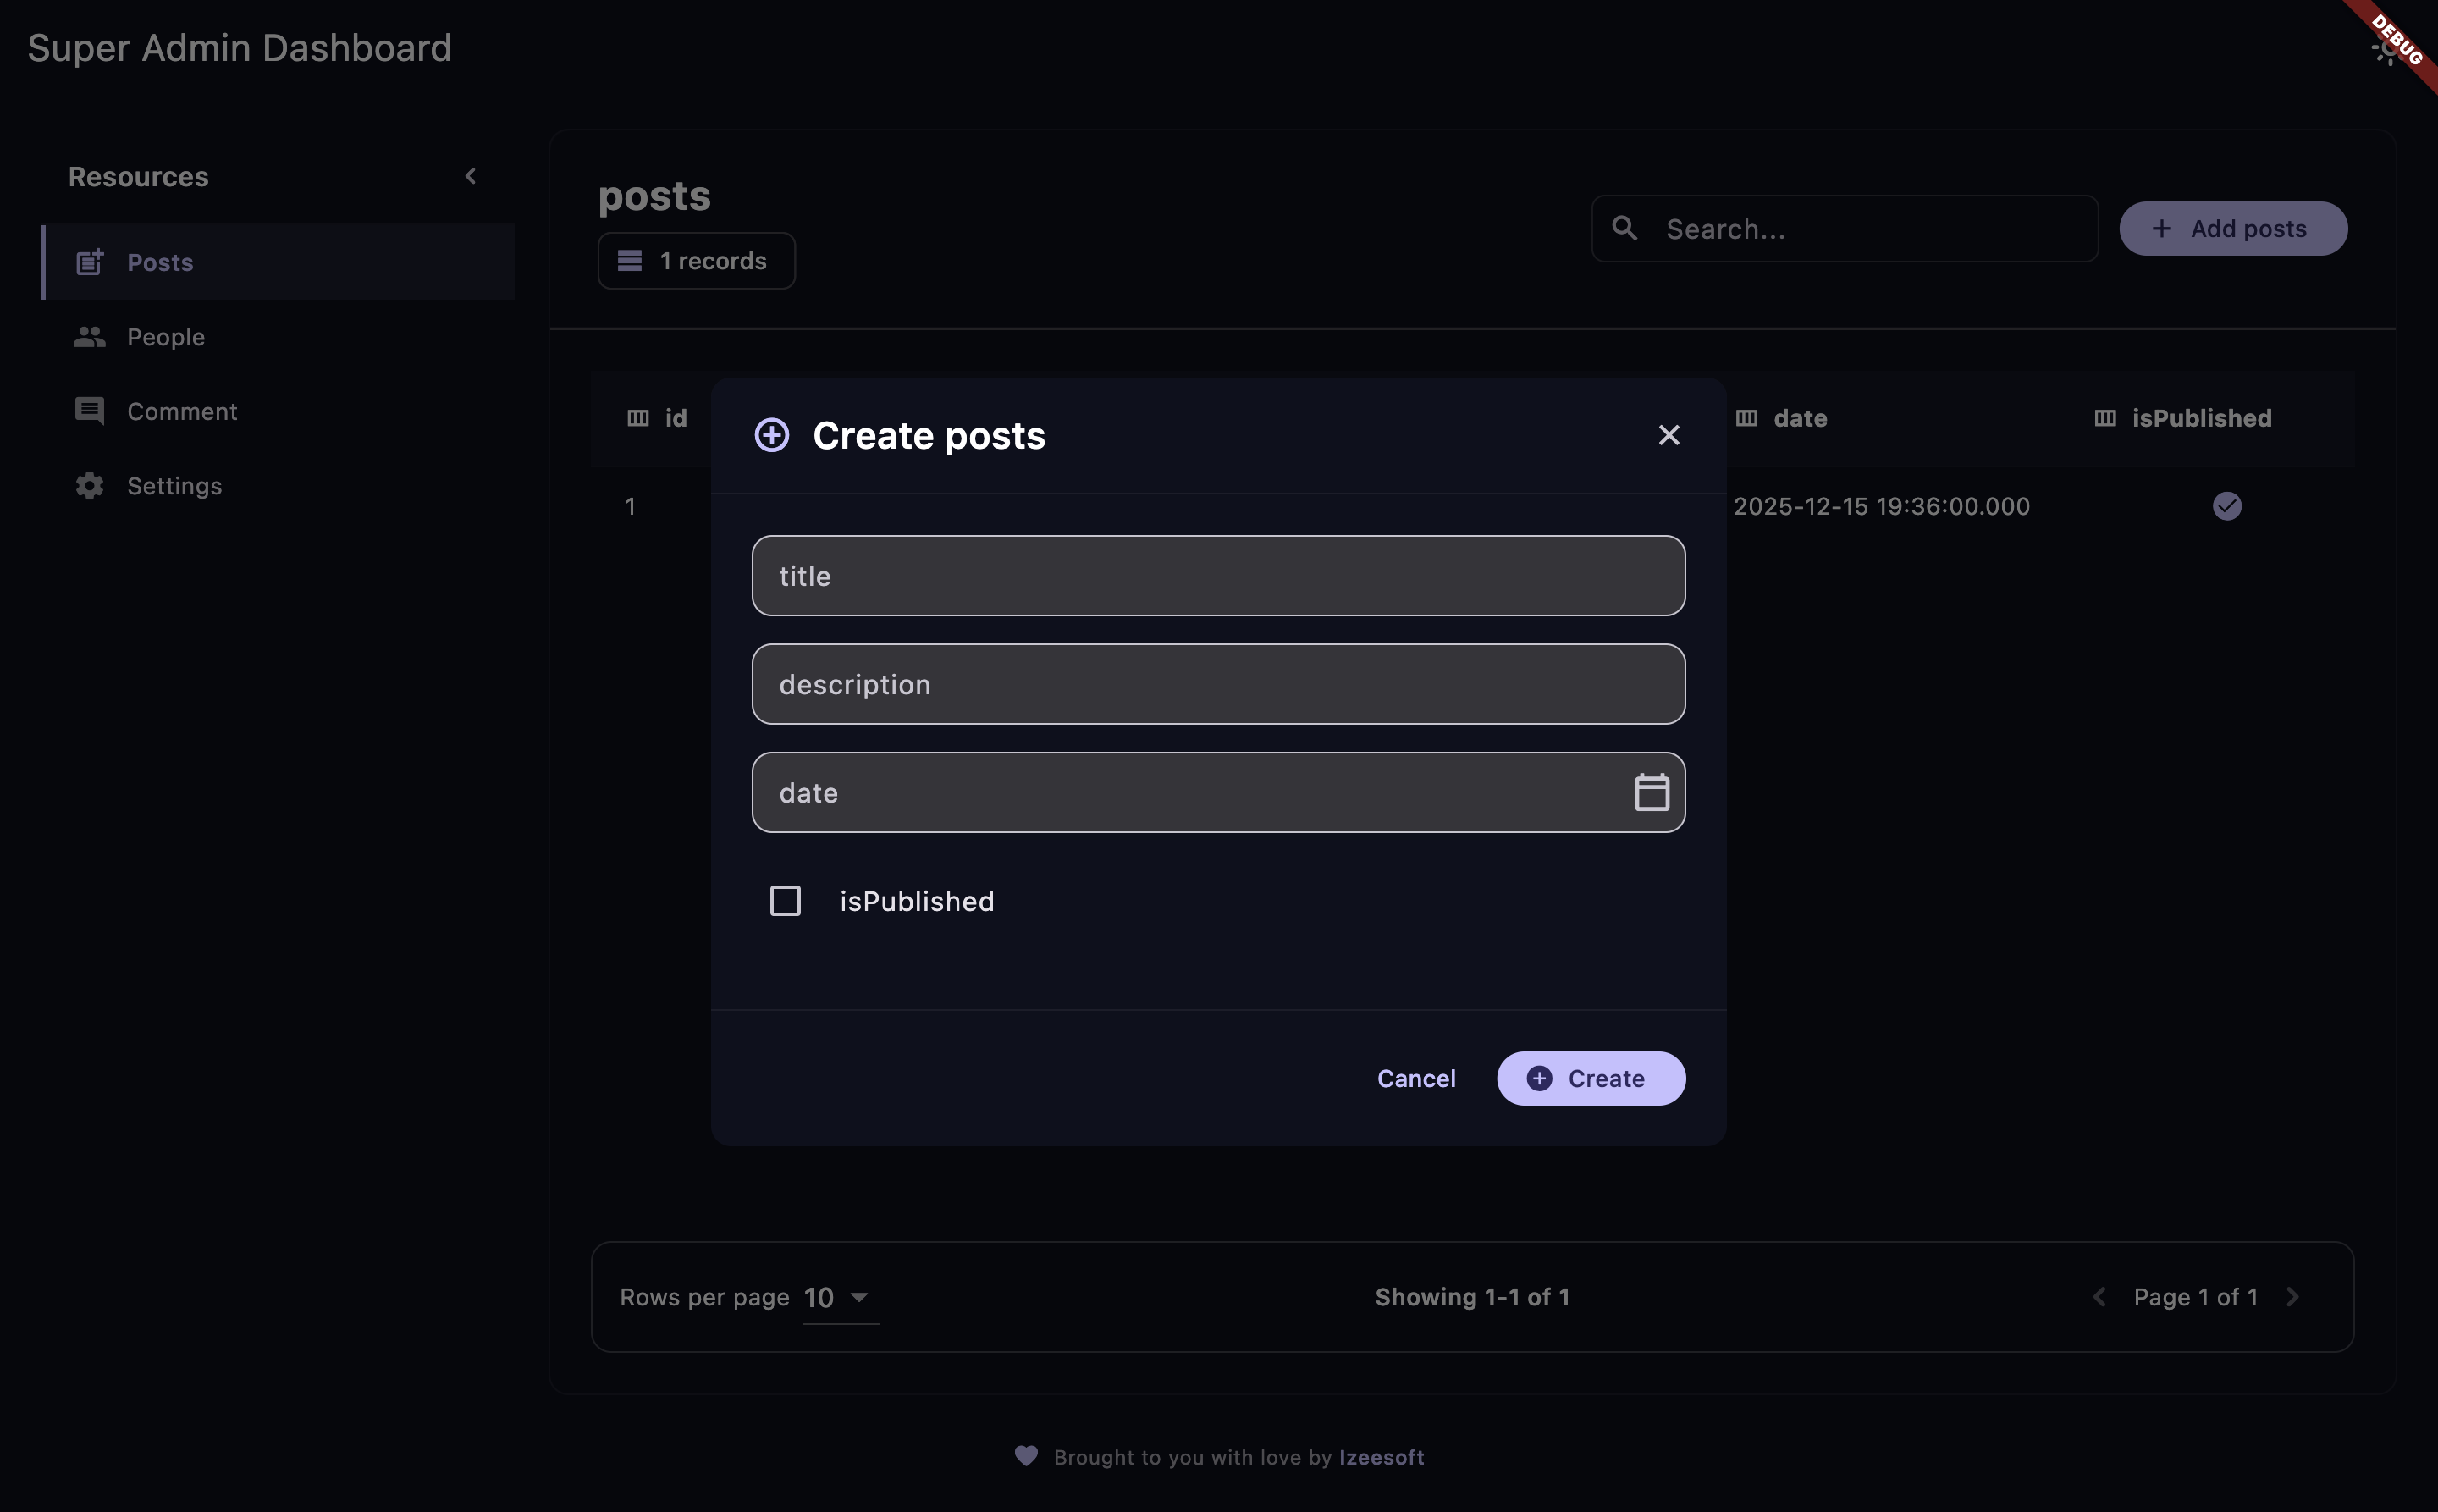
New record with a clean, user-friendly interface.
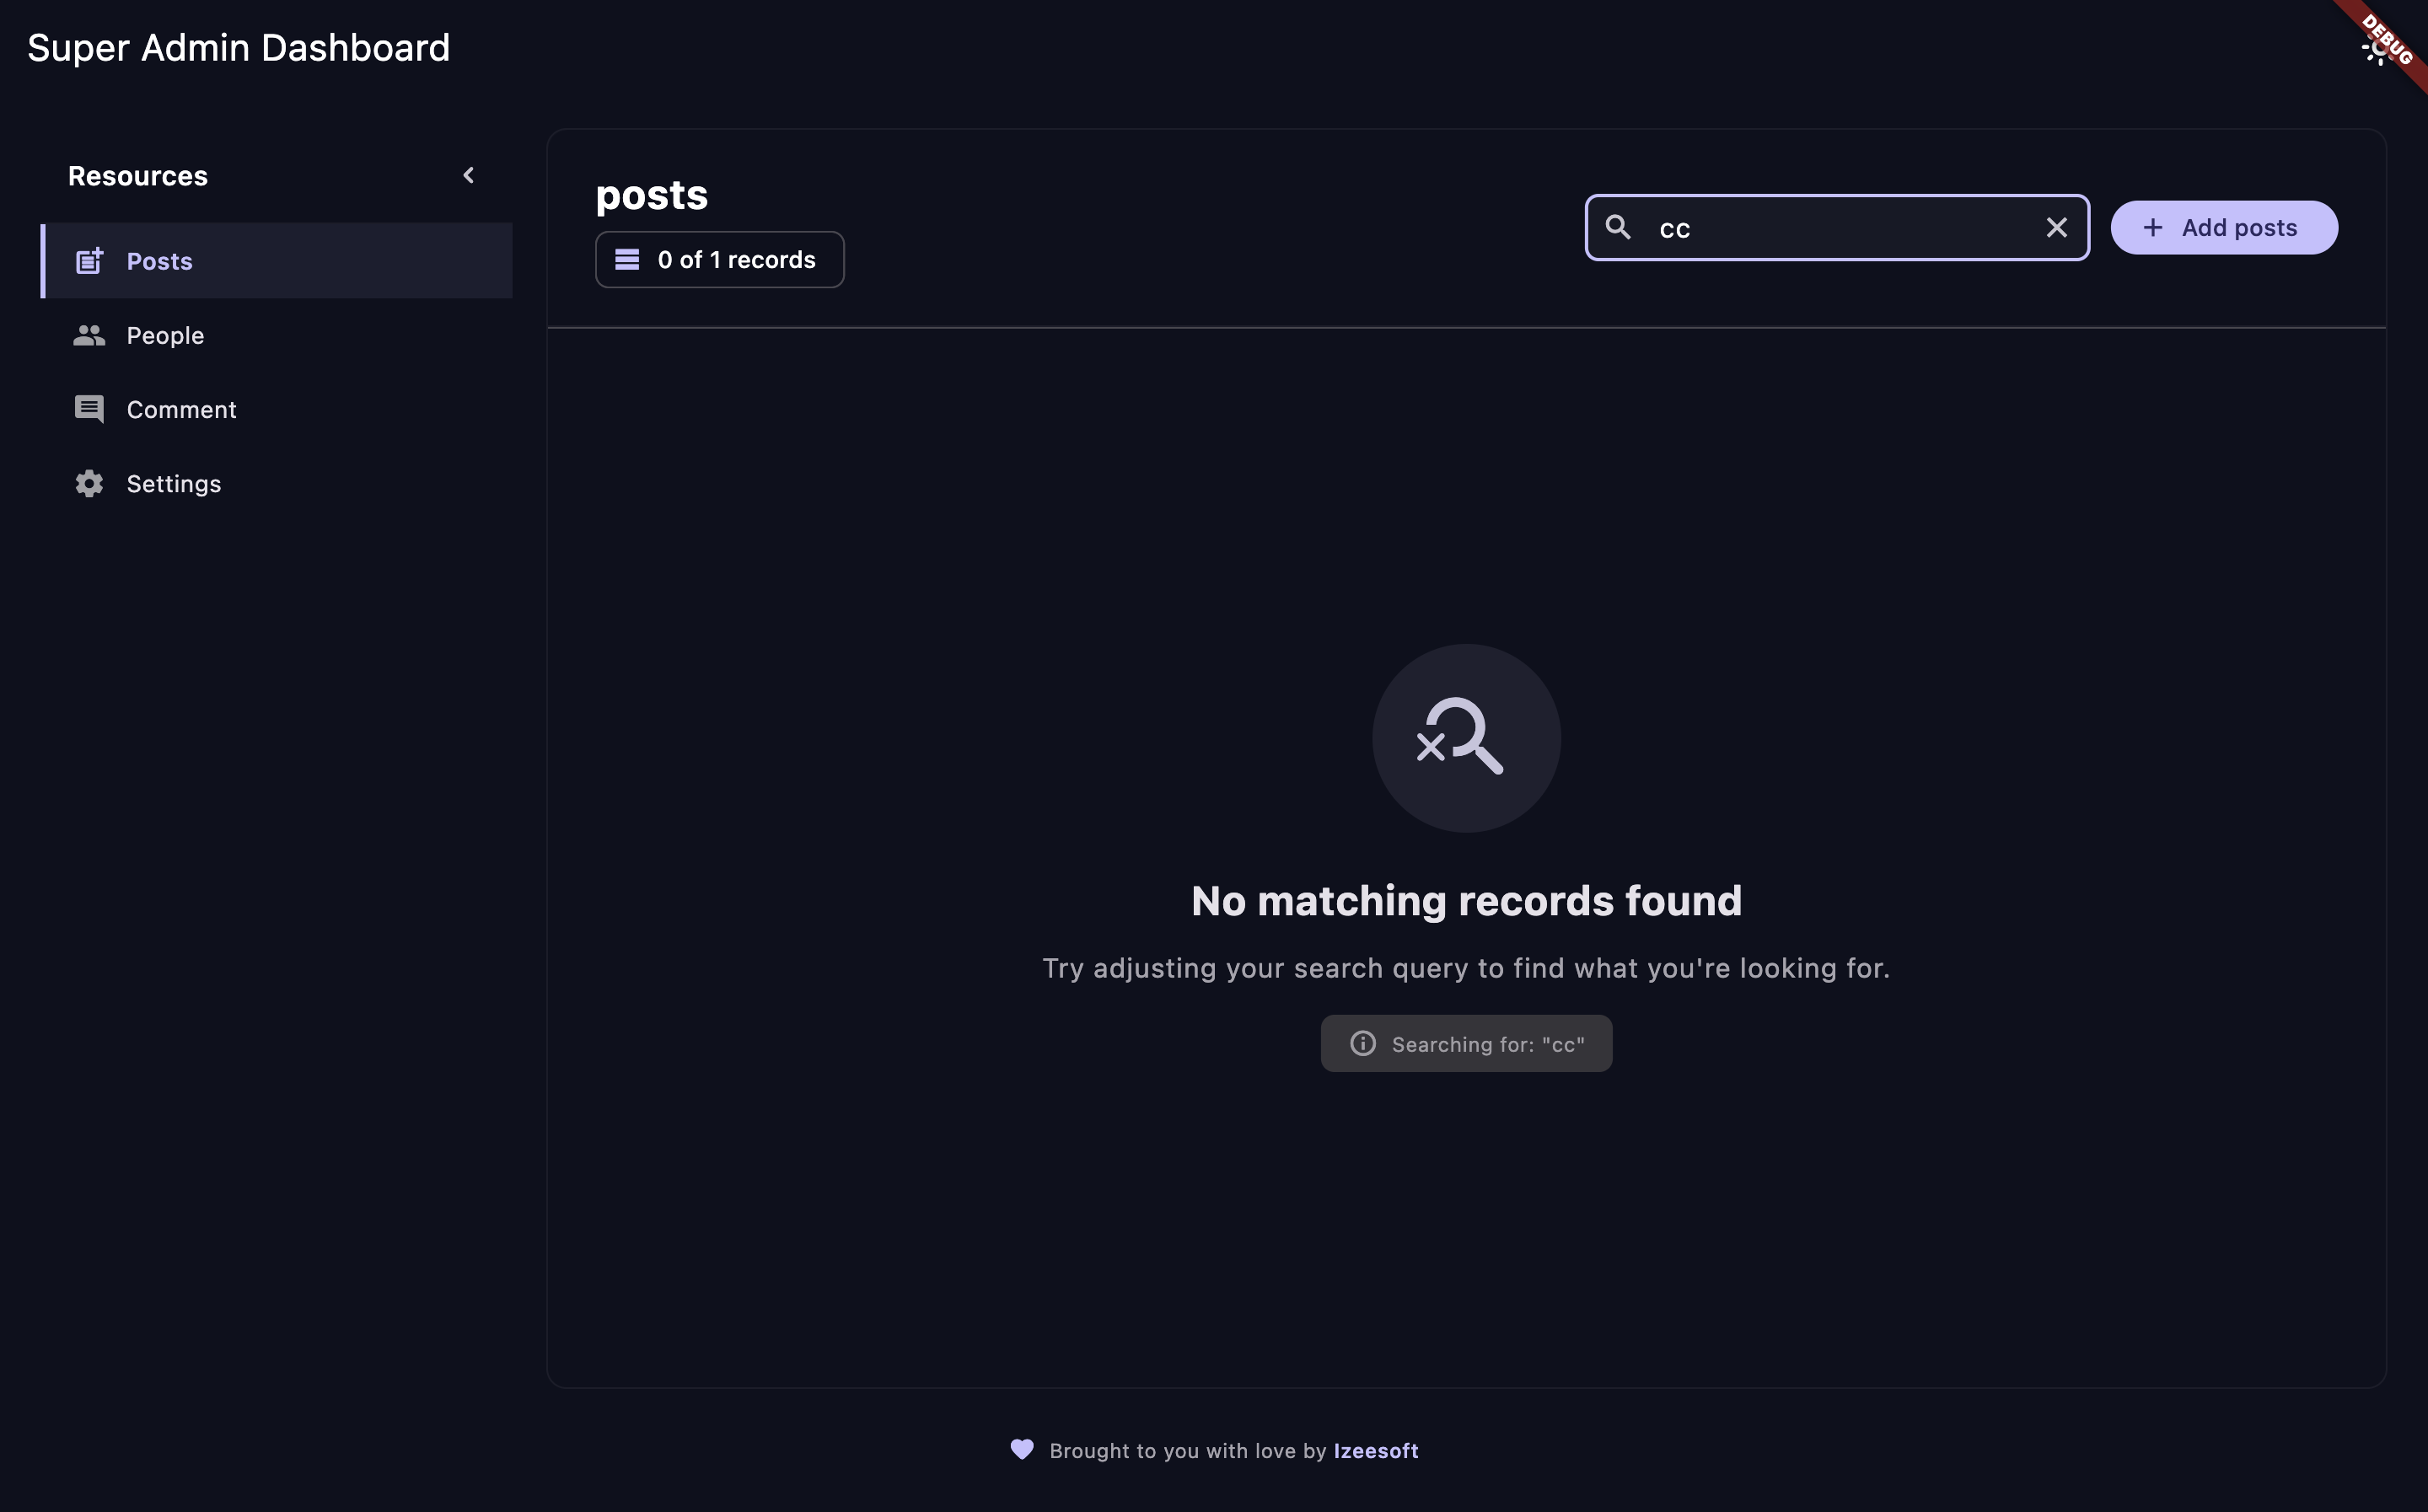
Powerful search and filtering capabilities to find exactly what you need.
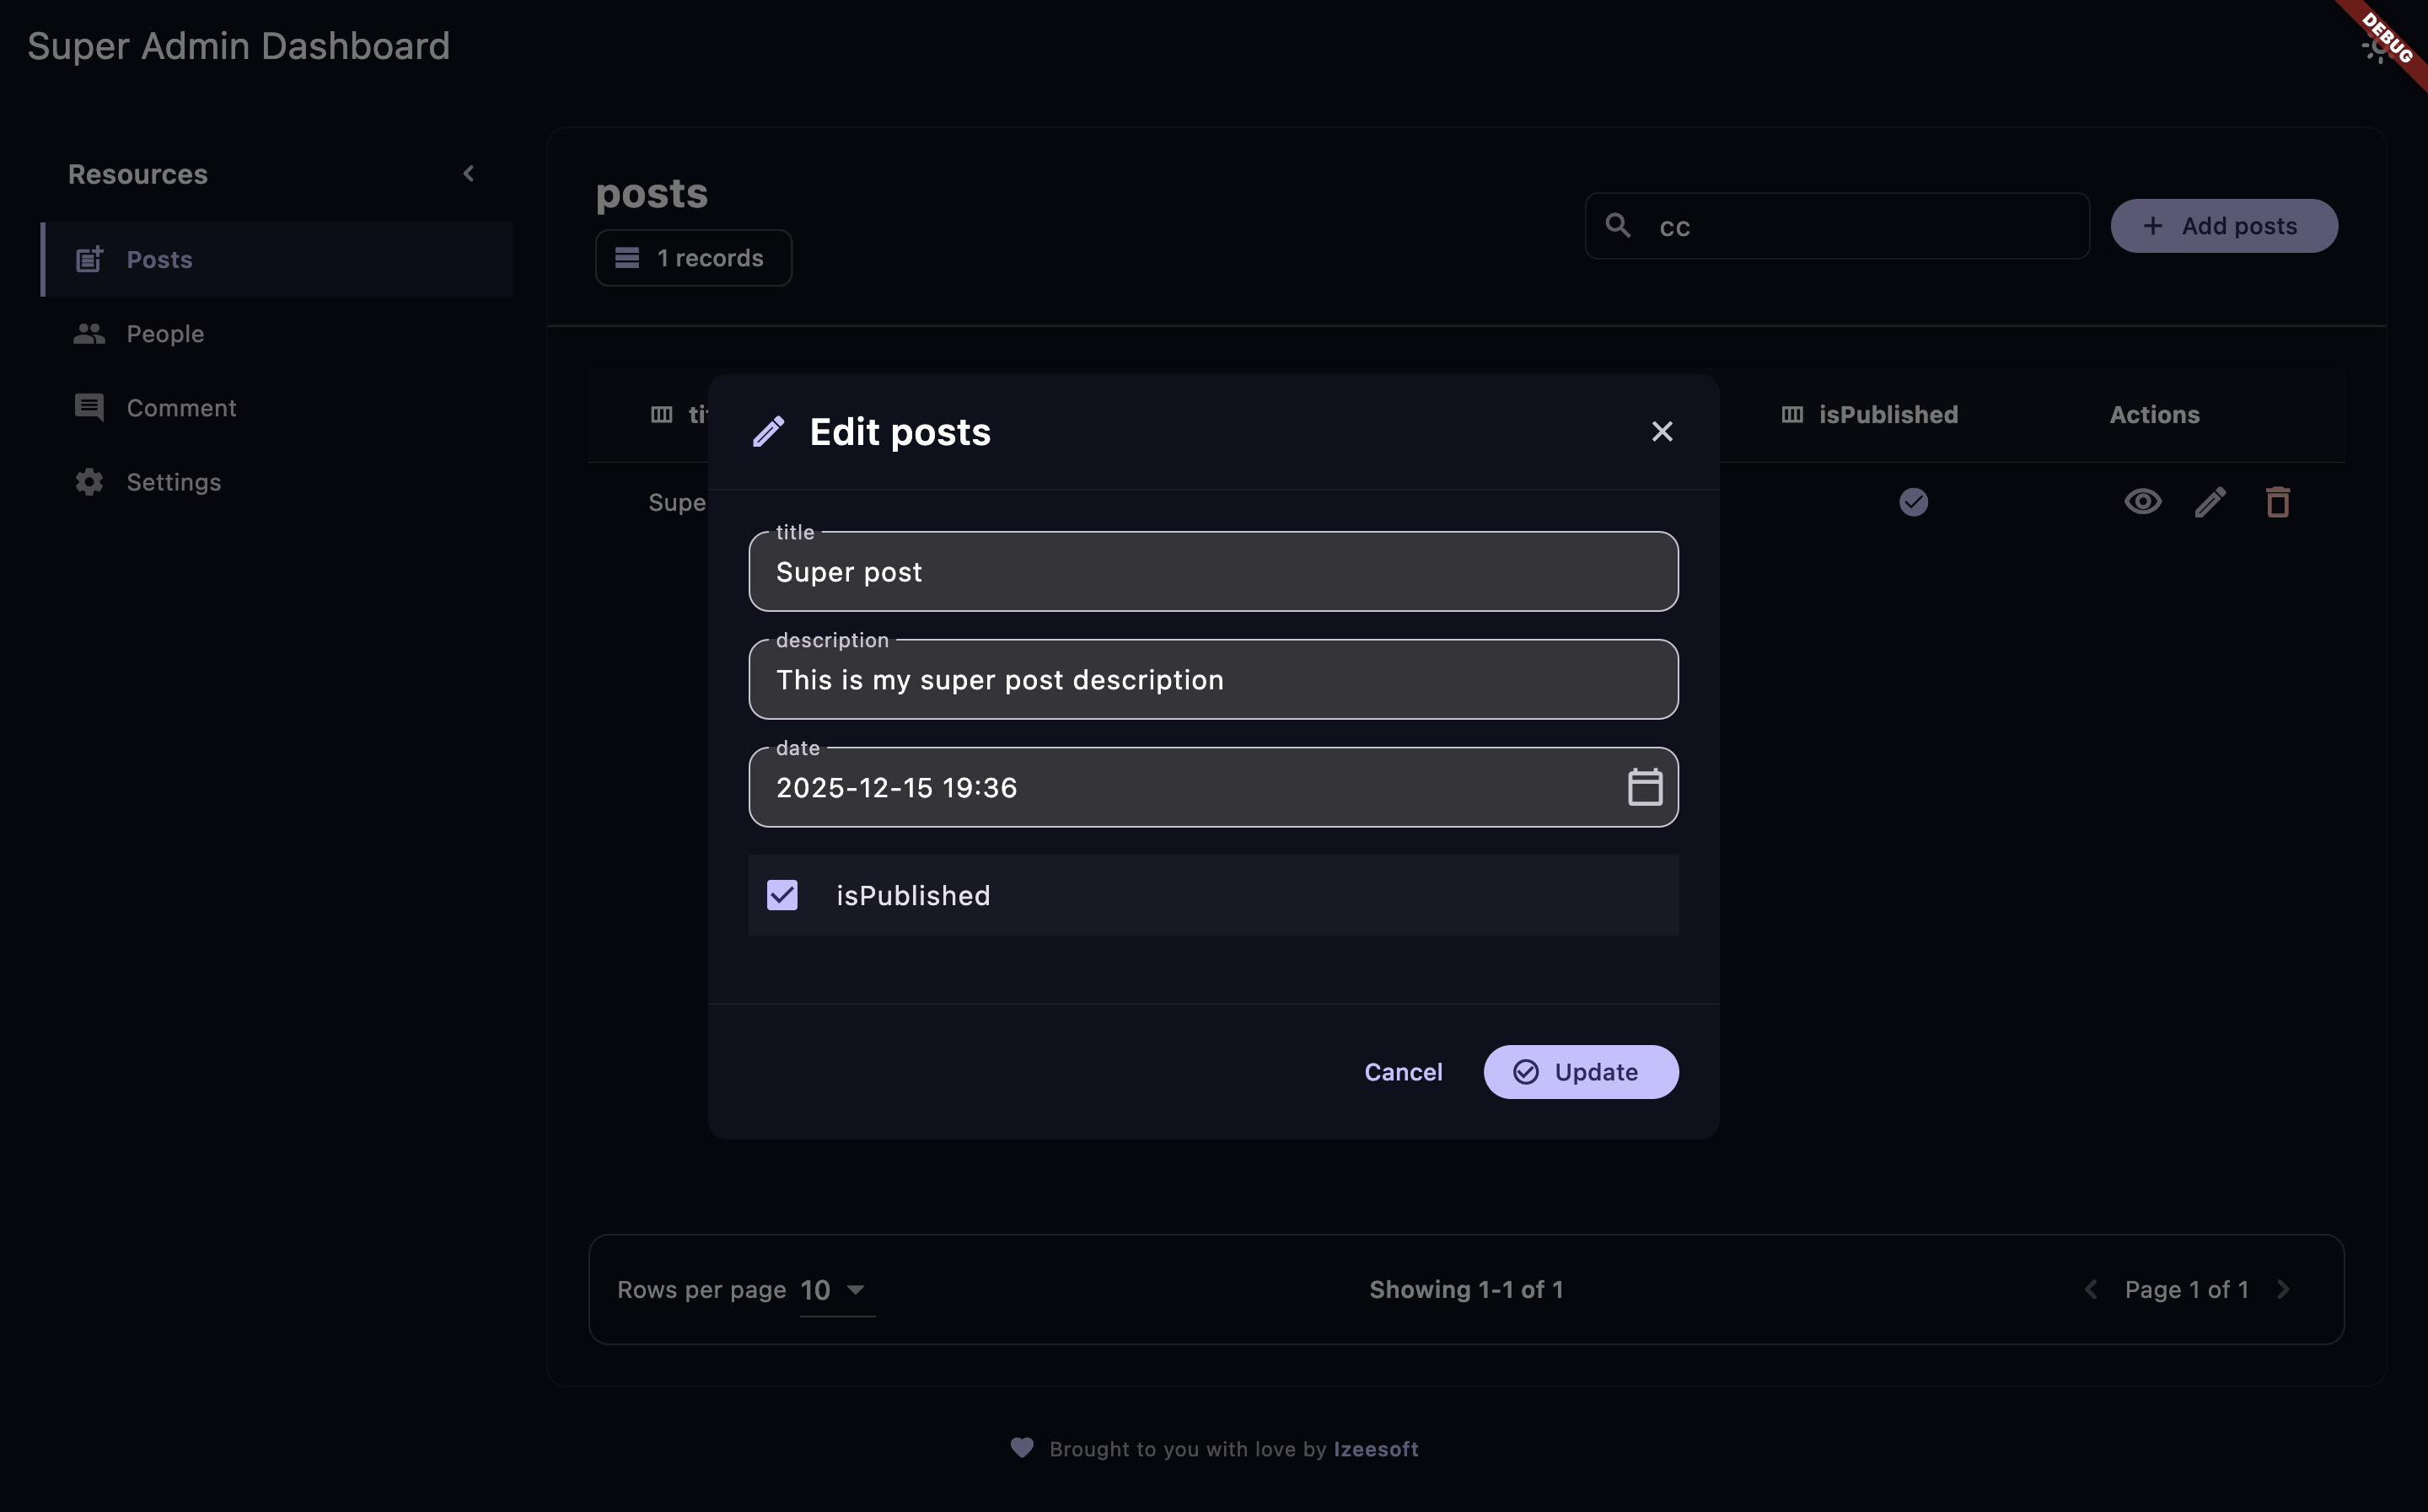
Edit record with a clean, user-friendly interface.
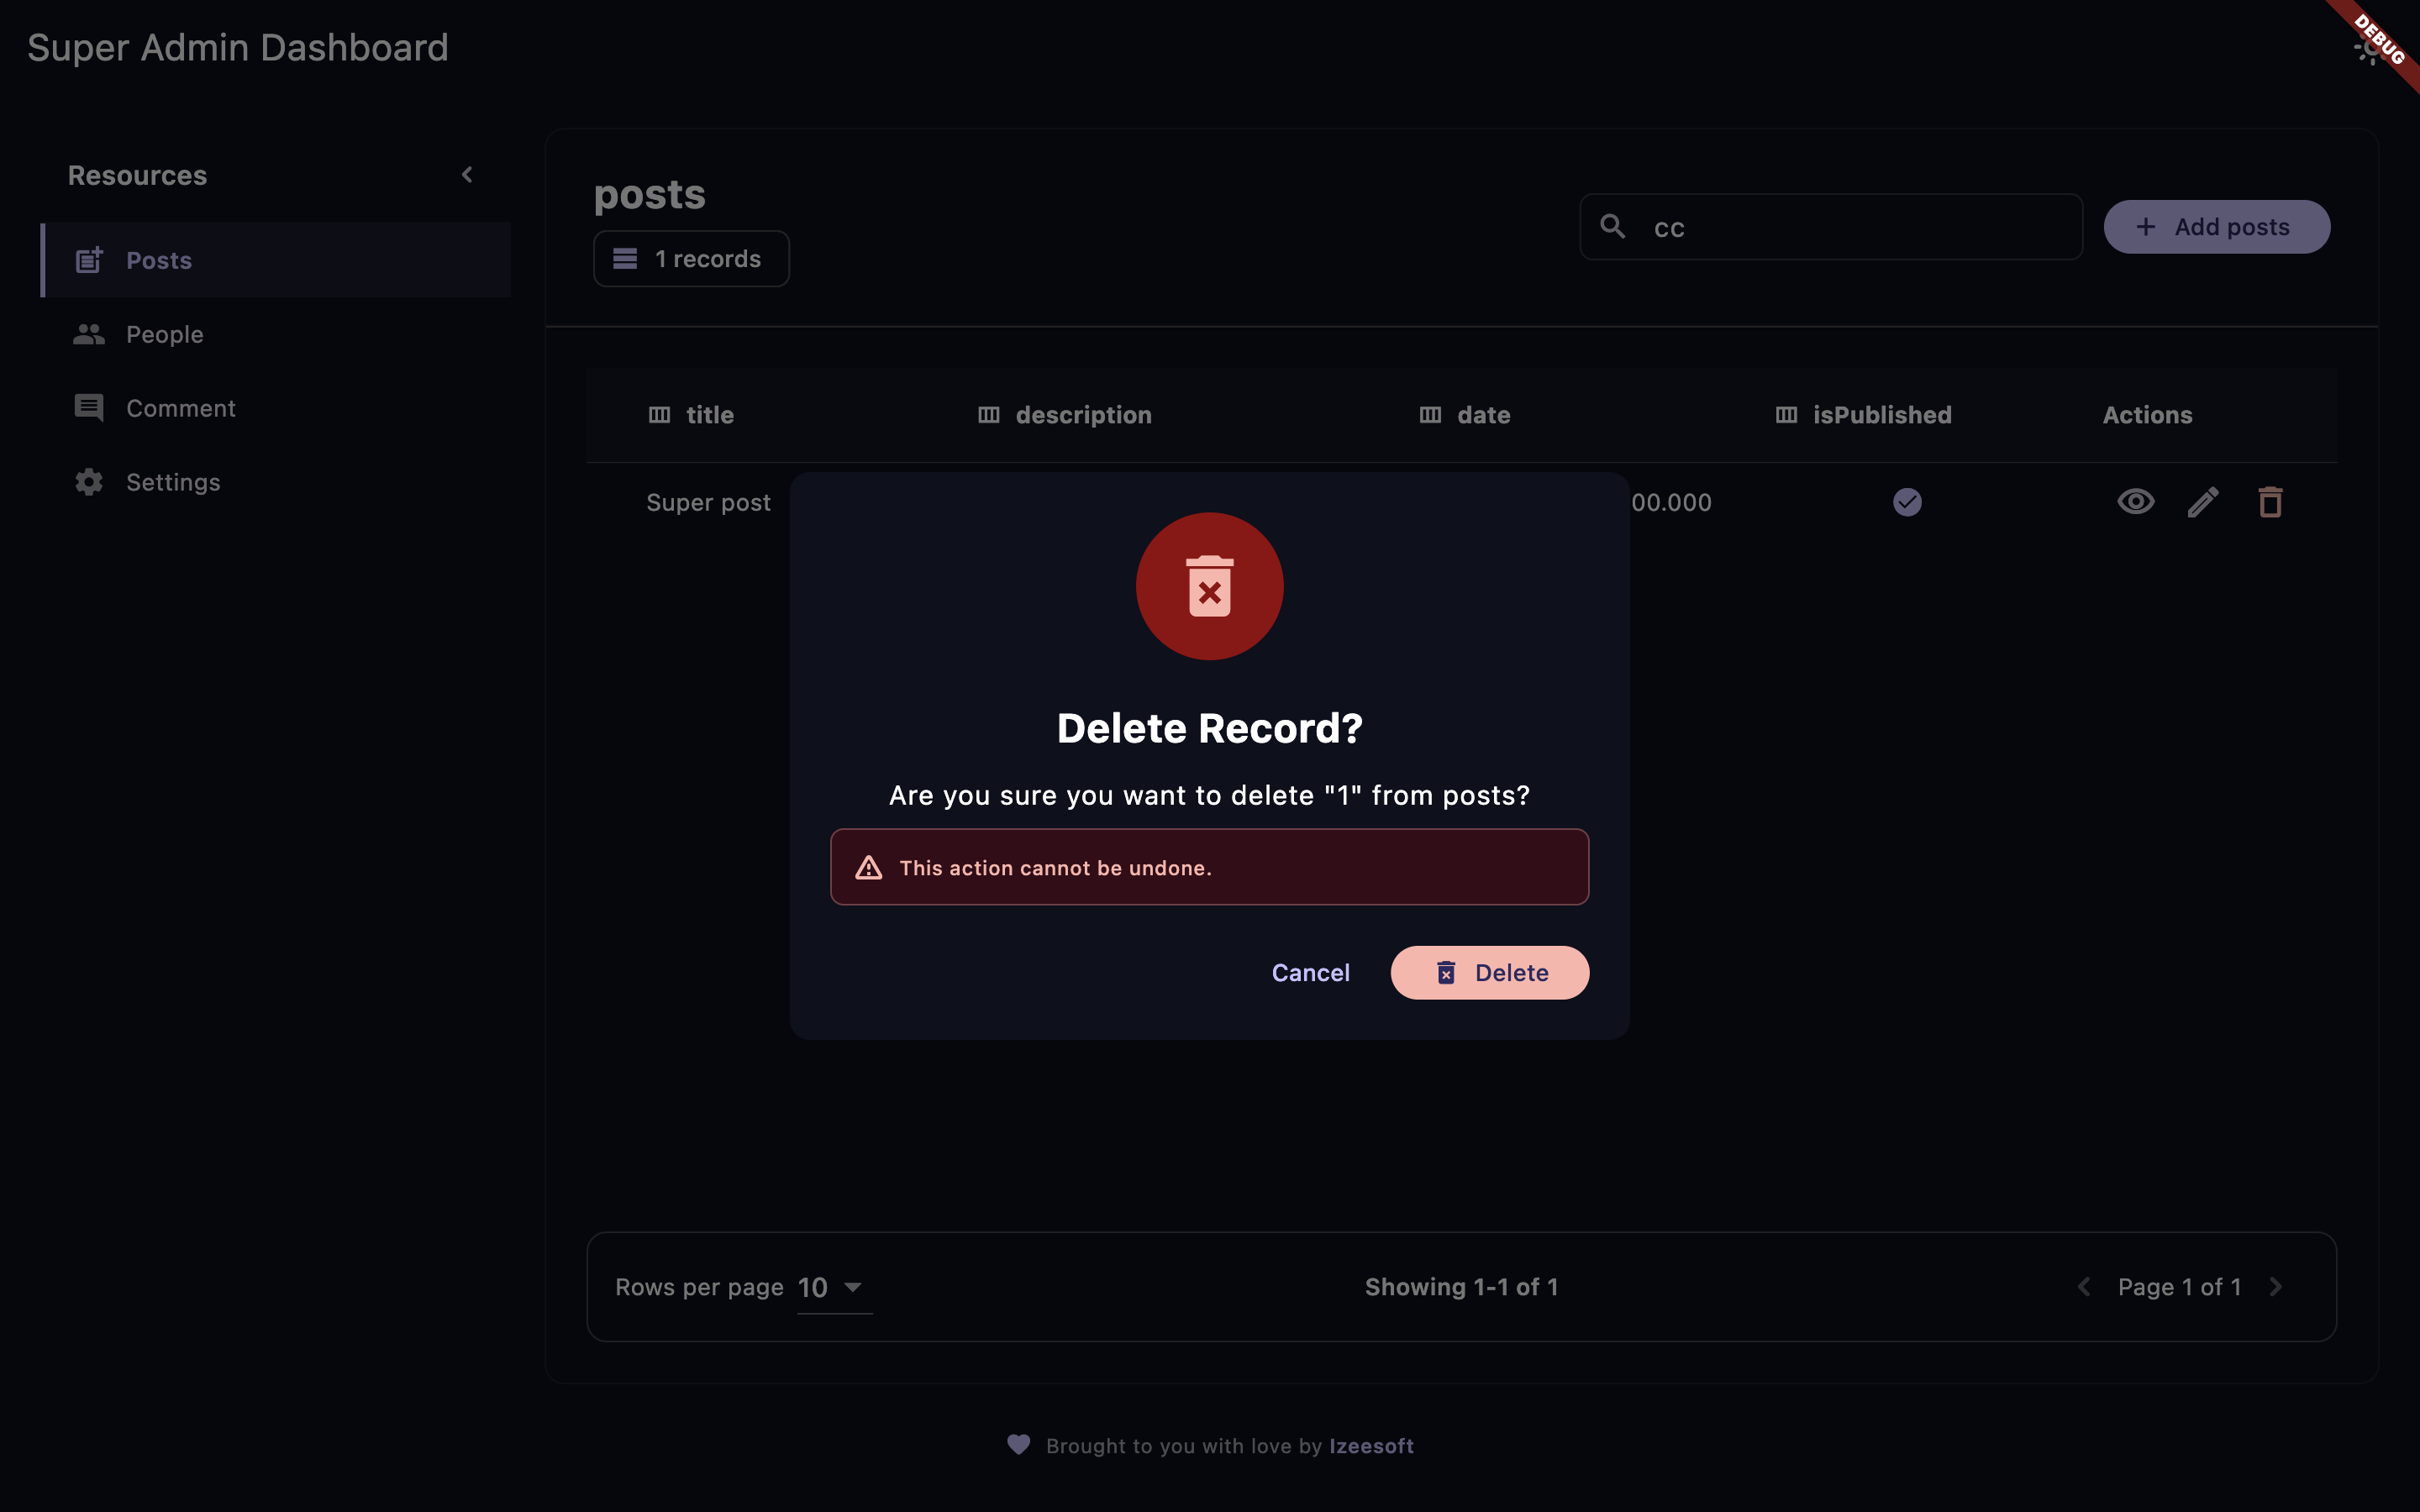
Delete record with a clean, user-friendly interface.
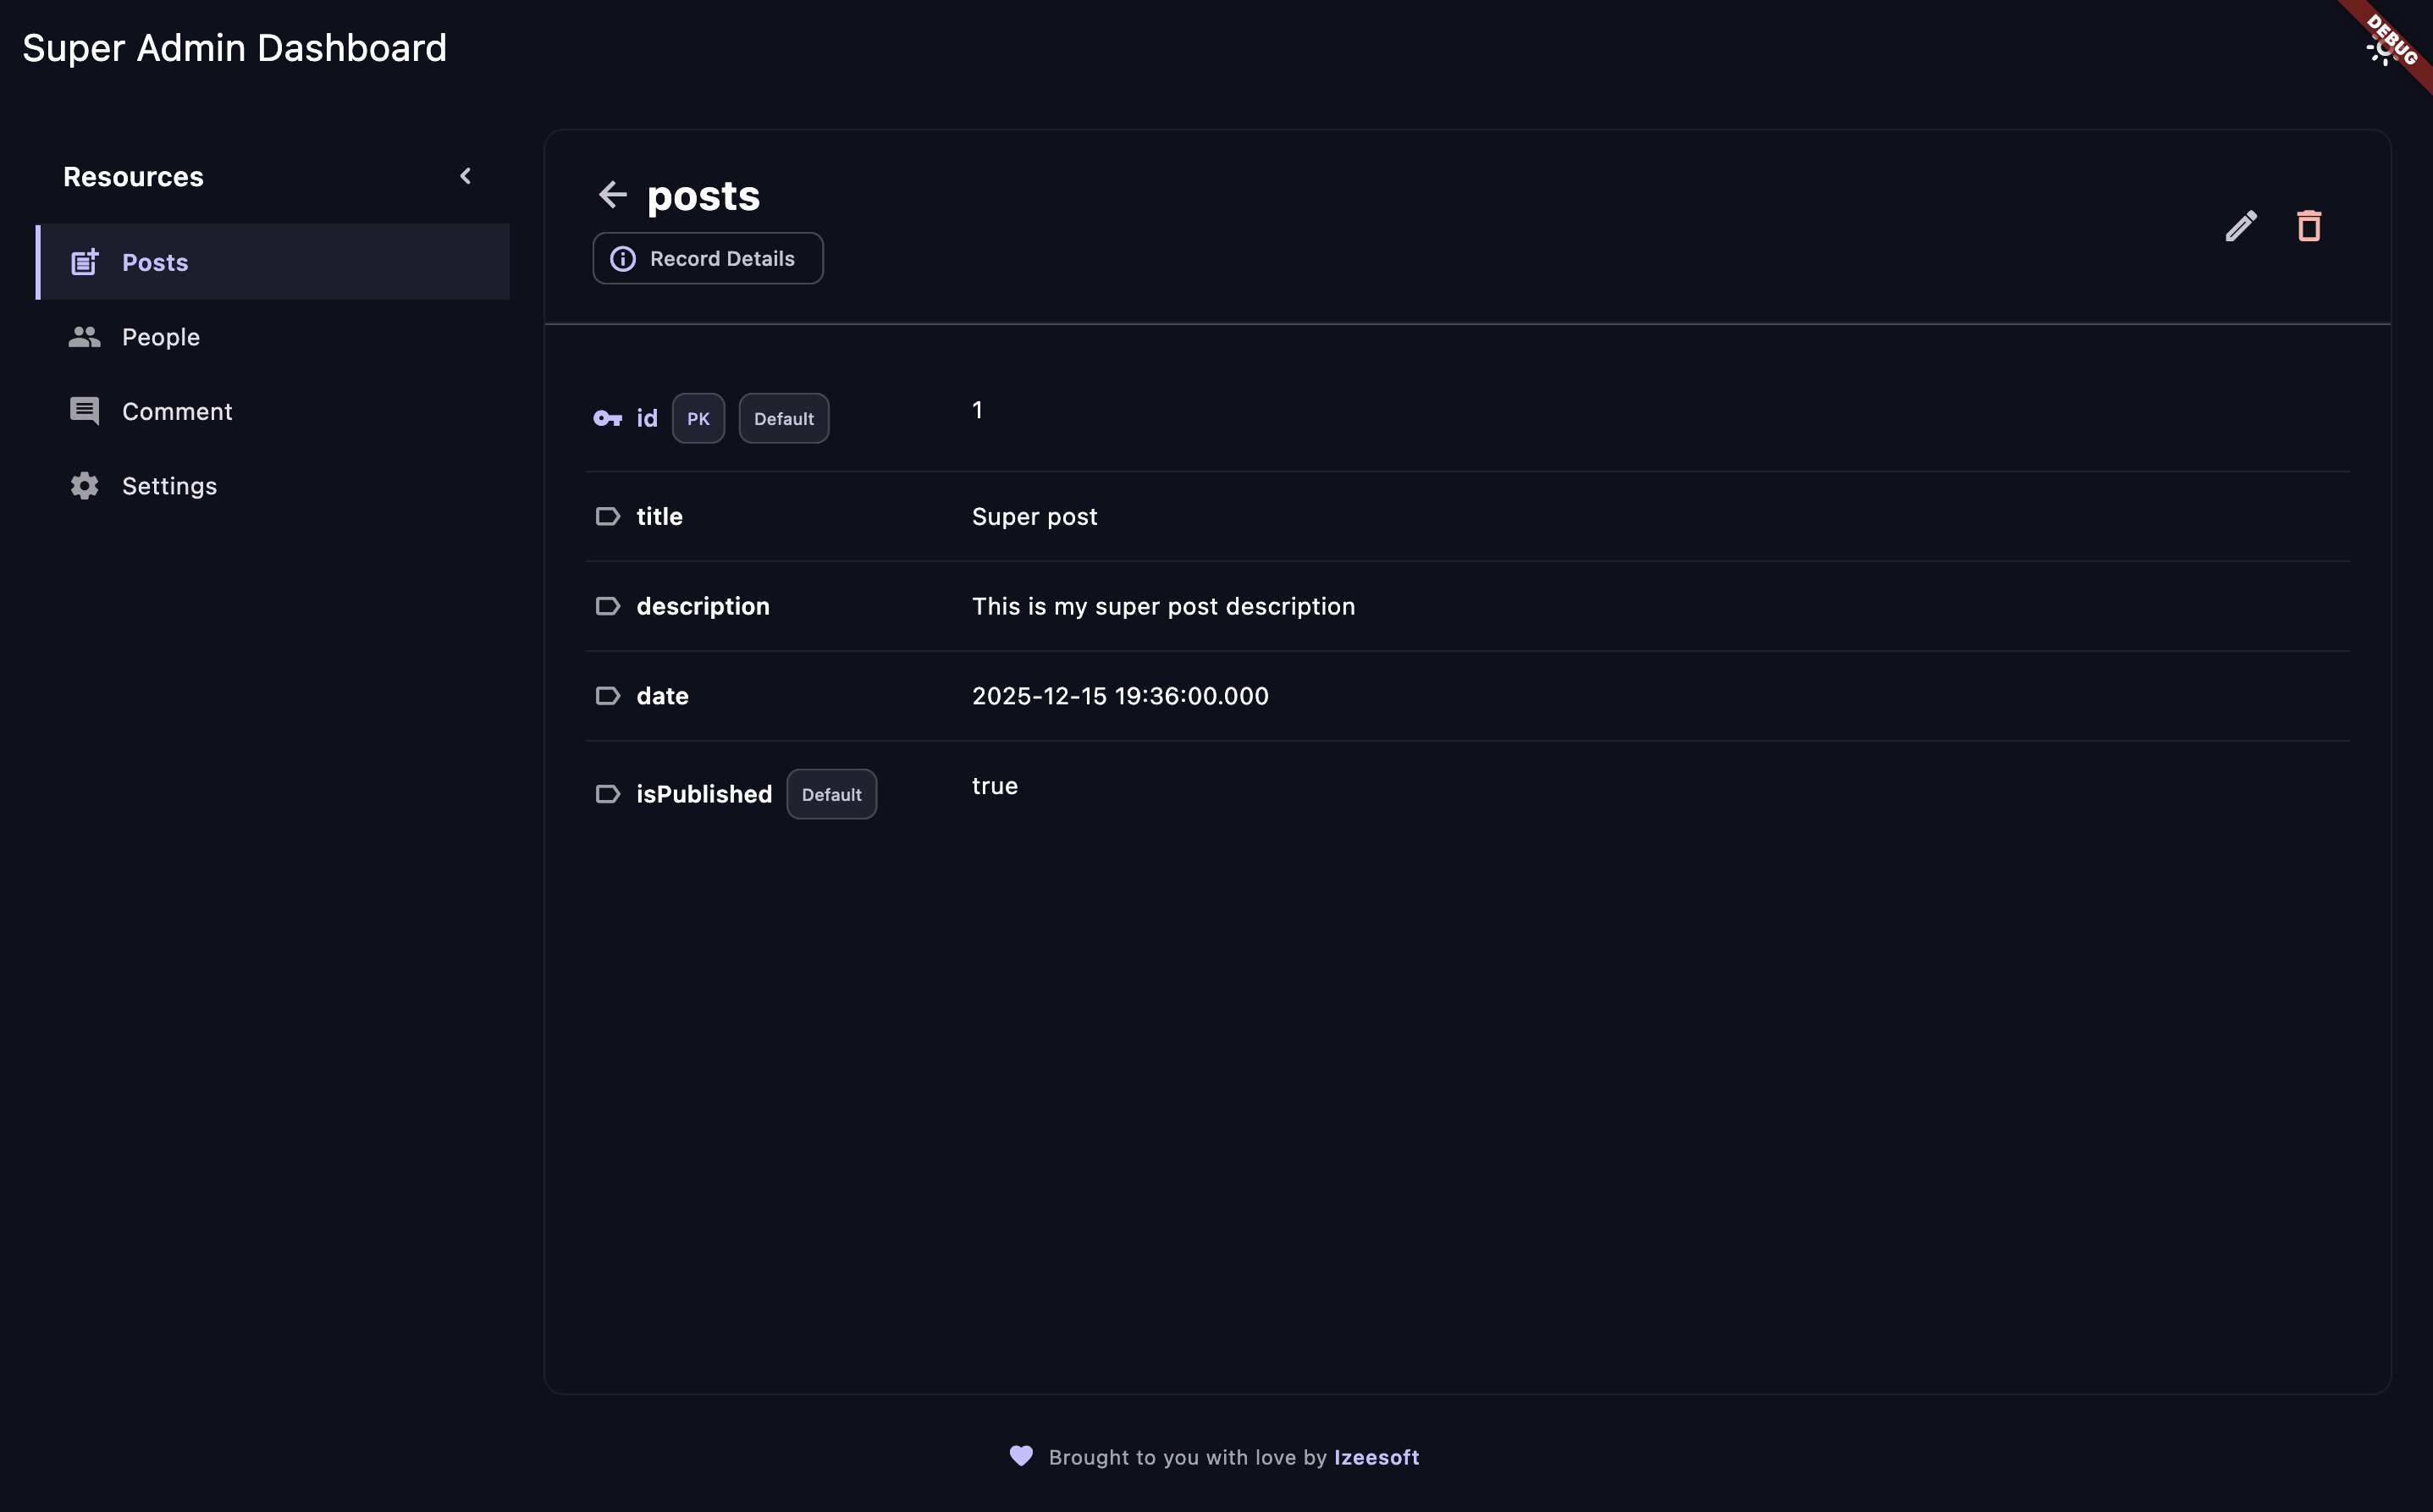
View detailed information about any record.
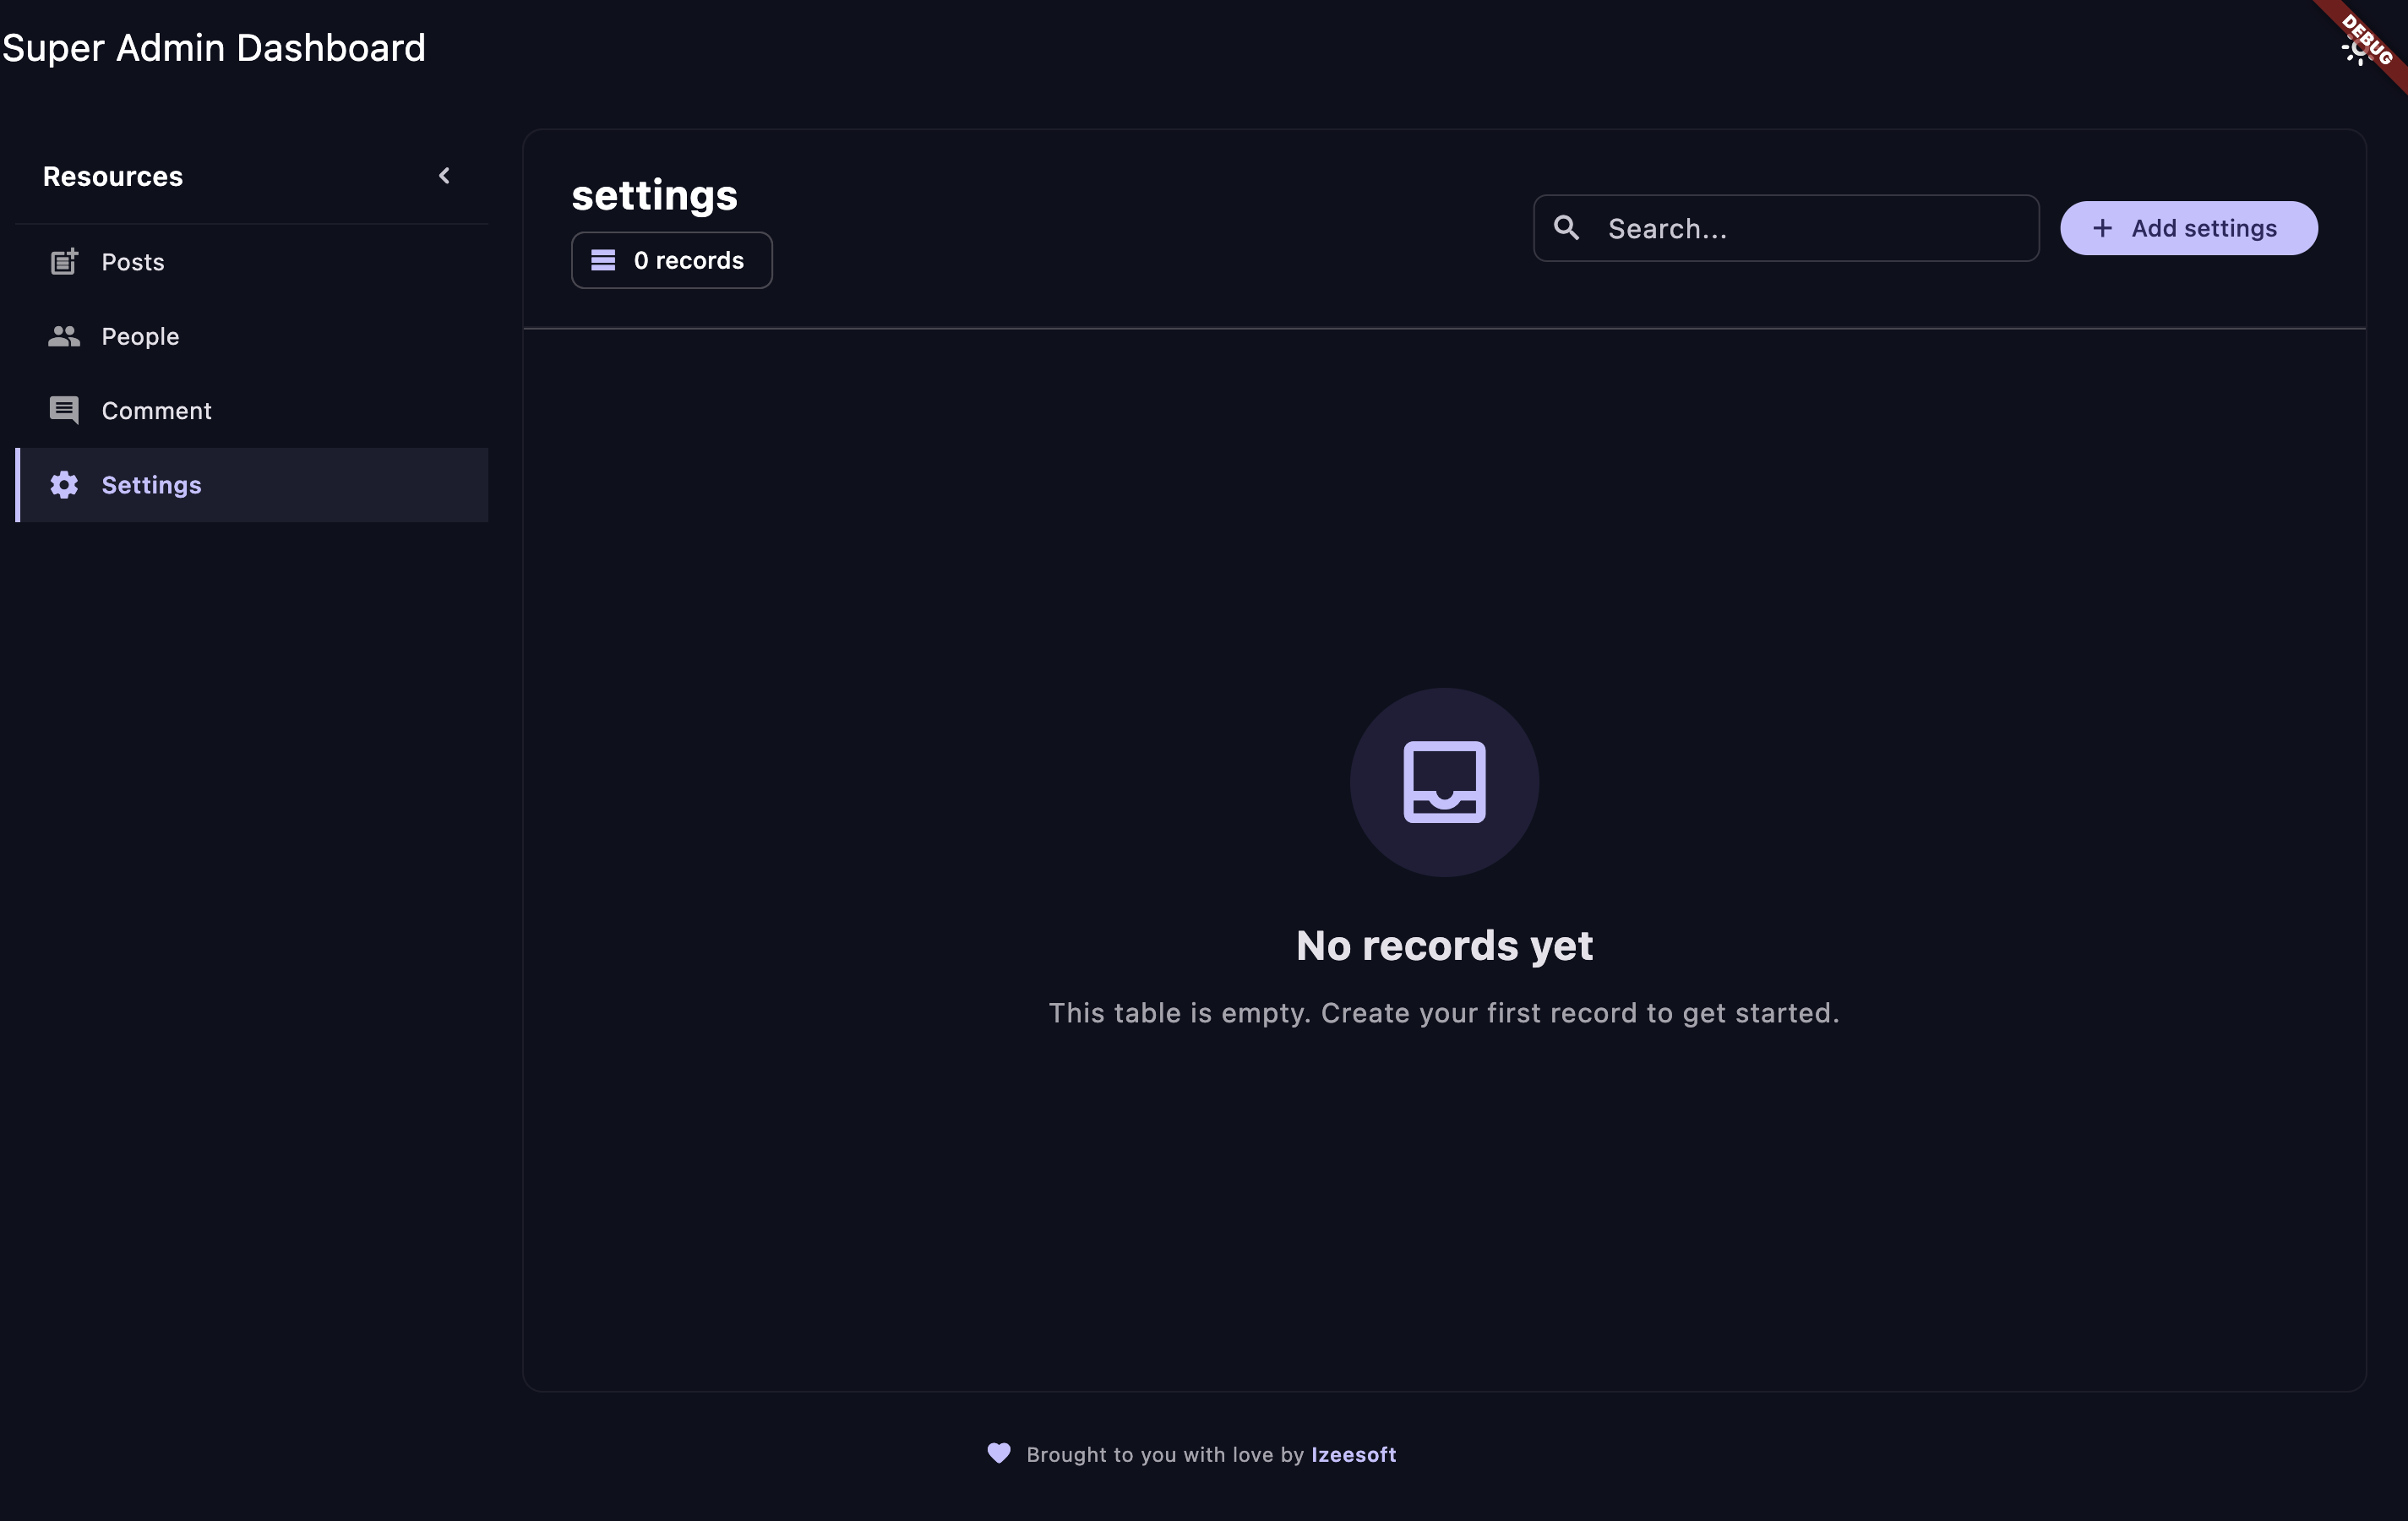
Beautiful empty states when no records are found.
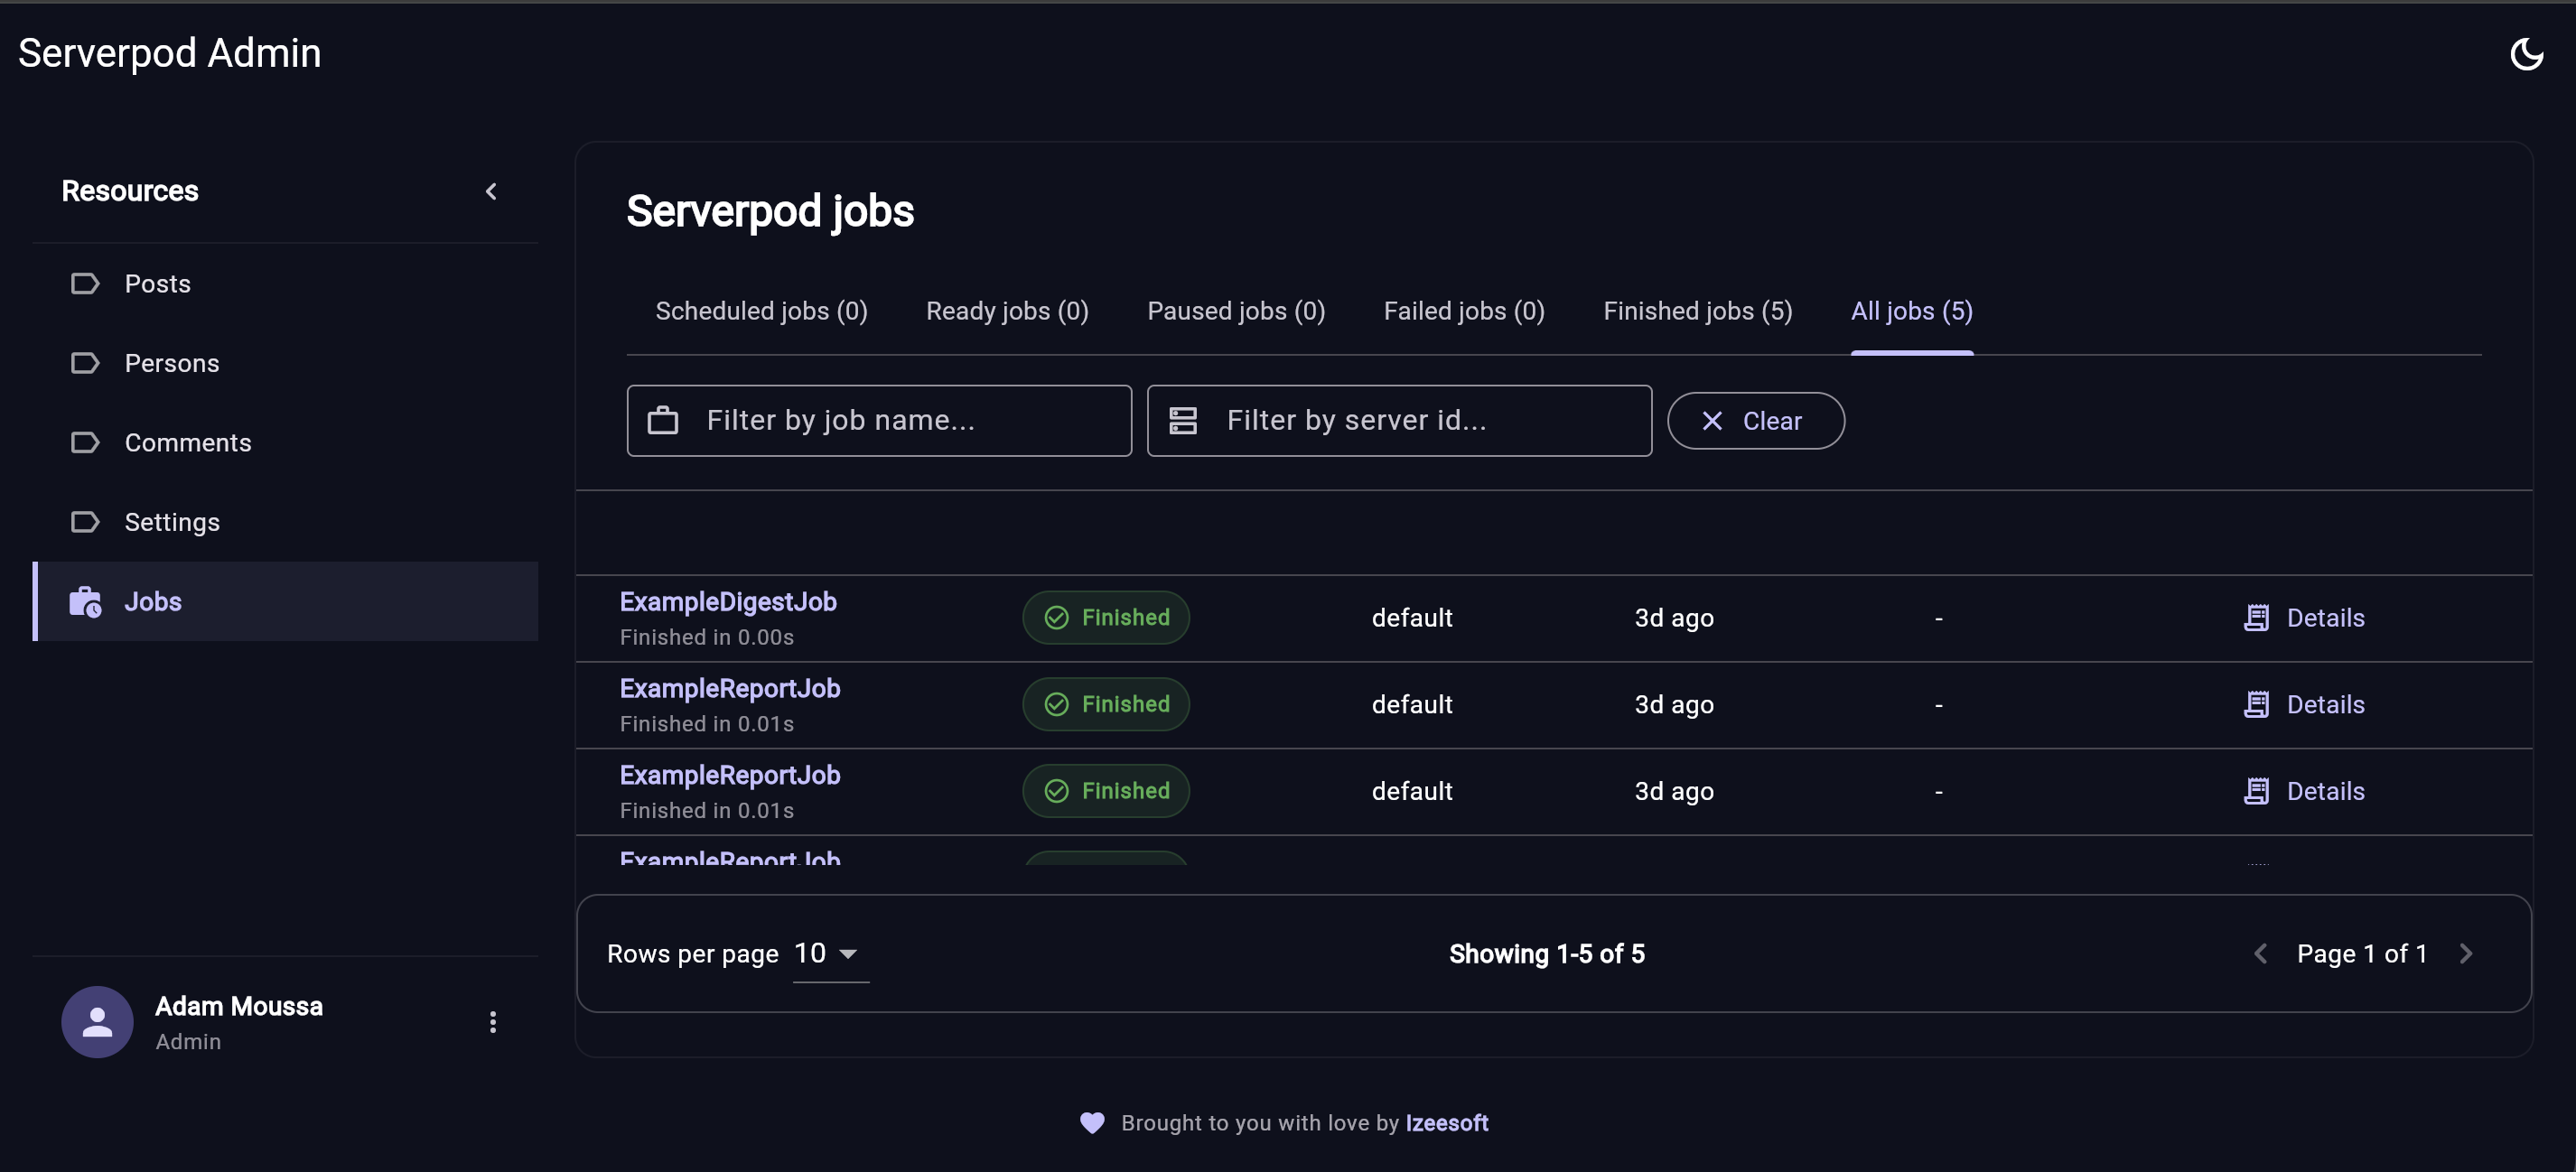
Monitor scheduled, ready, paused, failed, finished, and historical Serverpod jobs from the same admin dashboard.
No more writing boilerplate CRUD endpoints. Register your models once, and instantly get a complete admin interface with:
- Search, Filter & Sort – Search every text column, add filters that fit each column (contains, is / is not, at least / at most, on or before / after, empty), and sort by any column; all of it runs in the database
- Pagination – Pages are read from the database, so large tables stay fast
- Documents & Links – URLs open inside the dashboard: images with zoom, PDFs in the browser's viewer, other pages one click away
- Overview – A home page with your own key numbers (metrics), every table's row count with a 30-day chart of rows added, and the latest changes
- Table Options – Like Django's ModelAdmin: labels, sidebar groups, default columns and ordering, read-only and hidden fields, help text, searchable columns, fieldsets that group form fields, and turning create, edit or delete off per table
- Shareable Links – The open table, page, sort, search, filters or record are in the address, so links can be shared and the browser's Back button works
- Saved Views – Name a table's filters, sort, search and columns, and come back to them in one click
- Staff Roles – Give support or operations staff their own scopes with view, create, edit and delete permissions per table; administrators keep full access
- Quick Date Filters – Today, last 7 days, last 30 days and this month in one click
- Change History – Who created, changed, deleted or ran an action on each row, and which values changed (like Django's admin log), on every record and as recent actions
- Bulk Changes & Custom Actions – Select rows (or every row matching the filters), then delete them, set a field on all of them, or run actions you register per model
- Relationships – Foreign keys show the related row's name and open it; every record lists the rows pointing at it, which you add, edit and delete in place like Django's inlines; pickers search instead of loading whole tables
- Create & Edit – Intuitive forms for managing records
- Delete – Safe deletion with proper validation
- Column Visibility – Hide the columns you do not need on wide tables
- CSV/XLSX Import & Export – Export every row matching the current search and filters, or import changes, without custom scripts
- Profile Management – Admin users can update their profile from the dashboard
- Password Updates – Admin users can securely change their password
- Job Monitoring UI – A full Serverpod jobs dashboard for scheduled, ready, paused, failed, finished, and historical jobs
Built with flexibility in mind. The serverpod_admin_server exposes a clean API that any frontend can consume. Start with Flutter today, switch to Jaspr tomorrow, or build your own custom admin UI—the choice is yours!
- Type-Safe – Leverages Serverpod's generated protocol classes
- Integrated – Works seamlessly with your existing Serverpod setup
- Job-Aware – Enable
admin.jobs = trueto monitor Serverpod future calls from the admin dashboard - Extensible – Designed to grow with your needs
Stop spending days building admin interfaces. Get back to building features that matter. With Serverpod Admin, you can have a production-ready admin panel in minutes, not weeks.
Serverpod Admin has two ways to use the UI:
- Non-Custom: use the prebuilt Flutter web dashboard served by your
Serverpod backend at
/admin. This is the fastest path and is recommended when you do not need to customize the dashboard UI. - Advanced Custom: use
serverpod_admin_dashboardinside your own Flutter app when you want to customize theme, sidebar items, dialogs, details views, record body, or the jobs dashboard.
Both paths use the same server package, authentication, model registry, import and export support, profile/password flows, and jobs monitoring endpoints.
From your Serverpod server package directory:
dart pub add serverpod_admin_serverServerpod Admin uses serverpod_auth_idp. Configure auth, register the models
you want to manage, and enable jobs if you want the Serverpod jobs dashboard.
import 'package:serverpod/serverpod.dart';
import 'package:serverpod_admin_server/serverpod_admin_server.dart' as admin;

import 'src/generated/endpoints.dart';
import 'src/generated/protocol.dart';

void run(List<String> args) async {
  final pod = Serverpod(args, Protocol(), Endpoints());

  pod.initializeAuthServices(
    tokenManagerBuilders: [
      JwtConfigFromPasswords(),
    ],
    identityProviderBuilders: [
      EmailIdpConfigFromPasswords(
        sendRegistrationVerificationCode: _sendRegistrationCode,
        sendPasswordResetVerificationCode: _sendPasswordResetCode,
      ),
    ],
  );

  admin.jobs = true;
  admin.configureAdminModule((registry) {
    registry.register<Post>();
    registry.register<Person>();
    registry.register<Comment>();
    registry.register<Setting>();
  });

  admin.serveAdminDashboard(pod); // /admin

  await pod.start();
}
admin.jobs = true shows Serverpod's persisted future-call jobs in the admin
dashboard, including scheduled, ready, paused, failed, finished, and historical
jobs.
Enum columns are edited with a dropdown. On the Dart VM (dart run) their
values are discovered automatically. A compiled server (dart compile exe,
dart build cli, most Docker images) cannot discover the values of
name-serialized enums, so declare the enums your models use:
admin.configureAdminModule((registry) {
  registry.register<Order>();
  registry.registerEnum(OrderStatus.values);
});
Pass the complete values list; it is harmless on the VM and takes precedence
over automatic discovery.
To manage who can open the dashboard, register Serverpod's auth users:
admin.configureAdminModule((registry) {
  registry.registerAuthUsers();
});
The serverpod_auth_core_user table then lists every account. Pick
serverpod.admin in scopeNames to make someone an administrator (unpick it to
remove access; it applies when their access token next refreshes), and tick
blocked to stop someone signing in. Accounts are not created or deleted
there: they come from sign-up or AdminUser.create.
Models that extend the auth user show its access in their own rows, so you
manage a user where you manage their profile. A model extends the auth user when
it holds the user's id in a unique column: a relation to
module:serverpod_auth_core:AuthUser, or a UuidValue field named
authUserId:
class: UserProfile
table: user_profile
fields:
  authUserId: UuidValue
  fullName: String
indexes:
  user_profile_auth_user_idx:
    fields: authUserId
    unique: true
registry.register<UserProfile>() then adds authUser.scopeNames and
authUser.blocked to each row. They are read from and saved to
serverpod_auth_core_user, never copied into your table. Rows whose auth user
was deleted still save, with no access to grant. Name the column with
register<T>(authUserColumn: 'ownerId') if it is not detected. An admin cannot
remove their own admin access or block themselves.
Offer your own permission scopes in the same picker:
registry.registerAuthUsers(scopes: [const Scope('dispatcher')]);Any list or set column can be edited as a multi-select the same way:
registry.register<Team>(choices: {'tags': ['beta', 'internal']});To adjust rows before the dashboard shows them, for example to replace a
private file reference with a short-lived signed link, pass present. Paging,
sorting, search and filters still run in the database:
registry.register<Document>(
  present: (session, row) => row.copyWith(fileUrl: signedLink(row.fileUrl)),
);
A custom listRows still works, but then those operations run in memory over
every row it returns.
Custom actions run on the rows an administrator selects, like Django admin actions. Each run is recorded in the rows' history:
registry.register<Order>(actions: [
  AdminAction(
    name: 'ship',
    label: 'Mark as shipped',
    run: (session, orders) async {
      for (final order in orders) {
        await Order.db.updateRow(session, order.copyWith(shipped: true));
      }
      return '${orders.length} orders shipped.';
    },
  ),
]);
The dashboard also offers "Set field" and "Delete selected" for any
selection; they go through the same validation and updateRow hooks as a
single edit.
The change history is stored in the module's serverpod_admin_log table.
After upgrading to 1.0.19, create and apply a migration in your server
(serverpod create-migration). Changes to fields that look secret
(passwords, tokens, hashes) are recorded without their values. To keep the
history only for a while, for example when rows hold personal data you
promise to erase:
registry.historyRetention = const Duration(days: 30);register<T>(options: AdminOptions(...)) sets how a table appears and behaves,
like a Django ModelAdmin:
registry.register<Order>(
  options: AdminOptions(
    label: 'Orders',                 // shown instead of the table name
    group: 'Sales',                  // sidebar section
    listColumns: ['id', 'customerId', 'status', 'total'], // shown at first
    ordering: 'createdAt',           // default sort...
    descending: true,                // ...newest first
    readOnly: {'createdAt'},         // shown, not editable after creation
    hidden: {'paymentToken'},        // never sent to the dashboard
    searchColumns: {'reference', 'customerEmail'},
    labels: {'customerId': 'Customer'},
    help: {'status': 'Shipped orders can no longer be cancelled.'},
    canDelete: false,                // nobody deletes orders here
    fieldsets: [                     // groups fields in forms and details
      AdminFieldset(fields: ['customerId', 'status', 'total']),
      AdminFieldset(
        name: 'Delivery',
        description: 'Filled in by the warehouse.',
        fields: ['address', 'shippedAt'],
        collapsed: true,             // folded at first
      ),
    ],
  ),
);- Columns left out of
listColumnscan still be turned on from the column menu, and every column shows in a record's details. readOnlycolumns can be set when a row is created, and keep their stored values on every edit.hiddencolumns are never sent, searched, filtered, exported or written to the change history, and keep their stored values on edits too.canCreate,canEditandcanDeleteapply to everyone, administrators included; read-only tables such as logs set all three to false.chartColumnnames the date column the overview charts. It defaults to the first ofcreatedAt,requestedAt,insertedAt,addedAt,createdortimethat the table has.fieldsetswork like Django's: each group shows under its name and description in create and edit forms and in a record's details, folded at first whencollapsed. Columns no fieldset names follow in a last group named "Other", so a form never loses a field; hidden and unknown names are left out. A form with an invalid field unfolds every group.
Administrators hold serverpod.admin and may do everything a table allows.
To let other people in with less, declare staff scopes and grant them
per table. Staff only see the tables they were granted:
const support = Scope('support');

admin.configureAdminModule((registry) {
  registry.staffScopes = {support};
  registry.registerAuthUsers(scopes: [support]); // assign it in the dashboard

  registry.register<Ticket>(
    options: AdminOptions(permissions: AdminPermissions.all({support})),
  );
  registry.register<Customer>(
    options: AdminOptions(
      permissions: AdminPermissions(view: {support}, edit: {support}),
    ),
  );
  registry.register<Payment>(); // administrators only
});
A scope allowed to create, edit or delete may also view. Custom actions and "Set field" need edit; "Delete selected" needs delete. Every endpoint method checks the signed-in user's scopes on the server, so the dashboard's buttons are a convenience, not the protection. The jobs page stays administrators only, staff see the change history of the tables they may see, and only administrators change a user's scopes or blocked flag, even on rows staff may edit.
The dashboard asks the server whether someone who signs in may enter, so the
prebuilt /admin dashboard works for staff with no more setup. A custom
dashboard can skip that request with AdminDashboard(staffScopes: {'support'}).
Register the numbers your team checks every morning; they open the overview:
registry.registerMetric(AdminMetric(
  label: 'Orders today',
  hint: 'since midnight UTC',
  compute: (session) async {
    final now = DateTime.now().toUtc();
    final midnight = DateTime.utc(now.year, now.month, now.day);
    return '${await Order.db.count(session, where: (t) => t.createdAt >= midnight)}';
  },
));
A metric is shown to administrators, and to staff holding one of its
scopes. One that fails or takes longer than 10 seconds shows "—" instead of
breaking the page. Below the metrics, every table shows its row count and a
bar chart of the rows added on each of the last 30 days.
These need no setup in your server:
- Links. The address names what is open, so a link opens the same table,
page, sort, search, filters or record for whoever may see it, and Back and
Forward move through what you opened:
/admin/#/order?q=dakar&sort=-total&page=2&status__exact=paidor/admin/#/order/42. Filters are written like Django's (__exact,__not,__contains,__gte,__lte,__in,__isempty,__notempty). - Saved views. The bookmark button of a table saves its search, sort,
filters and shown columns under a name, and lists the views you saved.
Views are personal and stored in the module's
serverpod_admin_saved_viewtable: after upgrading to 1.0.21, create and apply a migration in your server (serverpod create-migration). - Related rows. A record's Related tab lists, for each table pointing at it, its rows in a small table you can edit and delete from, and Add opens a form already linked to the record, like Django's inlines. Each table's permissions apply.
The dashboard asks only for what it shows, and every endpoint call makes a fixed number of database queries however many rows it touches:
| Action | Queries |
|---|---|
| A page of a table | 1, plus a count when the page is full |
| A page with only some columns shown | Reads those columns alone |
| A row, the names of related rows, a picker | 1, never counted |
Filters on authUser.* values |
A subquery, not the whole table |
| Edit one row | 3 (read, save, history) |
| Delete one row | 2 (delete returning the row, history) |
| Delete, update or run an action on selected rows | 2–3 for any number of rows |
| Import a spreadsheet | 1 request: one insert, one read, one save |
| Export, "Select all" | 1 query (keys only for "Select all") |
| Overview | 1 request: all counts in one query, all charts in another |
| A record's Related tab | 1 request, one query per related table |
Tables registered with their own updateRow, deleteById or createRow
hooks still run them once per row, as they should. Tables with more than
100,000 rows show an estimate on the overview instead of being counted. On
large tables, index the chartColumn (such as createdAt) and, if staff
search them often, the searched text columns (a pg_trgm GIN index).
From the same Serverpod server package directory:
dart run serverpod_admin_server:serverpod_admin installThe installer downloads the prebuilt Flutter web dashboard from the latest
GitHub release and places it in web/admin. admin.serveAdminDashboard(pod)
serves that folder at /admin.
To install to another folder:
dart run serverpod_admin_server:serverpod_admin install --target web/customadminpathTo serve another route:
admin.serveAdminDashboard(
  pod,
  path: '/customadminpath',
);Admin users must have the serverpod.admin scope. Use this as a development or
bootstrap helper, then remove it or guard it once your admin user exists.
import 'dart:io';

import 'package:serverpod_admin_server/serverpod_admin_server.dart';

Future<void> createAdminUser() async {
  final email = Platform.environment['SERVERPOD_ADMIN_EMAIL'];
  final password = Platform.environment['SERVERPOD_ADMIN_PASSWORD'];

  if (email == null || password == null) {
    throw StateError(
      'Set SERVERPOD_ADMIN_EMAIL and SERVERPOD_ADMIN_PASSWORD first.',
    );
  }

  await AdminUser.create(
    email: email,
    password: password,
  );
}http://localhost:8082/admin
The dashboard shows a login screen for unauthenticated users and only allows
users with the serverpod.admin scope.
The prebuilt app talks to your Serverpod API. In local development it maps
localhost:8082/admin to localhost:8080/ for API calls by default.
Use this path when you want to build your own Flutter admin app and customize
the UI. You still use serverpod_admin_server on the backend, but you do not
need to run the prebuilt dashboard installer.
From your Flutter app:
flutter pub add serverpod_admin_dashboardYour Flutter app also needs the generated client for your Serverpod project,
including the serverpod_admin module client.
import 'package:flutter/material.dart';
import 'package:serverpod_admin_dashboard/serverpod_admin_dashboard.dart';
import 'package:serverpod_auth_idp_flutter/serverpod_auth_idp_flutter.dart';
import 'package:serverpod_flutter/serverpod_flutter.dart';

import 'src/generated/client.dart';

late final Client client;

Future<void> main() async {
  WidgetsFlutterBinding.ensureInitialized();

  client = Client('http://localhost:8080/')
    ..connectivityMonitor = FlutterConnectivityMonitor()
    ..authSessionManager = FlutterAuthSessionManager();

  await client.auth.initialize();

  runApp(
    AdminDashboard(
      client: client,
      title: 'My Admin',
      sidebarItemCustomizations: const {
        serverpodJobsResourceKey: SidebarItemCustomization(
          label: 'Jobs',
          icon: Icons.work_history,
        ),
      },
    ),
  );
}The custom dashboard path lets you keep the default admin behavior while overriding the parts you care about:
- Sidebar labels and icons
- Theme
- Resource table/body
- Details screen
- Create, edit, and delete dialogs
- Jobs dashboard section
- Footer
The authentication behavior is the same as the non-custom path: unauthenticated
users see login, and only users with serverpod.admin or a staff scope can
enter.
AdminDashboard keeps what is open in the address when it is the app
(runApp(AdminDashboard(...))), with Flutter web's default #/ addresses.
Inside your own MaterialApp, your app owns the address and the dashboard
leaves it alone; deepLinks: false turns it off in any case.
Serverpod Admin offers flexible customization options, from simple sidebar tweaks to complete UI replacement.
Customize individual sidebar items with an icon, a label, or both. An icon
alone keeps the label the server gives the table (AdminOptions.label), and
shows when the sidebar is collapsed to icons:
AdminDashboard(
  client: client,
  sidebarItemCustomizations: {
    'orders': SidebarItemCustomization(icon: Icons.receipt_long),
    'posts': SidebarItemCustomization(
      label: 'Posts',
      icon: Icons.post_add,
    ),
    'persons': SidebarItemCustomization(
      label: 'Person',
      icon: Icons.person,
    ),
    'comments': SidebarItemCustomization(
      label: 'Comment',
      icon: Icons.comment,
    ),
    'settings': SidebarItemCustomization(
      label: 'Setting',
      icon: Icons.settings,
    ),
  },
)
This allows you to:
- Customize labels – Change the display name for any resource
- Customize icons – Use your own icons for better visual identification, also in the collapsed sidebar
- Keep it simple – Only customize what you need, leave the rest default
For complete control over the admin interface, you can replace any component with your own custom widgets:
AdminDashboard(
  client: client,
  // Custom sidebar - completely replace the default sidebar
  customSidebarBuilder: (context, controller) {
    return CustomSidebar(controller: controller);
  },

  // Custom body/records pane - replace the default table view
  customBodyBuilder: (context, controller, operations) {
    return CustomBody(
      controller: controller,
      operations: operations,
    );
  },

  // Custom record details view
  customDetailsBuilder: (context, controller, operations, resource, record) {
    return CustomDetails(
      controller: controller,
      operations: operations,
      resource: resource,
      record: record,
    );
  },

  // Custom edit dialog
  customEditDialogBuilder: (context, controller, operations, resource,
      currentValues, onSubmit) {
    return CustomEditDialog(
      resource: resource,
      currentValues: currentValues,
      onSubmit: onSubmit,
    );
  },

  // Custom delete confirmation dialog
  customDeleteDialogBuilder: (context, controller, operations, resource,
      record, onConfirm) {
    return CustomDeleteDialog(
      resource: resource,
      record: record,
      onConfirm: onConfirm,
    );
  },

  // Custom create dialog
  customCreateDialogBuilder: (context, controller, operations, resource,
      onSubmit) {
    return CustomCreateDialog(
      resource: resource,
      onSubmit: onSubmit,
    );
  },

  // Custom footer (displayed above the default footer)
  customFooterBuilder: (context, controller) {
    return CustomFooter(controller: controller);
  },

  // Custom themes
  lightTheme: myLightTheme,
  darkTheme: myDarkTheme,
  initialThemeMode: ThemeMode.dark,
)| Builder | Purpose | Parameters |
|---|---|---|
customSidebarBuilder |
Replace the entire sidebar | (context, controller) |
customBodyBuilder |
Replace the records table view | (context, controller, operations) |
customDetailsBuilder |
Replace the record details view | (context, controller, operations, resource, record) |
customEditDialogBuilder |
Replace the edit dialog | (context, controller, operations, resource, currentValues, onSubmit) |
customDeleteDialogBuilder |
Replace the delete confirmation dialog | (context, controller, operations, resource, record, onConfirm) |
customCreateDialogBuilder |
Replace the create dialog | (context, controller, operations, resource, onSubmit) |
customFooterBuilder |
Add custom footer above default footer | (context, controller) |
When creating custom builders, you have access to:
-
AdminDashboardController– Provides access to:resources– List of all registered resourcesselectedResource– Currently selected resourceloading– Loading statesthemeMode– Current theme mode- Methods to load data, refresh, etc.
-
HomeOperations– Provides CRUD operations:list()– Get list of recordsfind()– Find a specific recordcreate()– Create a new recordupdate()– Update an existing recorddelete()– Delete a record
-
AdminResource– Information about the resource:key– Resource identifiertableName– Database table namecolumns– List of column definitions
Widget CustomSidebar(AdminDashboardController controller) {
  return Drawer(
    child: ListView(
      children: [
        const DrawerHeader(
          decoration: BoxDecoration(color: Colors.blue),
          child: Text('My Admin Panel'),
        ),
        ...controller.resources.map((resource) {
          final customization = controller.sidebarItemCustomizations?[resource.key];
          return ListTile(
            leading: Icon(customization?.icon ?? Icons.table_chart),
            title: Text(customization?.label ?? resource.tableName),
            selected: controller.selectedResource?.key == resource.key,
            onTap: () => controller.selectResource(resource),
          );
        }),
      ],
    ),
  );
}Widget CustomEditDialog({
required AdminResource resource,
required Map<String, String> currentValues,
required Future<bool> Function(Map<String, String> payload) onSubmit,
}) {
final formKey = GlobalKey<FormState>();
final controllers = currentValues.map(
(key, value) => MapEntry(key, TextEditingController(text: value)),
);
return AlertDialog(
title: Text('Edit ${resource.tableName}'),
content: Form(
key: formKey,
child: SingleChildScrollView(
child: Column(
children: resource.columns.map((column) {
return TextFormField(
controller: controllers[column.name],
decoration: InputDecoration(labelText: column.name),
enabled: !column.isId, // Disable editing ID fields
);
}).toList(),
),
),
),
actions: [
TextButton(
onPressed: () => Navigator.pop(context),
child: const Text('Cancel'),
),
TextButton(
onPressed: () async {
if (formKey.currentState!.validate()) {
final payload = controllers.map(
(key, controller) => MapEntry(key, controller.text),
);
final success = await onSubmit(payload);
if (success && context.mounted) {
Navigator.pop(context);
}
}
},
child: const Text('Save'),
),
],
);
}Serverpod Admin implements strict role-based access control:
- ✅ Admin-Only Access – By default, all access requires the
serverpod.adminscope - ✅ Staff Roles – Scopes you list in
registry.staffScopesget only the per-table permissions you grant them (see Staff Roles and Permissions) - ✅ Secure by Default – Without admin privileges, users cannot access any part of the admin panel
- ✅ Authentication Required – The dashboard automatically shows a login screen for unauthenticated users
- ✅ Scope Validation – Every endpoint method checks the user's scopes on the server, whatever the dashboard shows
Important: Without the serverpod.admin scope, users will see an error message and cannot access the admin panel, even if they successfully authenticate with email/password.
- User enters email and password on the login screen
- Authentication is handled via
serverpod_auth_idp(EmailAuthController) - Upon successful authentication, the system checks for the
serverpod.adminscope, or asks the server whether the user holds a staff scope - If they do, they're granted access to the dashboard
- Otherwise they see an error: "User does not have admin privileges"
Serverpod Admin fills the gap that every Serverpod developer has felt. No more custom admin code. No more database dives. Just a beautiful, powerful admin panel that works out of the box.
Welcome to the future of Serverpod administration. 🎉